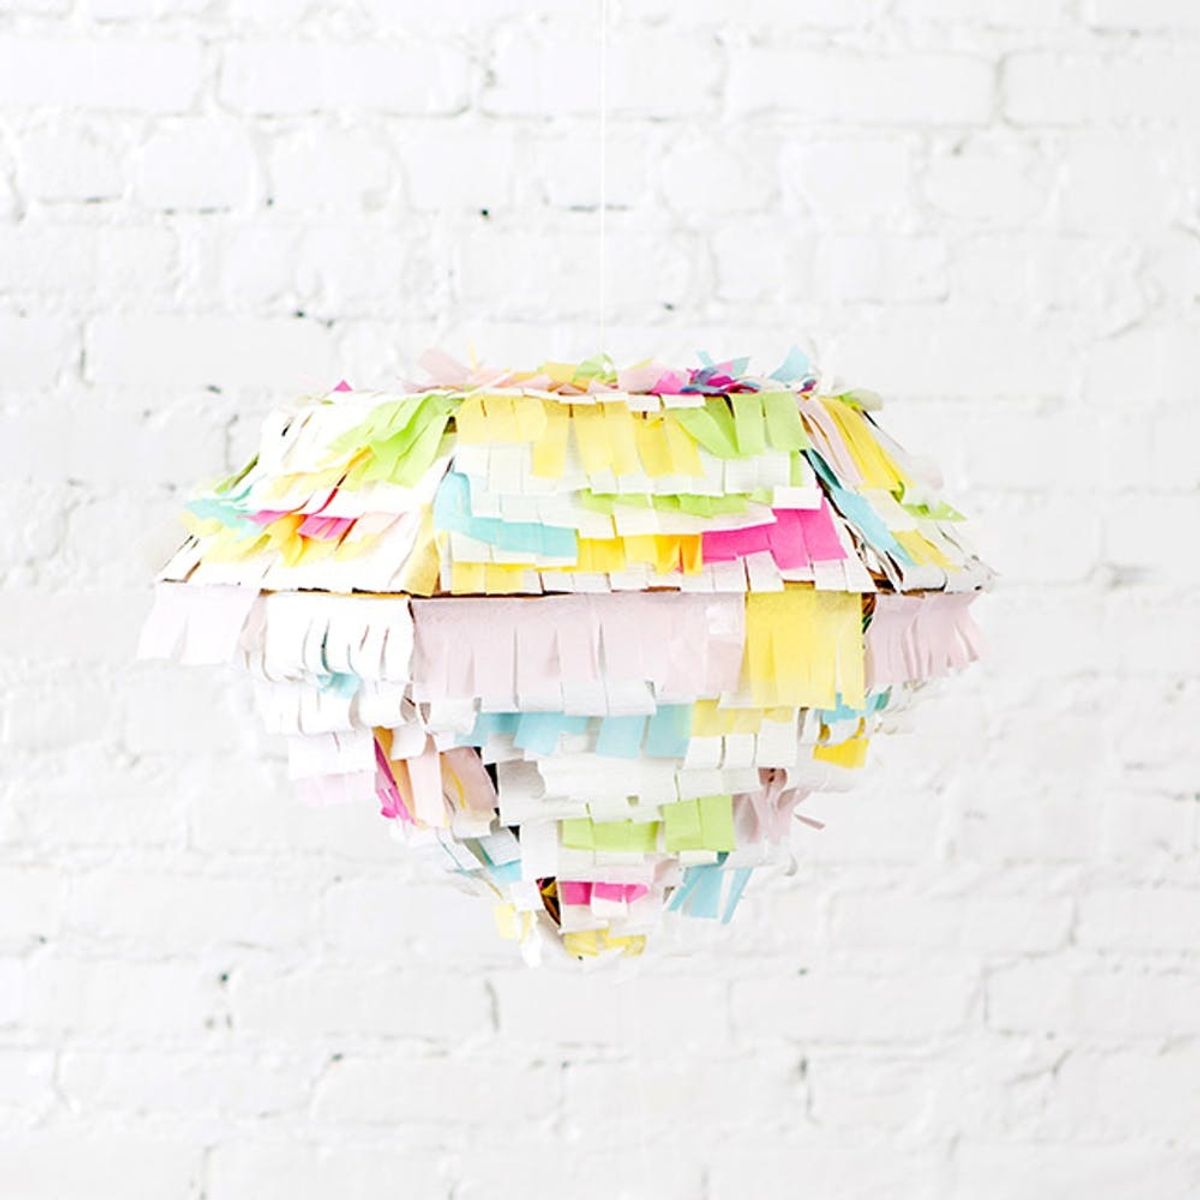
Make a Watercolor-Inspired Diamond Piñata for Your Wedding

Choosing your wedding decor might just be the most fun part of the wedding-planning process. When it comes to decor elements, we suggest you DIY your hearts out! What should you make, you ask? Well, every wedding needs a piñata ;) So today, we’re going to show you how to make a watercolor-inspired diamond piñata. We LOVE DIY piñatas and we LOVE watercolor (check out our Intro to Watercolor Painting Class!), so we melded our loves together (in true wedding fashion) to create a stunning piece that will look amazing at your venue. Fill it with treats or favors, and let your guests swing at it during the reception.
We’re going to be real with you, this piñata took some thinking. A diamond shape requires reaching into the depths of that trigonometry class that you thought you’d never apply IRL. Don’t worry, though. We’ve got all the measurements covered in our tutorial.
Materials:
- — cardboard
- — duct tape or strong masking tape
- — cotton string
- — utility knife
- — scissors
- — ruler
- — pen
- — variety of tissue paper colors
- — scratch paper to trace your shape onto your cardboard (not pictured)
- You will need to cut six equilateral triangles, six isosceles trapezoids and one hexagon. A mouthful, we know, but it’s not too bad! Start with your triangles.
Determine the height of your triangle (we went big with 10 inches) and draw a line that size onto your scratch paper. The bottom endpoint will be the middle of the base of the triangle. Our base was five inches, so we measured a straight line with our ruler at two and a half inches on either side. Draw a line to connect one end of your five-inch line to the top of your triangle. Do the same on the other side. Now, you have your equilateral triangle template. Trace this six times on your cardboard and cut your triangles out with a utility knife.
The trapezoids will connect with the base of your triangles, so they need to be the same length (five inches). The rest is up to you. Just make sure your template is actually a trapezoid shape.
Line up all of your trapezoids with the shorter ends facing in with the corners touching, and trace the shorter ends to create your hexagon. Since you’re working with cardboard, it’s a bit forgiving, and the shape doesn’t have to be EXACT.
 Pro Tip: Something we didn’t do, but would if we were to do this again, is to fully tape the piñata on the inside AND outside before adding the tissue paper. This will provide a better and more secure structure.
 Now that you have your shapes cut, time to trim up some tissue paper! We did a mix of white, green, yellow, pink and blue. Cut your tissue paper into strips about three inches wide, and cut small slits across the strip to make fringe. Start with the bottom layer, and tape your strip across your cardboard piece. The next layer should be an inch higher than the one underneath. Don’t forget to alternate colors!
Cut a flap into your hexagon. This is where you’ll load your piñata with GOODIES!
 Lay your hexagon with the cut out flap tissue-paper side down. Line up your trapezoids along the edges of your hexagon and duct tape to secure.
Cut a small rectangle of cardboard, and strike an X with your utility knife. This is to give your string more durability. Knot, double knot, triple knot (for good measure) your string and pull it through until the knot is up against your small piece of cardboard.
Strike another X in the middle of your hexagon, and pull the string until your small piece of cardboard is tight against the underside of your hexagon.
 Almost there!
 Tape your triangles to your trapezoids. The end result should look like a pretty cardboard flower. Now is the tricky part: Enlist a friend to hold the string of your piñata as you tape the inside edges of your shapes together.
 Voila! You did it. Now fill this baby up.
 Find a little corner of the venue where you can hang the piñata, and be sure to bring something to strike it with like a wiffle ball bat.
Show us your piñata by tagging us on Instagram and using hashtag #iamcreative!


