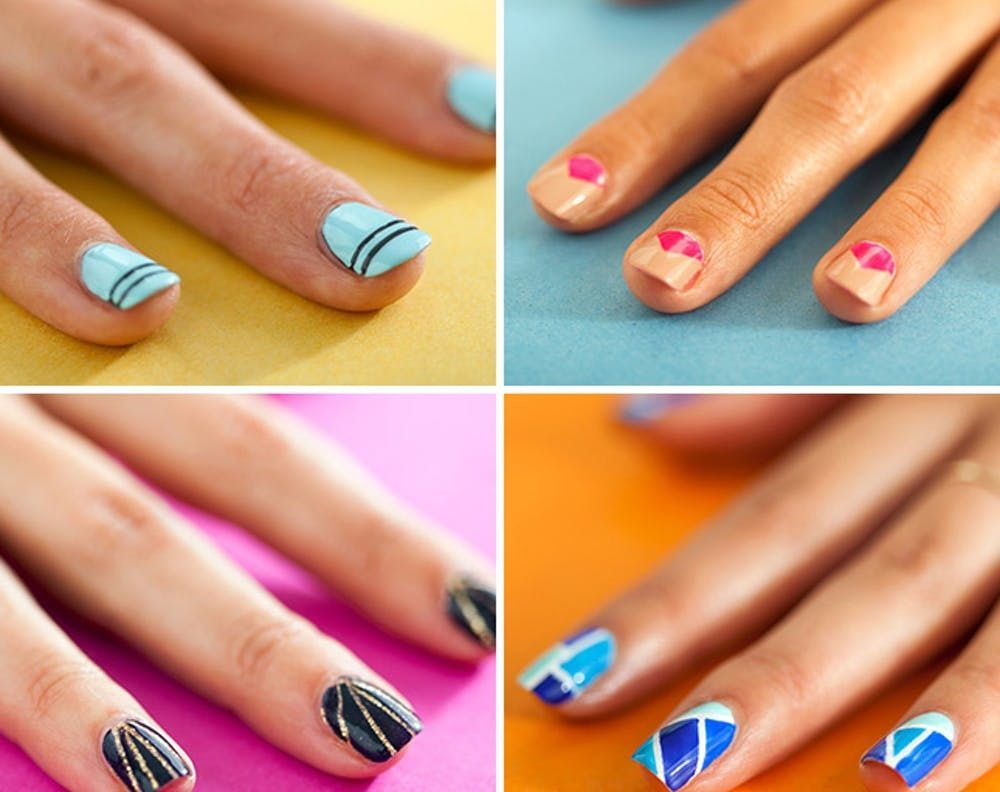
We’re all about nail art, but some of the designs can be intimidating! Luckily they aren’t nearly as hard as they look, just so long as you have a little bit of patience. These four fun DIYs are from the artists at TopCoat, a new online marketplace that helps you find and book appointments with nail artists in your area—think “Lyft for your nails.” Today’s styles come from San Francisco-based nail artist Kiri Jones of Pams and Kin. The only additional supply you’ll need (other than polish, of course!) is tape. You can use clear tape or painter’s tape, or if you want delicate professional looking lines, opt for striping tape. The other step to a fabulous manicure? The right top coat. Our pick is Seche Vite. Your mani will be dry in 3-5 minutes. Trust us!
Which design will you try?
This is an easy and fun way to break into nail art since it ‘s not too far outside your comfort zone. Nude and neon is a great combination, and if you work in a more conservative office, your co-workers likely won’t even notice the difference.
Materials:
– Essie Brooch the Subject
– Essie Bottle Service
– painter’s tape
– scissors
Instructions:
1. Choose two colors.
2. On all 10 fingers, paint the color you want to be the chevron as the base coat.
3. Cut a piece of clear or painter’s tape into a square, and place one of the corners on the nail coming from the nail bed.
4. Paint the second color over the entire exposed part of the nail.
5. Remove the tape immediately after painting the top color.
6. After completing all 10 fingers, paint each nail with top coat.
If you’re using a neon like we did, start with a white base coat—it will make the neon even brighter.
It’s important you to do steps 2–4 on each nail before moving onto the next finger. You don’t want the polish to dry while the tape is still on your nail. If you let it dry, removing the tape will take all the polish with it.
We may have been jamming to Robin Thicke all summer, but these lines are clean and classy. This minimalist design is completely work-appropriate. If you want an even simpler version, just leave the striping tape on and skip the second coat! It comes in several colors and is quite affordable.
Materials:
– Essie Power Clutch
– Essie Mint Candy Apple
– nail striping tape
– scissors
Instructions:
1. Choose two colors.
2. On all 10 fingers, paint the whole nail the color you want for the thin lines as the base coat.
3. Using two pieces of striping tape, make two parallel lines on the top half of the nail.
4. Using the second of the two colors, paint over the entire nail.
5. Remove the tape immediately after painting the top color.
6. After completing all 10 fingers, paint each nail with top coat.
It’s important you to do steps 3–5 on each nail before moving onto the next finger. You don’t want the polish to dry while the tape is still on your nail.
We love how crisp those striping tape lines are!
Here’s where we step up the glam. Perfect for an evening cocktail party under the stars, this manicure is still easy, even if it doesn’t look like it. We love the sparkly gold. Simply add a few small pieces of gold jewelry and you’re good to go.
Materials:
– LeChat Gold Glitter Polish
– OPI Road House Blues
– nail striping tape
– scissors
Instructions:
1. Choose two colors.
2. On all 10 fingers, paint the whole nail one color and let the base color (gold in this case) dry completely. This will be the color of the thin, radial lines.
3. Start with one hand. On all 5 fingers, place 3–4 pieces of striping tape on each nail, overlapping one end at the center of the nail bed, extending out toward the tip of the nail but rotating slightly to create radial lines.
4. Using the second of the two colors, paint over the entire nail.
5. Remove the tape immediately after painting the top color.
6. Repeat steps 3–6 on your second hand.
7. Paint each nail with top coat.
Don’t feel like DIY-ing? Book an appointment on Topcoat to get this manicure.
Make sure you leave enough striping tape on either end of the nail so you can easily pull it of.
We like to use a glitter as the base coat to give the mani a hint of glamour.
Time to experiment! We love this color blocking technique using five polishes in the same color family—different shades of blues, pinks, yellows all looks incredible and are unique twist on the ombre style.
Materials:
– SinfulColors Snow Me White
– OPI Eurso Euro
– OPI No Room for the Blues
– Essie Mint Candy Apple
– Essie Butler Please
– nail striping tape
– scissors
– OPI Rapidry Top Nail Coats
Instructions:
1. Choose five colors—keep in mind one will be the base color.
2. Paint nails with your base color. White is always a good option, but you could also do a nude or another light hue.
3. Start with one hand at a time. On all five fingers, place striping tape in geometric, intersecting shapes across the nail bed. You should create four distinct sections on the nail.
4. Using one color at the time, carefully paint inside of the tape shapes.
5. Remove tape after finishing the final color.
6. Add top coat. Complete each nail before moving on to the next.
7. Repeat steps 3–6 on your second hand, and you’re set!
We like to use white as the base color. And we like to use a single spritz of OPI Rapidry Top Nail Coats after the base color to speed up the drying process.
Doing the same pattern on all nails is fun, but you can experiment how you arrange colors for a similar effect.
Remember that you should paint and remove the tape on each individual nail before moving on to the next one to prevent the polish from drying with the tape underneath.
Have you tried your hand at nail art? Tell us what you tried (and how it went!) in the comments!