 Recommended for you

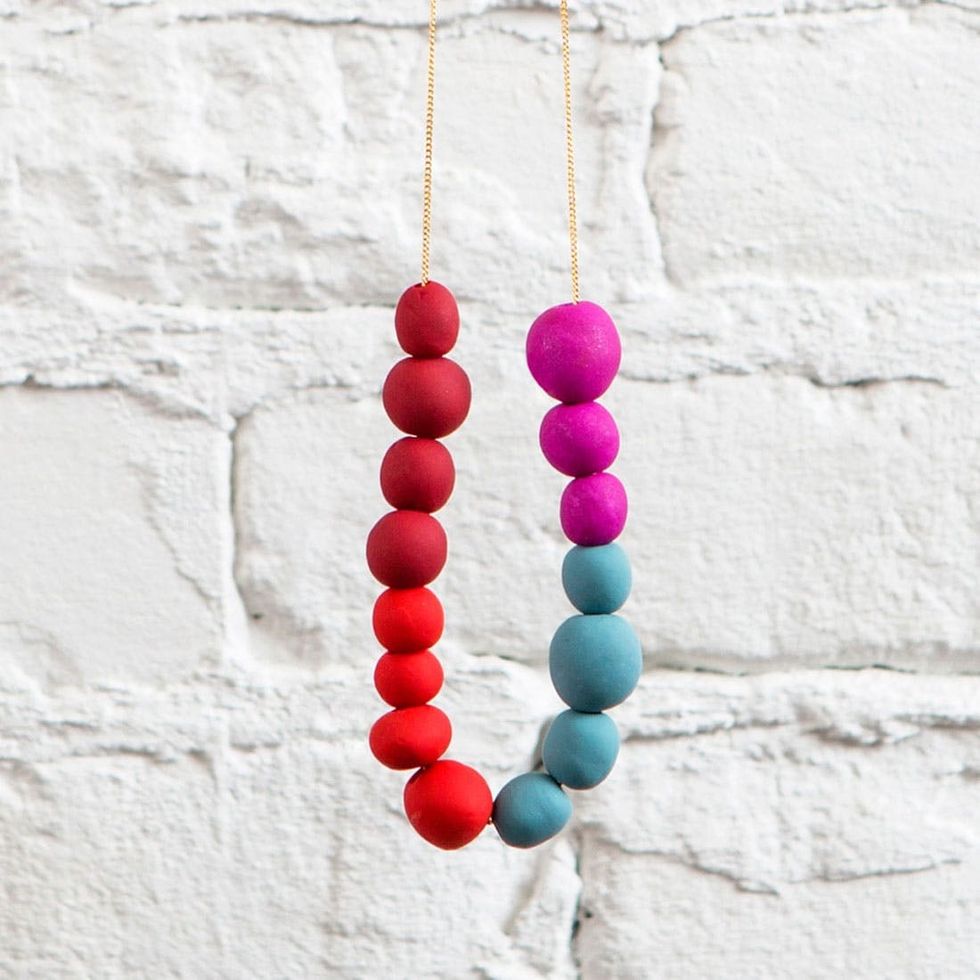
When’s the last time you busted out a few packages of Sculpey and went to town on making beads? Summer camp, perhaps? For today’s edition of #31DaysofDIY, we’re throwing it back to our clay days. This material isn’t just for kiddie crafts — with a few simple steps, you can make yourself a gorgeous color block statement necklace.
No idea what #31DaysofDIY is? It’s a brand new tradition here at Brit + Co that’s all about kicking off 2015 right. We’ve challenged ourselves to make or learn something new every single day for the month of January, and we’re inviting all of you along for the ride. From DIY basics like Sewing 101 to learning to design and laser cut our own stencils, we hope this month of making inspires you to make all year long.

Now, time to… just bead it :)
Tools + Materials:
– Sculpey clay in various colors
– gold chain
– gold jump rings
– gold clasp
– needle nose pliers
– wooden dowel or lollipop stick (for piercing the beads)
Instructions:
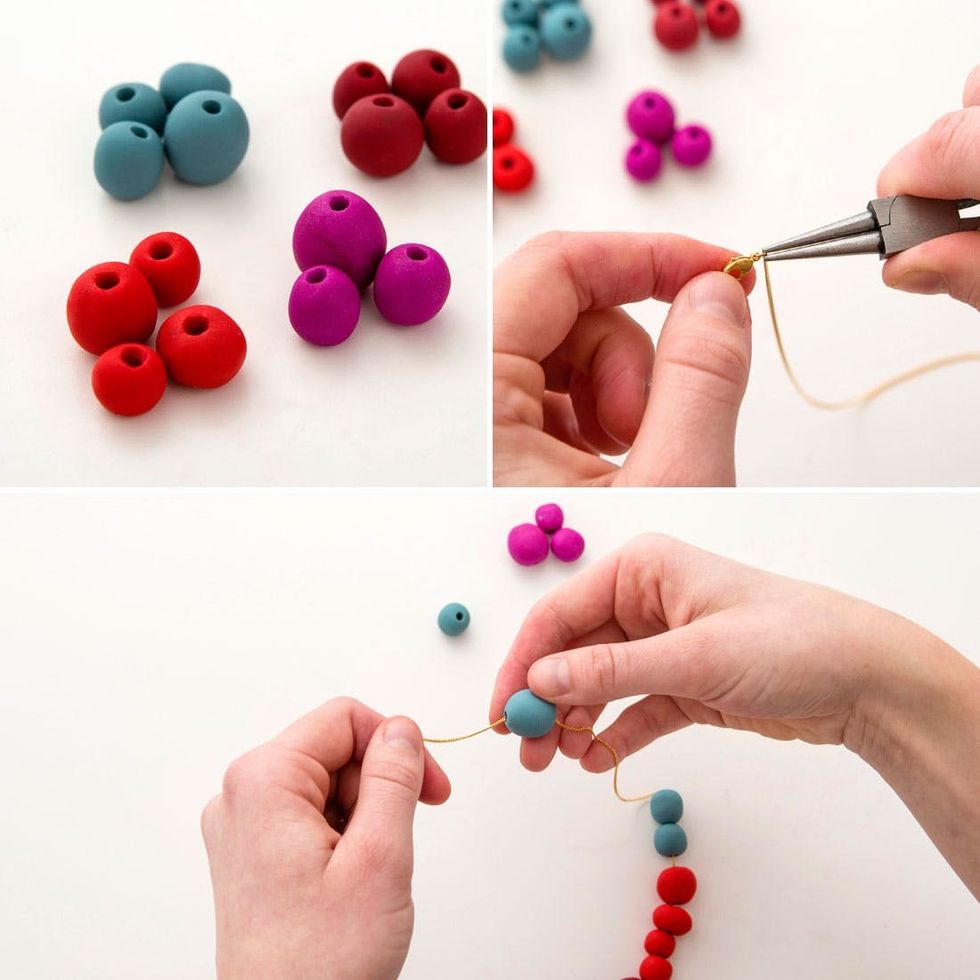
1. Create spherical beads by rolling 1/2 inch square pieces of clay in your hand. Change up the size based on personal preference.
2. Use a wooden dowel or lollipop stick to pierce holes in your beads. Remember to make the hole slightly bigger than the necklace chain — the Sculpey will shrink in the oven.
3. Bake your beads in the oven for 15 minutes at 275 degrees F.
4. While beads are cooling, add a clasp to one end of your chain.
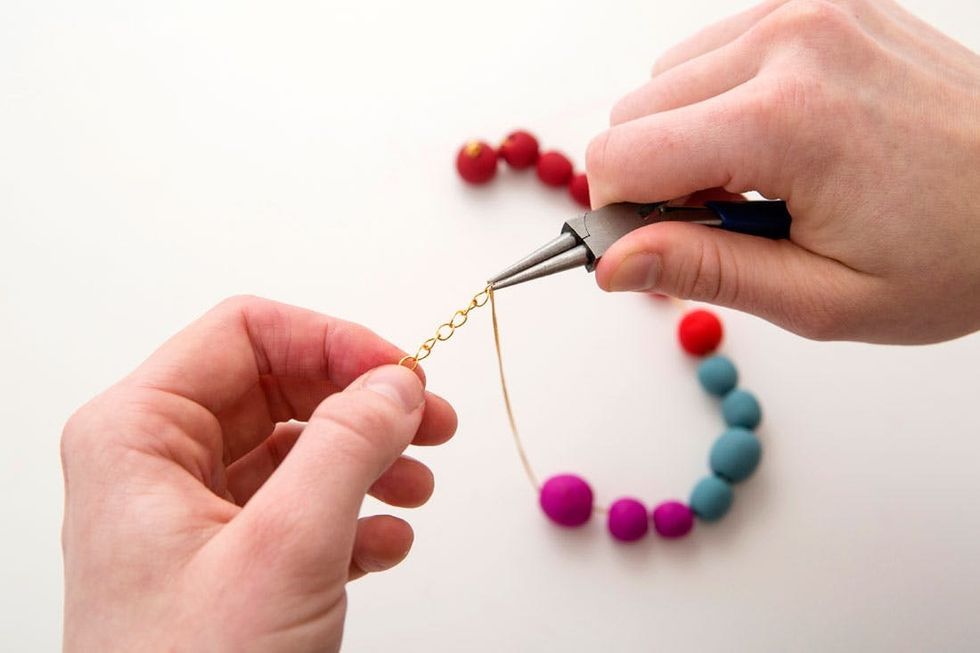
5. String beads onto your chain.
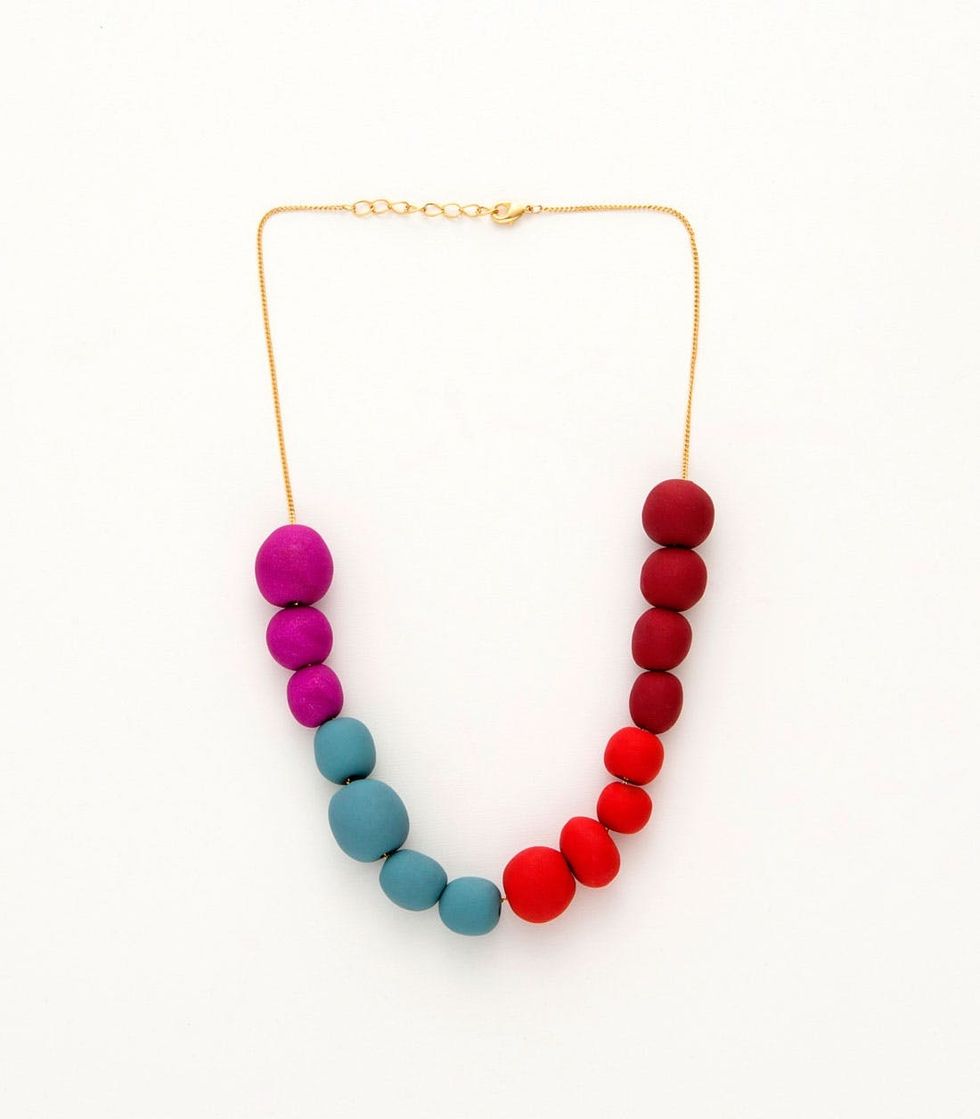
6. Attach a clasp to the other end. We included a few extra jump rings to make the necklace adjustable.
7. Done!
We choose three warm colors and one cool one for our color blocked look.
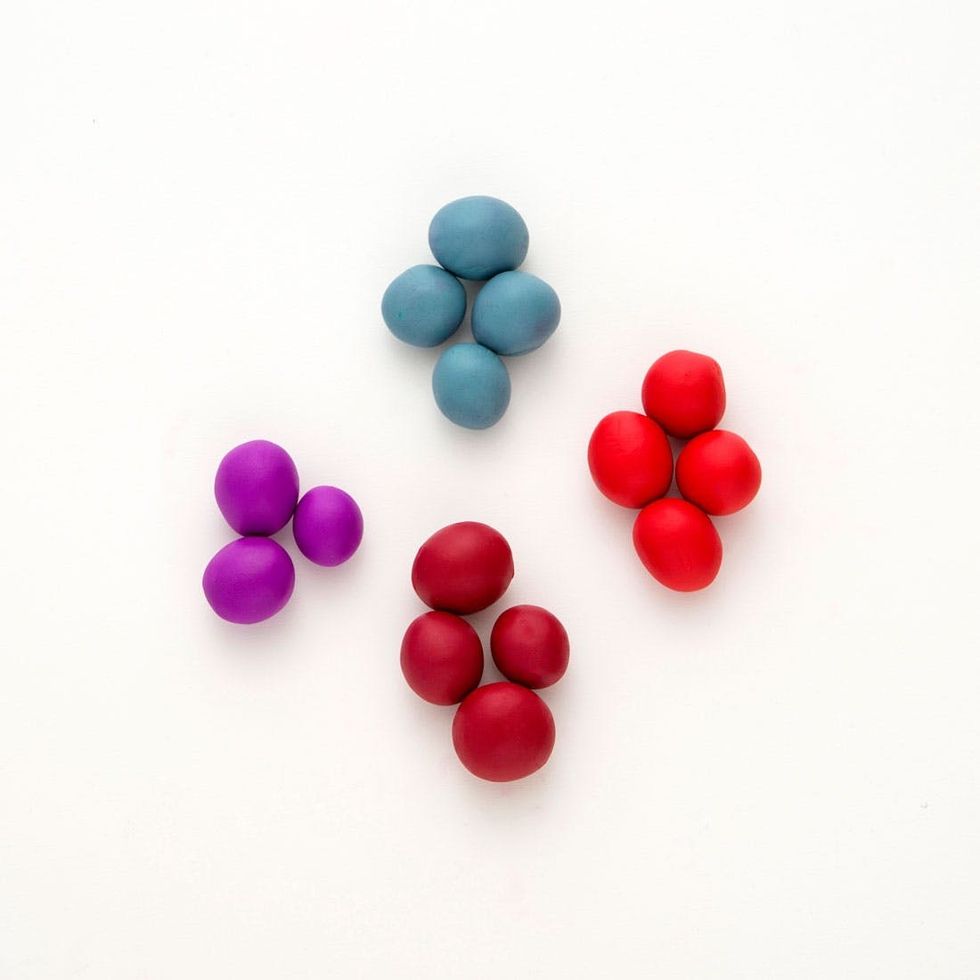
Create spherical beads by rolling 1/2 inch square pieces of clay in your hand. Change up the size based on personal preference.
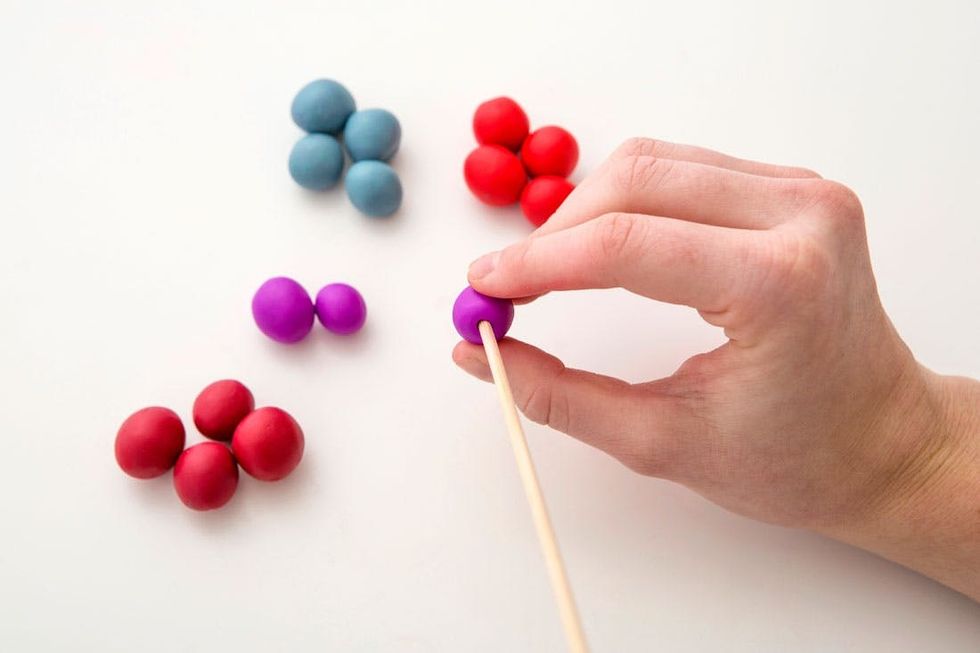
Use a wooden dowel or lollipop stick to pierce holes in your beads. Remember to make the hole slightly bigger than the necklace chain — the Sculpey will shrink in the oven.
Bake your beads in the oven for 15 minutes at 275 degrees F. Depending on your oven and the size of your beads, they may need a little more time. Be sure to check that they are no longer malleable before taking them out for good.
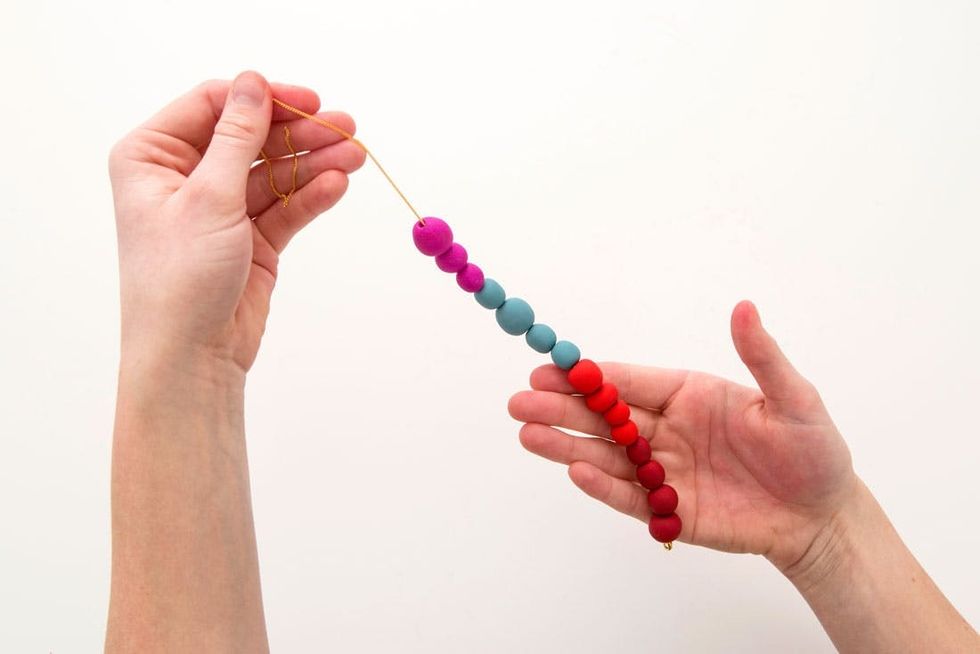
Let beads cool. While beads are cooling, add a clasp to one end of your chain, then string on those beads!
Looking pretty good, don’t you think?
Attach a few jump rings to the other end of your chain to make the necklace adjustable. Done!
How will you personalize this project to suit your own sense of style? Share photos of your creations to Instagram, Facebook, Tumblr or Twitter using the hashtag #31DaysofDIY. We’ll feature our favorite projects and makers throughout the month of January here on Brit.co.