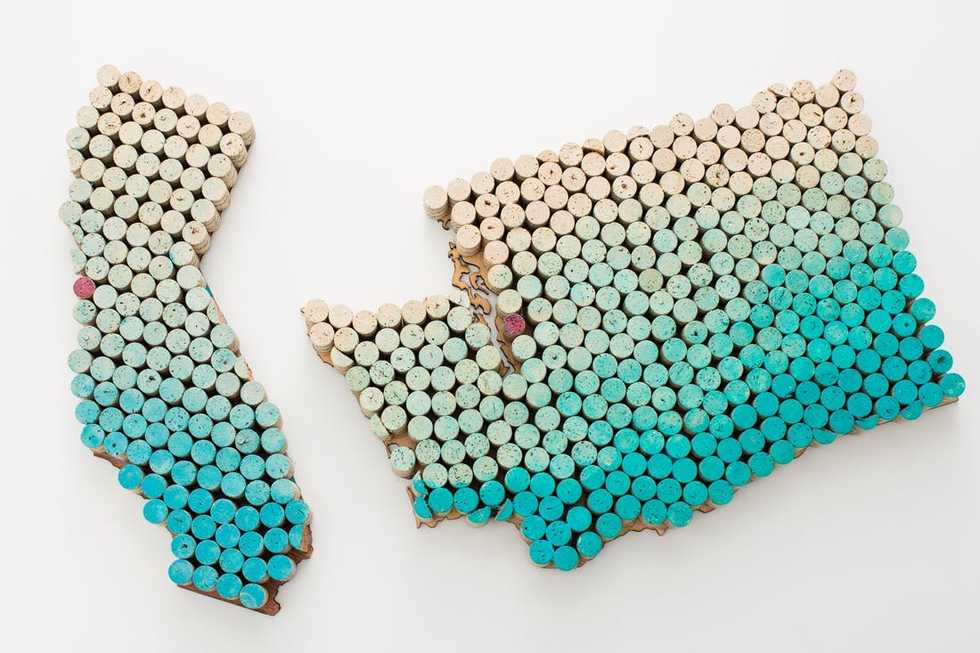
 Recommended for you
As with many fashion fads, tie dye is back! Not the multi-colored tie dye your hippy dad likes to rock or the kind you might see at a Phish concert. We’re talking about indigo-dyed garments (traditionally called Shibori in Japan). This DIY is super easy, fun and the pattern possibilities are endless. Best of all, you can’t mess up. No matter what you do, your newly dyed item will have a look of its own. All you need is this Indigo Tie Dye Kit ($12) and a few white clothing items!
 – Jacquard’s Indigo Tie Dye Kit
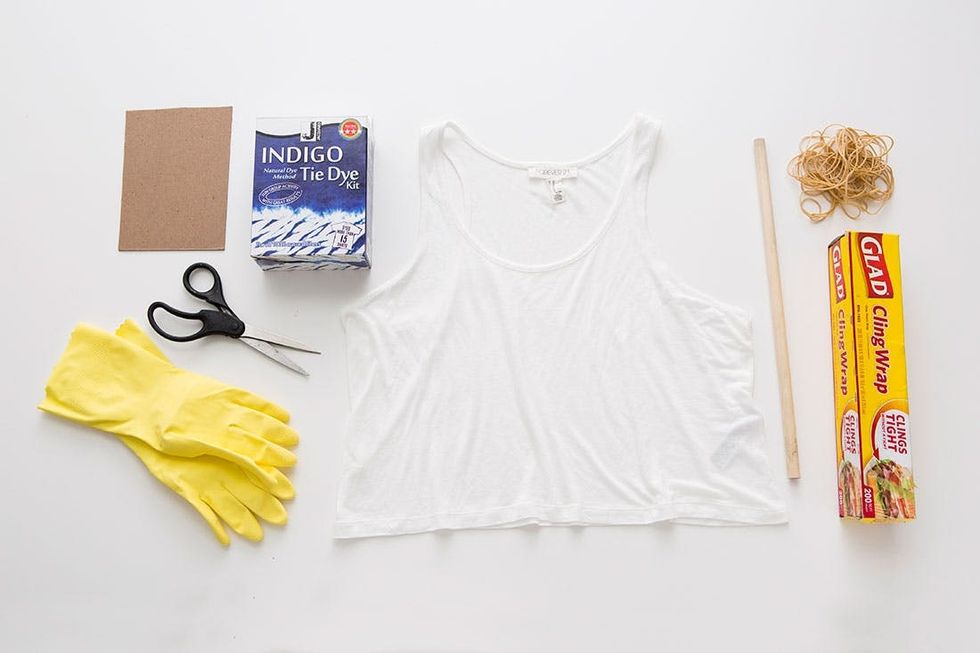 – pre-reduced indigo
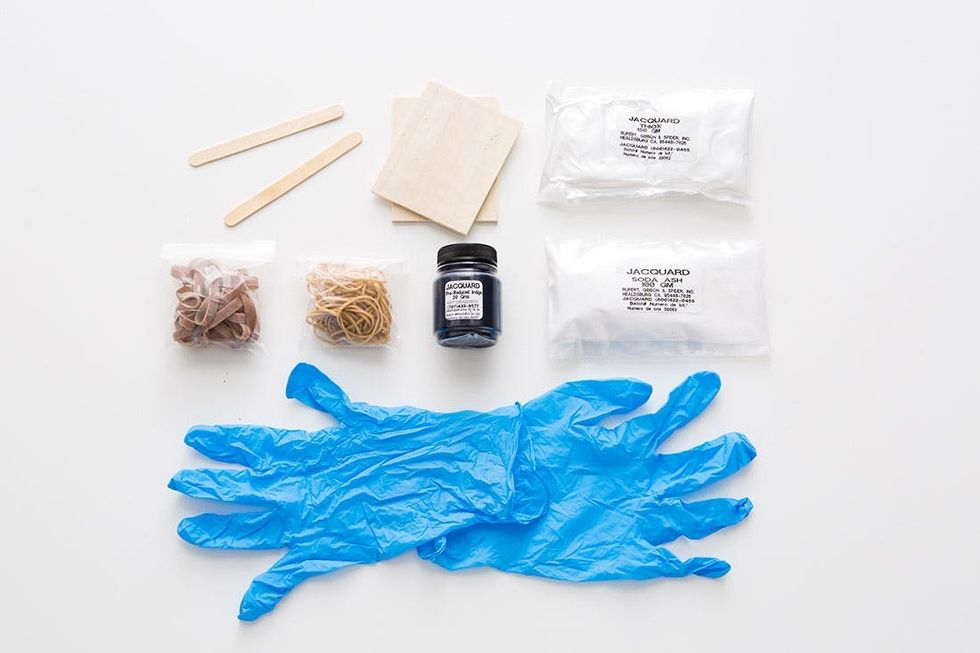
– reducing agent (thiox + soda ash)
– gloves
– rubber bands
– 2 wood blocks
– 2 popsicle sticks
Instructions:
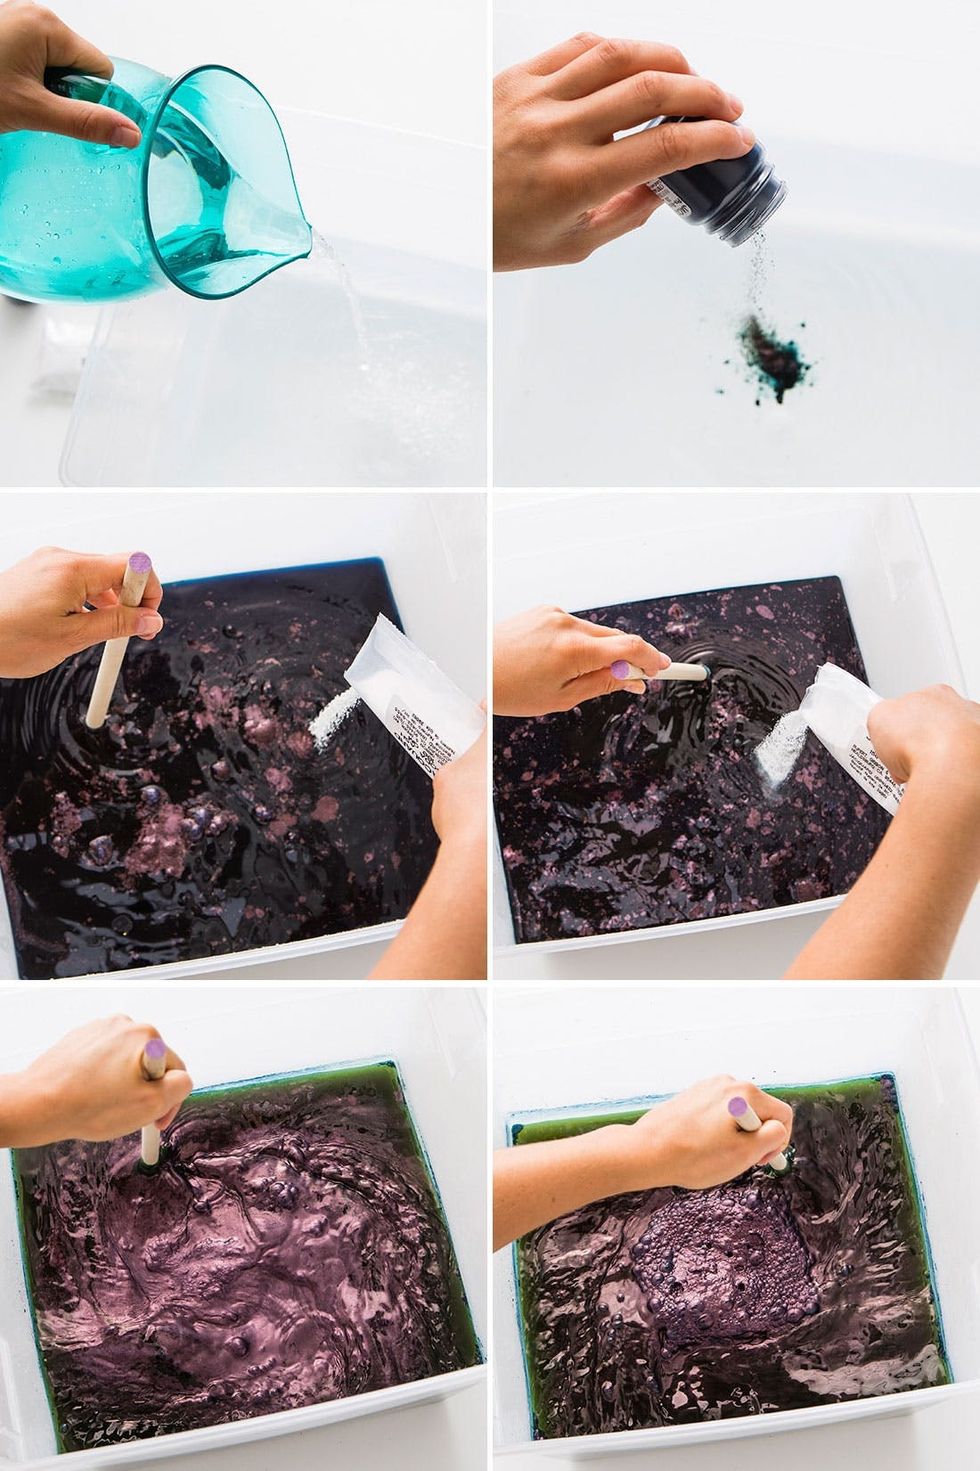
1. Fill a five gallon tub with four gallons of warm water. Pour the indigo dye into the water while stirring. Add the thiox and soda ash and continue stirring. Let the liquid settle and then stir in the opposite direction. Allow the mixture sit for one hour.
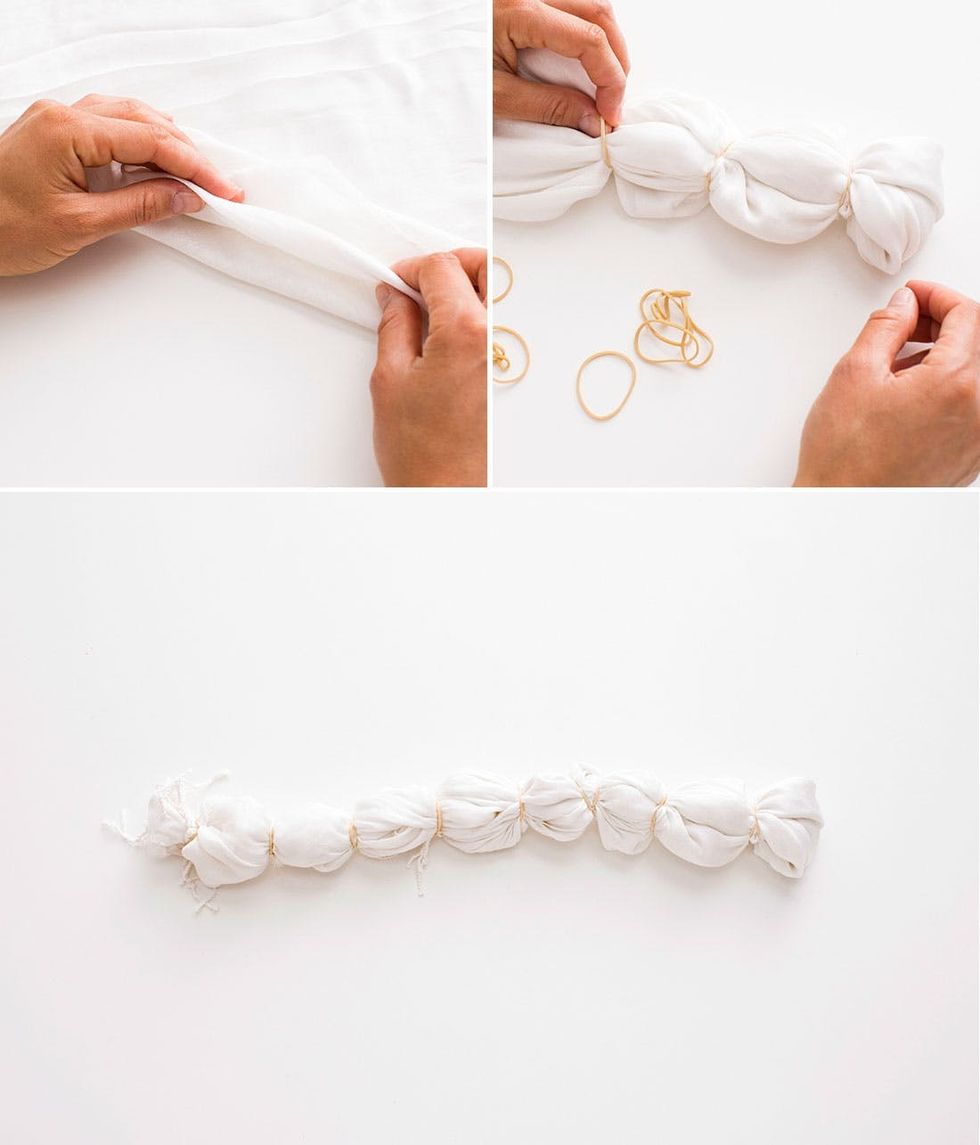
2. Prepare your items by folding and adding rubber bands (see techniques below).
3. Submerge your items in cool water and wring them out.
4. Remove the top layer of film from the vat of dye. Save the film — you will put it back in the vat after you finish dying if you want to save your dye to use again in the next few days.
5. One at a time, add your items to the dye, gently squeezing them while they are submerged allowing the dye to penetrate the fabric. At this point the color will be bright green.
6. Squeeze out any excess dye and set your garment aside for 20 minutes to oxidize.
7. Rinse your garment, remove the rubber bands and rinse again. Put your finished items in a washing machine with gentle detergent.
Find yourself a five gallon tub and fill it with four gallons of warm water. Slowly pour the Jacquard’s indigo dye into the water. Start stirring and gradually add the thiox followed by the soda ash. Give it a good whirl in one direction and then stir it in the opposite direction. When it’s thoroughly mixed, let it sit with the lid on for an hour.
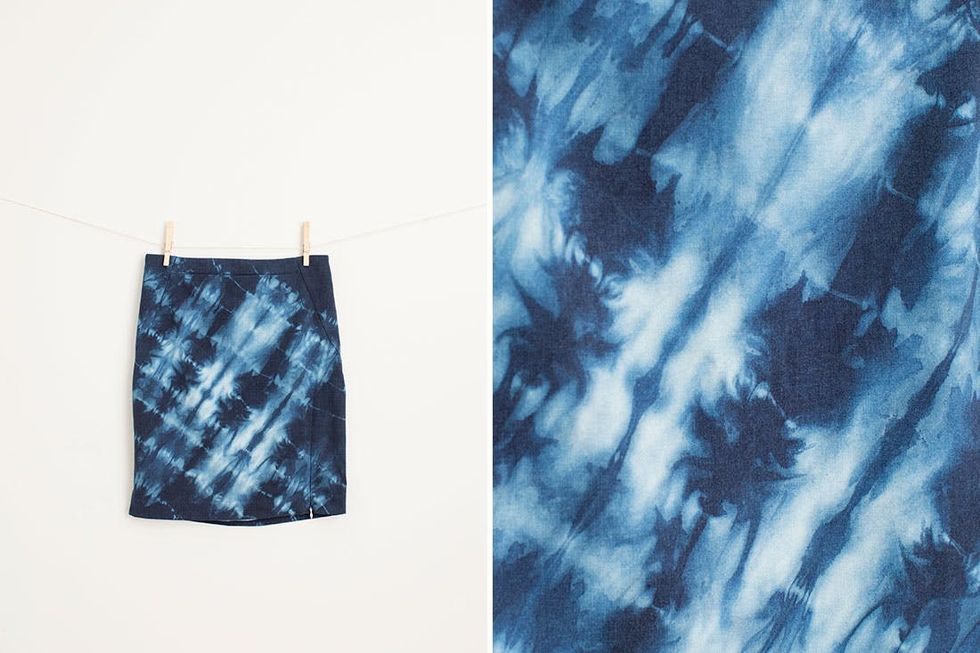
While you’re waiting you can prepare your items. We dyed a tank top, a skirt, a napkin, a scarf and a tote bag. Each one was a different fabric and took the dye differently, yet they all turned out really well! There are tons of techniques to create patterns, but really it’s impossible to mess up. No matter what you do, your shirt or napkin or pillowcase will look amazing! Here are four techniques we used to dye our pieces.
How hot is that skirt? Here’s how we did it.
Accordion Fold

For this design make a diagonal accordion fold and then place rubber bands along the length of the folded skirt about two inches apart. Now, onto scarf prep!
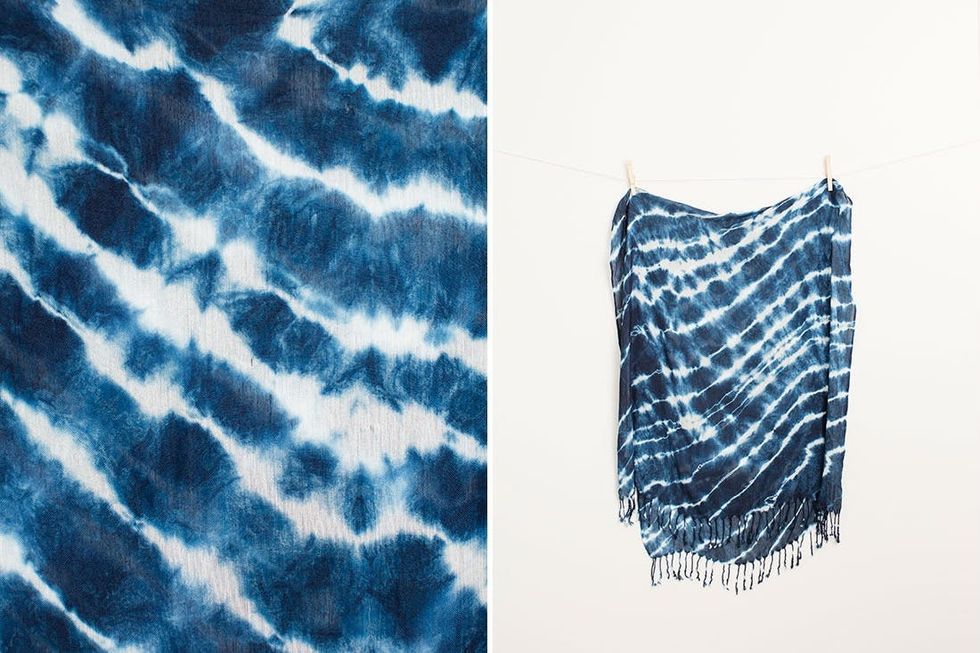
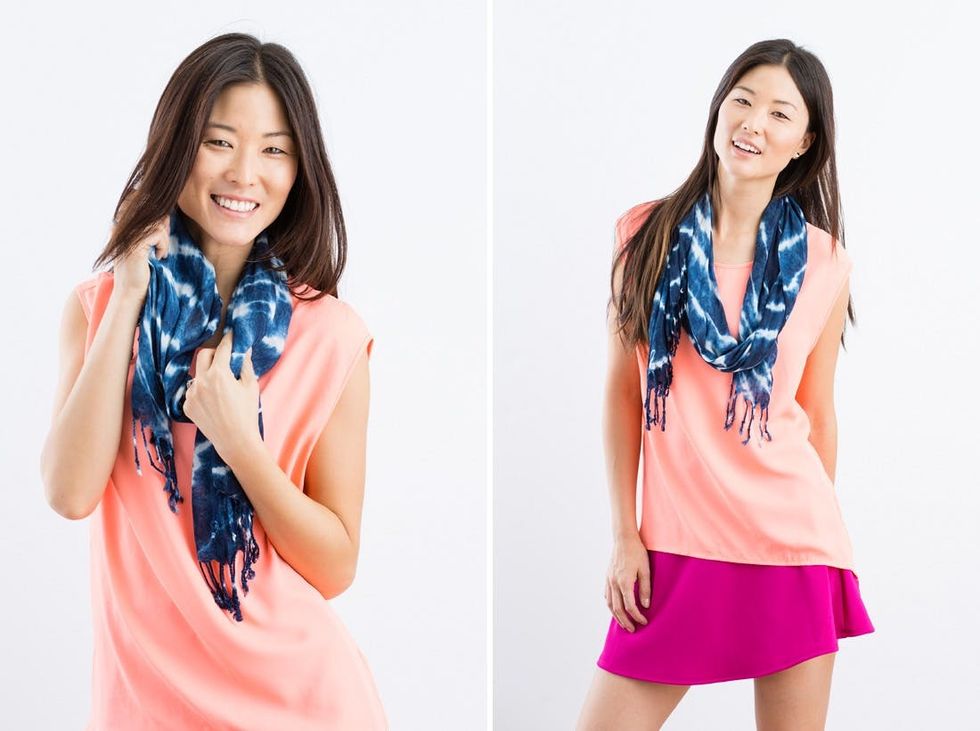
We love how the bright white comes through in the scarf.
We used the same technique for the scarf except that we folded the scarf in half first to make it a little bit easier to handle. Since the fabric was silky, the folds weren’t perfect, but that’s okay! It created a really beautiful pattern. Who needs symmetry anyways. Now, onto the next technique.
Kapow!
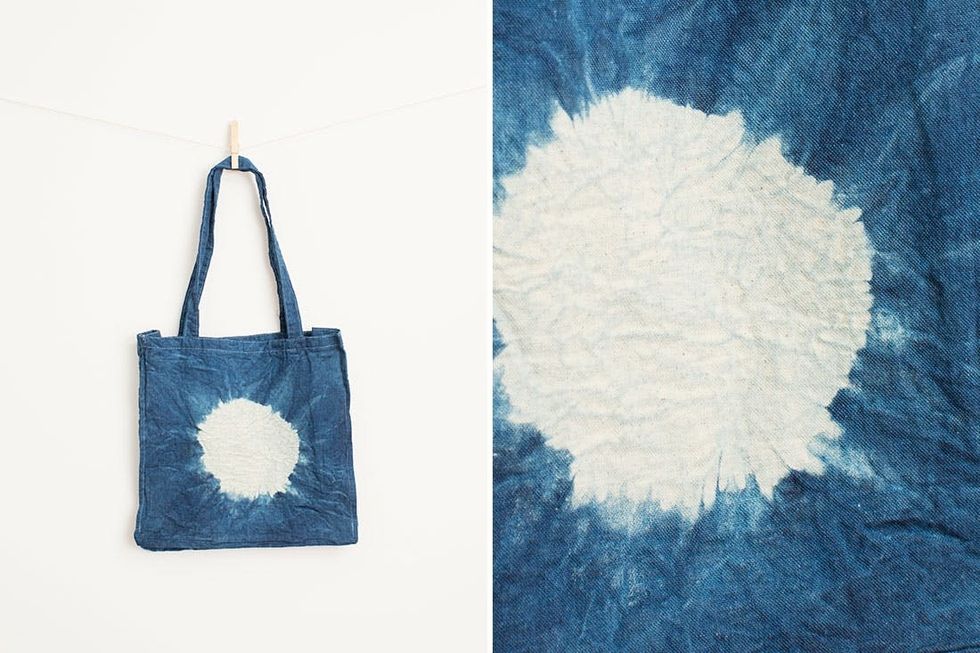
Single Circle
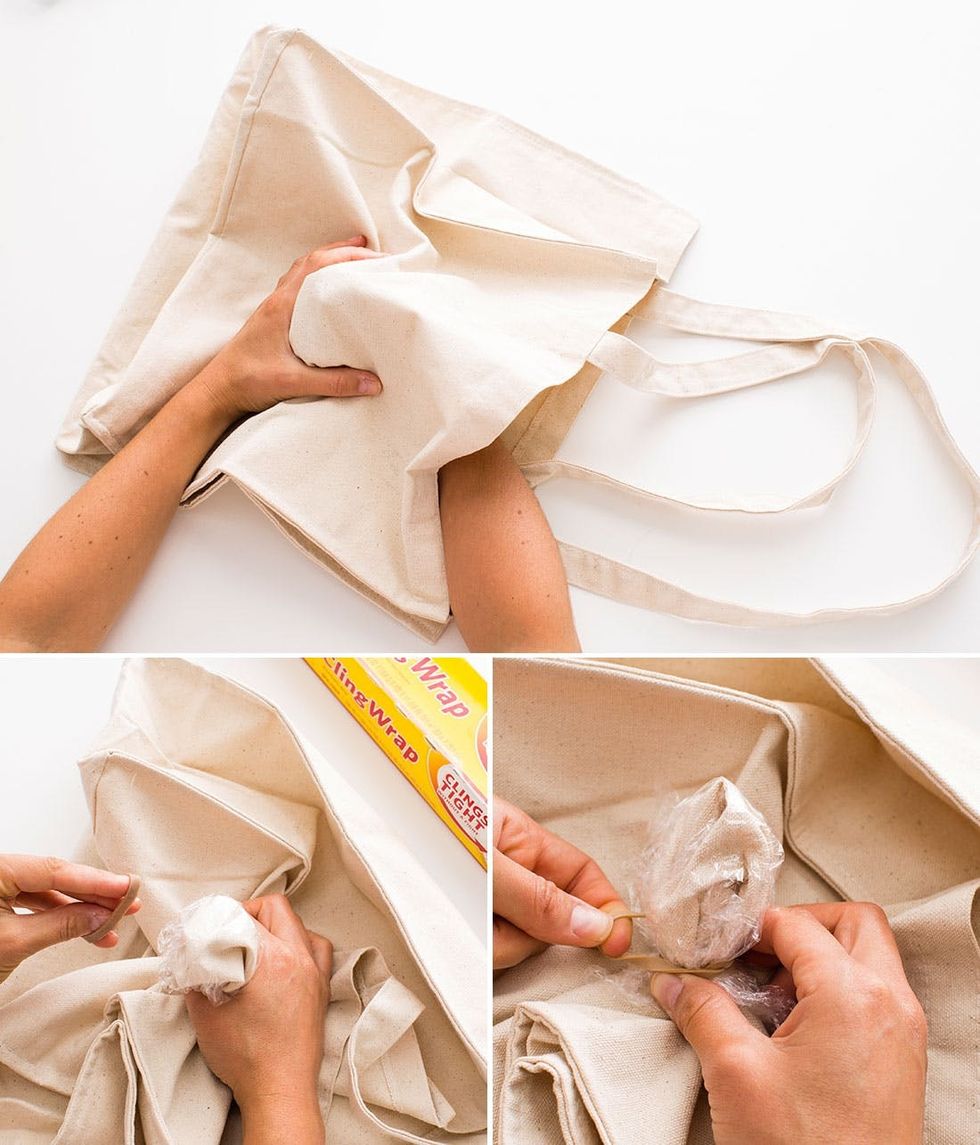
Next up we folded a tote bag. To make a single splotch, cover a fist-worth of fabric with cling wrap and tightly wind a rubber band around the knob of fabric.
You probably recognize this design, as it is super popular with tie dye fashion.
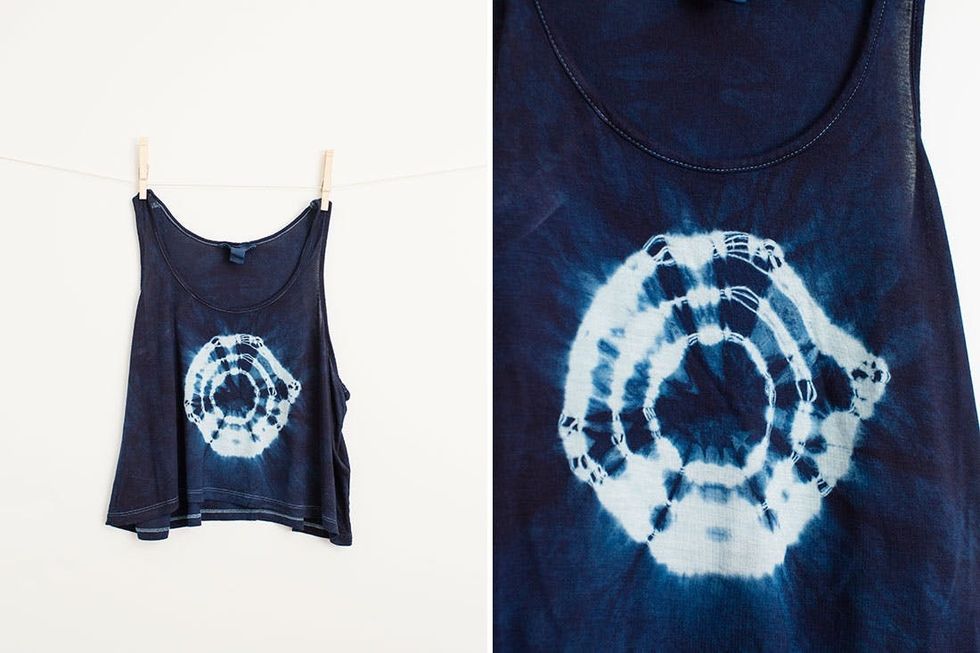
Concentric Circles
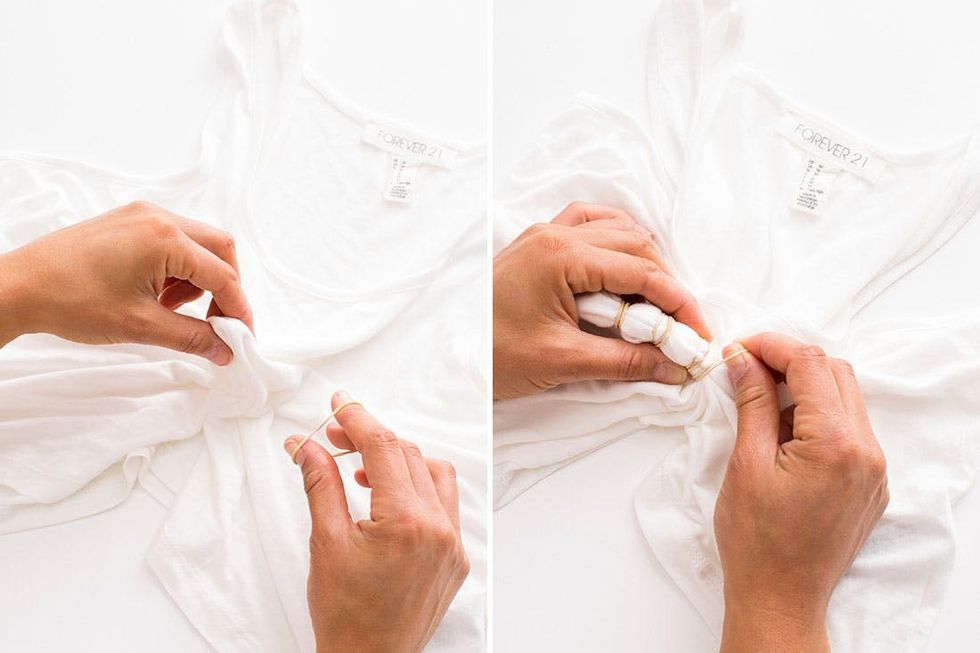
Moving on to the tank top. We made concentric circles for this one. You can also use this technique to create multiple circles all over your garment. Grab a bit of fabric at a point and pull it up. Wrap it with a rubber band about an inch from the tip. Keep adding rubber bands moving down the fabric as you go. The further apart you place your rubber bands, the wider your circles will be.
That’s right — we got a little geometry up in here!
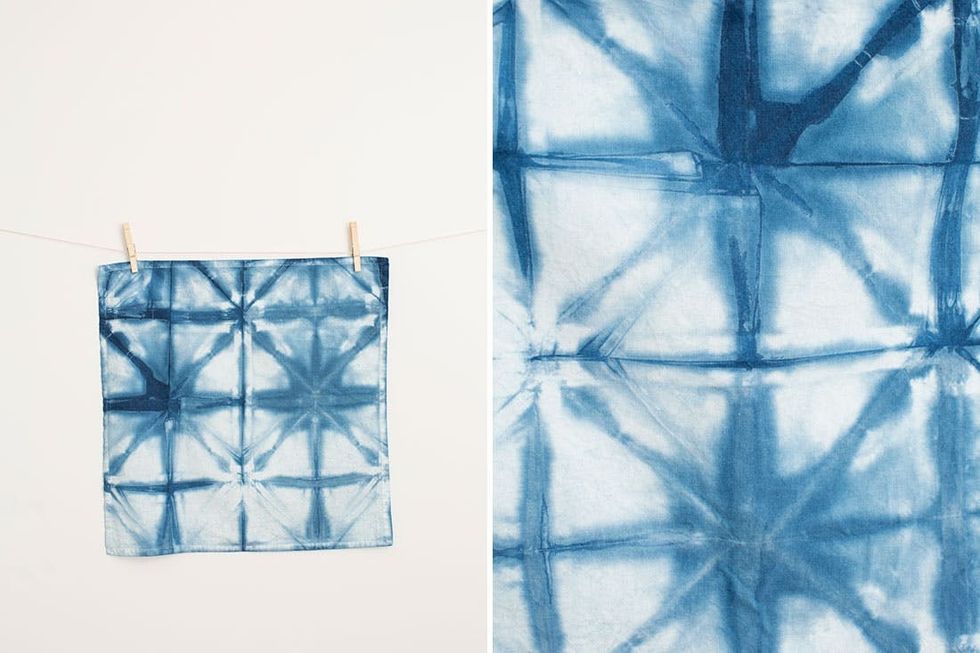
Triangles
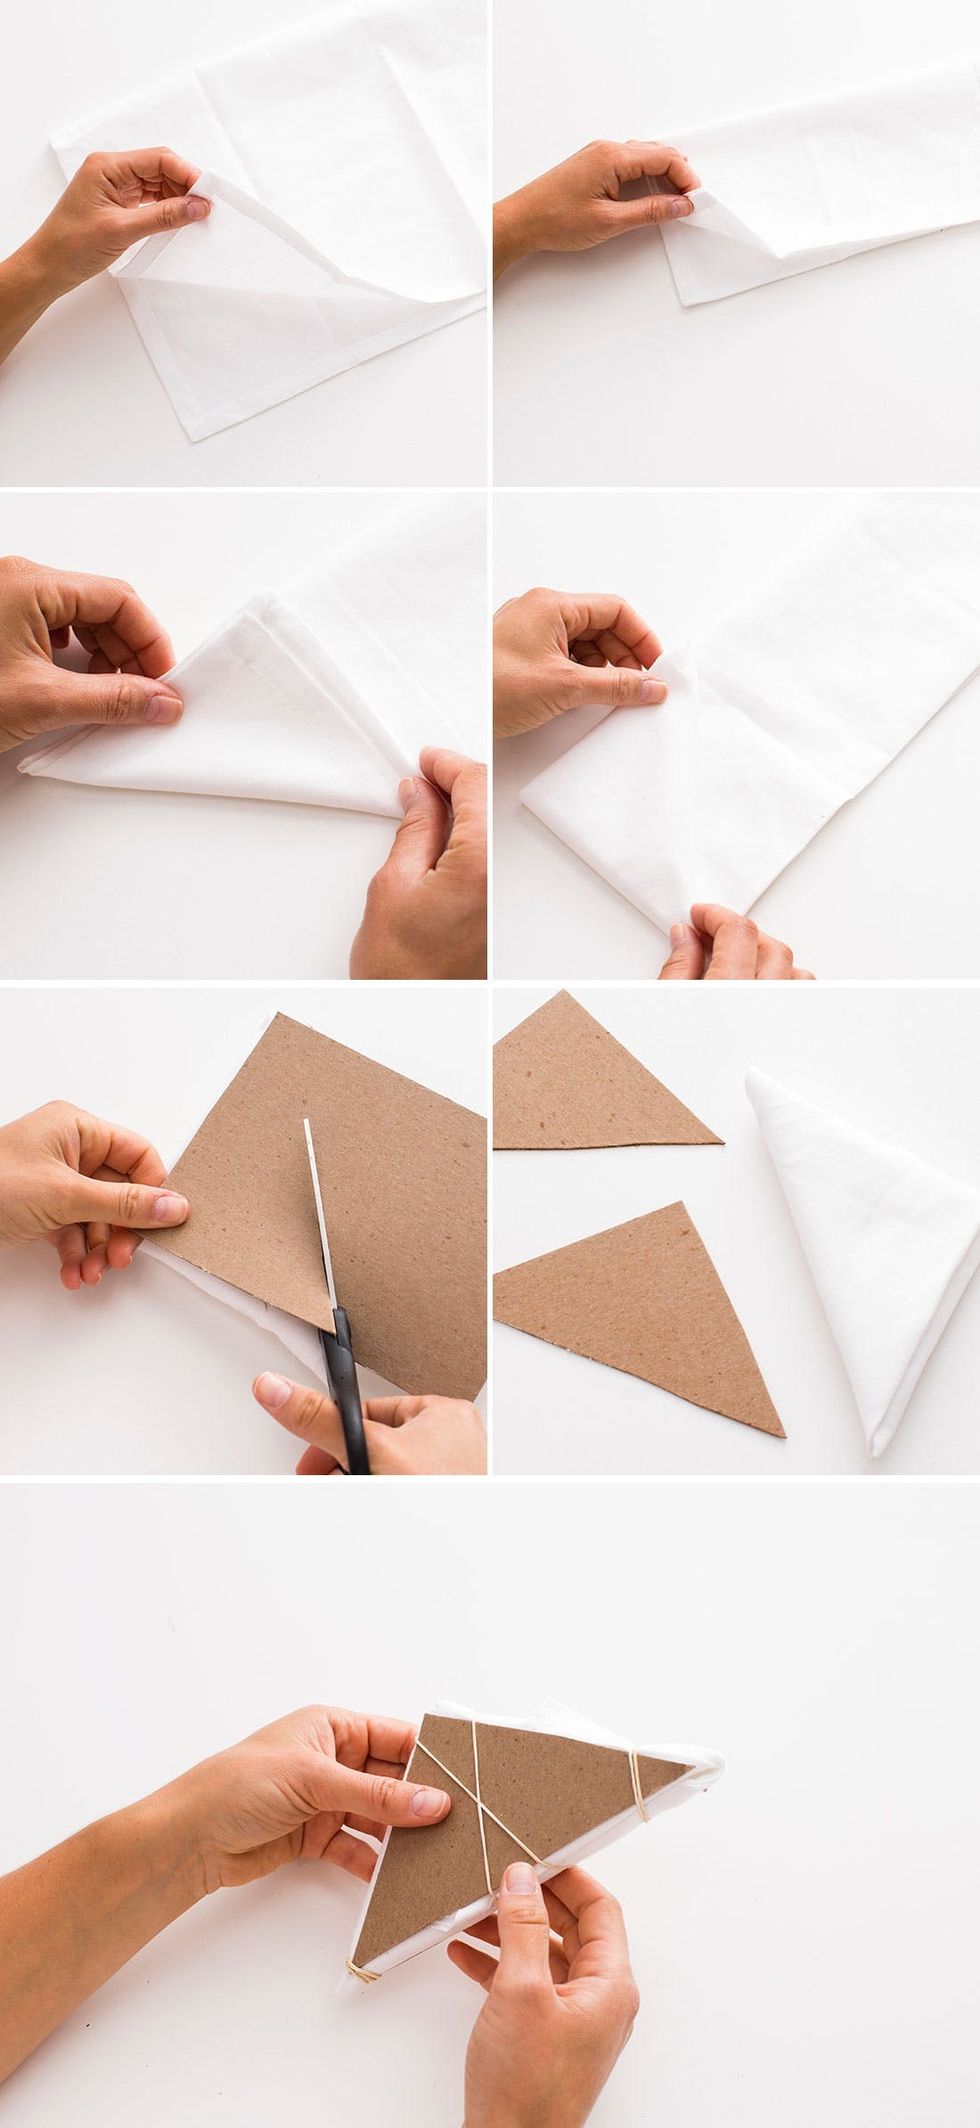
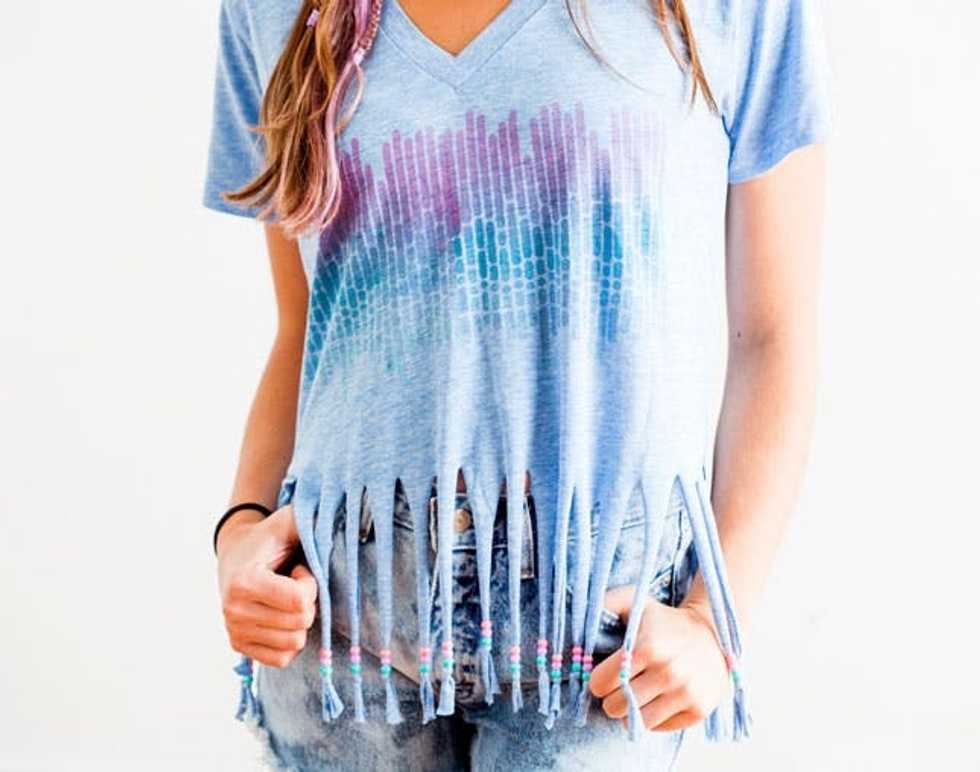
Finally, we dyed a napkin with a triangular pattern. Fold your napkin in half lengthwise and then do that a second time. Now fold the corner on the diagonal creating a triangle. Fold that triangle over itself moving up the napkin until you reach the end. Cut two triangles out of cardboard. These should be the same size as the folded napkin. Place one on each side and add rubber bands to keep the cardboard and folds in place.

Now it’s time to dye!

Once your items are ready, saturate them in clean water. Wring them out and then they are ready to dye!
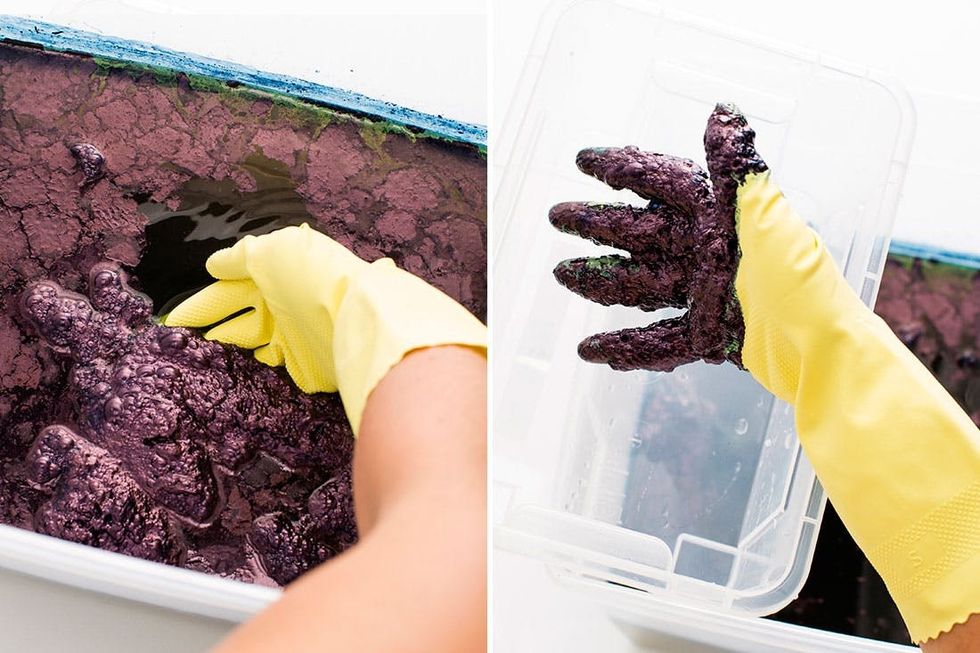
Open the lid on your dye and you will see a top layer of film. Remove the film setting it into a separate receptacle. You’ll actually want to save this if you plan on dying over multiple days.

Take your first item and submerge it in the dye. Gently knead it like a cat so that it soaks up the dye. Don’t let it sink to the bottom of the vat because there is sediment down there. You’ll notice that your item looks fluorescent green. That’s not indigo?! No, it’s not, but that’s okay. When the item is left out in the air, it will oxidize and turn blue. So cool!
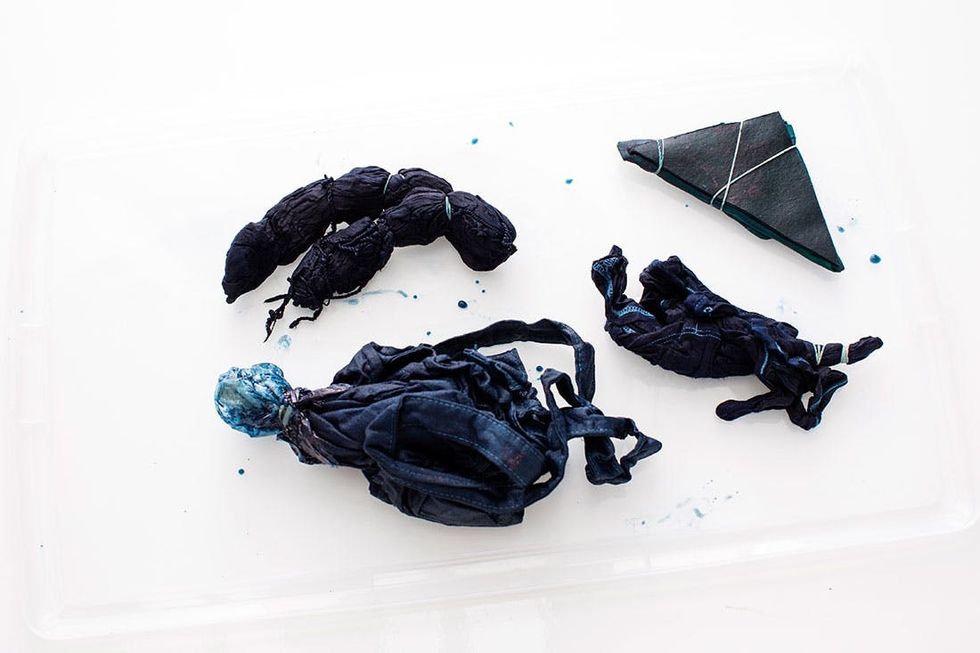
Let your items sit for 20 minutes and then if you want to make them darker, you can dip them in the dye again.
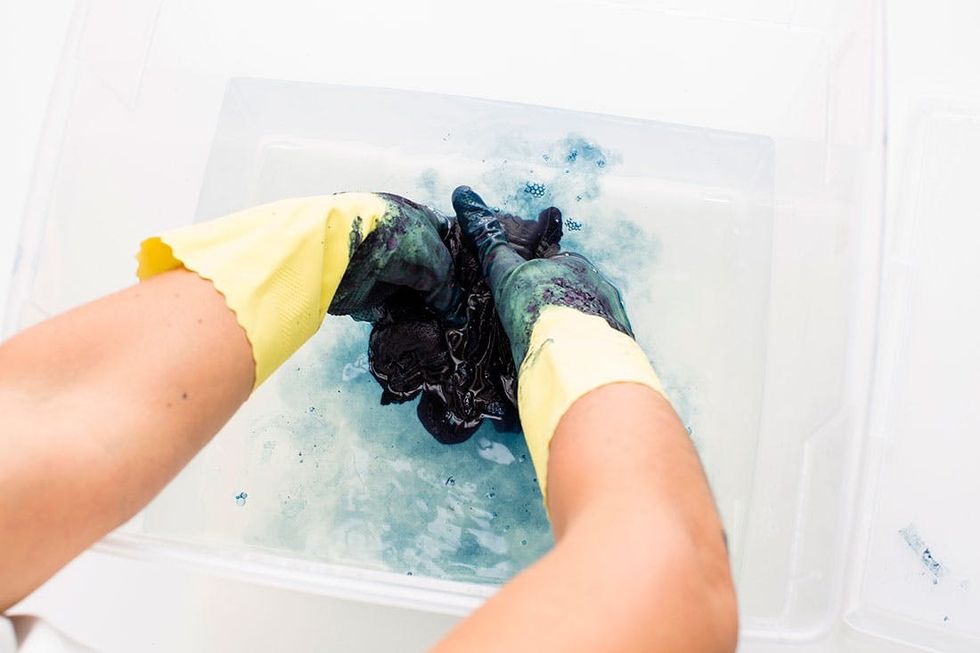
Once you achieve the color you want, rinse your piece in cold water. Take the rubber bands off (it’s easiest to cut them, but don’t cut the fabric!) and keep rinsing. Then put your items in the washing machine with mild detergent. Otherwise you’ll get blue on your skin and look like Tobias from Arrested Development when he was trying out for the Blue Man Group.

When you are done, you can put the top layer of film that you saved back into the vat of dye. Stir it and then cover it with the lid. The dye will keep for a few days. When you are ready to dispose of the dye, we recommend pouring it in your toilet. This is the most environmentally safe way to get rid of dye.
Now, time to wear the rest of these indigo items! Thanks to our gorgeous designer Krystle for modeling :)
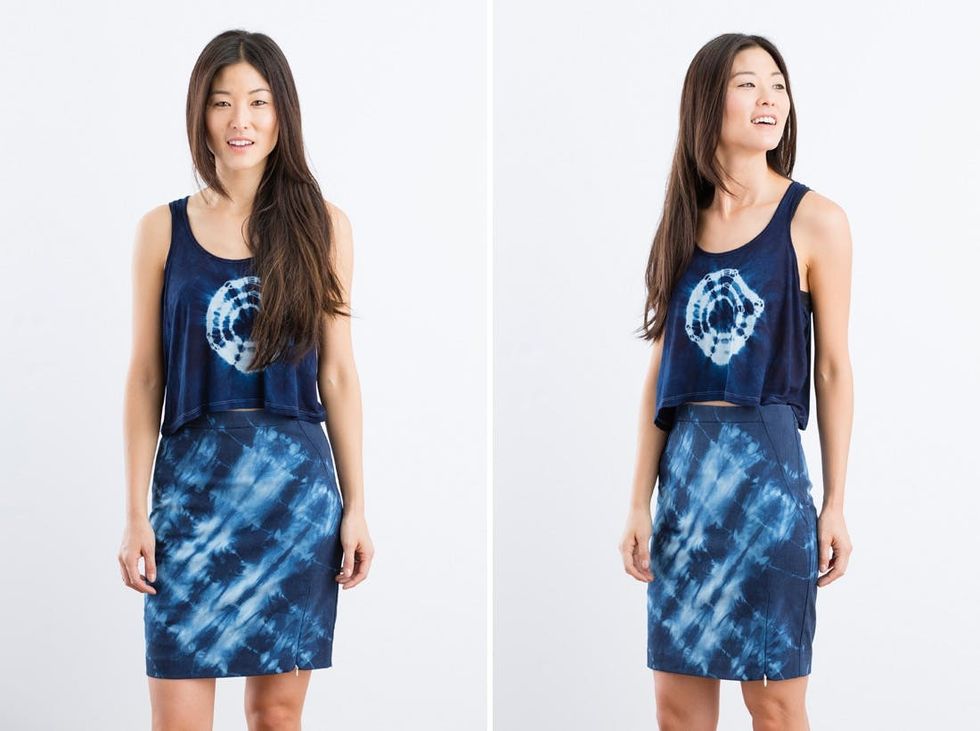
Even though the skirt and tank were different fabrics, they both took the dye beautifully.
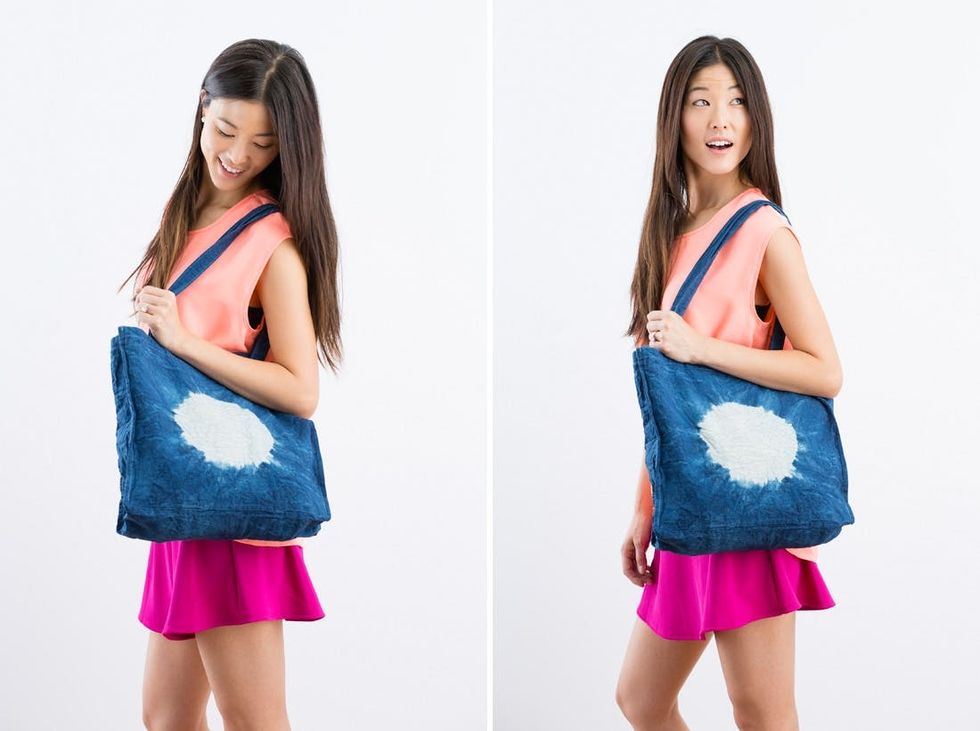
Such a fun bag!
Love the combo of color blocks and indigo!