Recommended for you
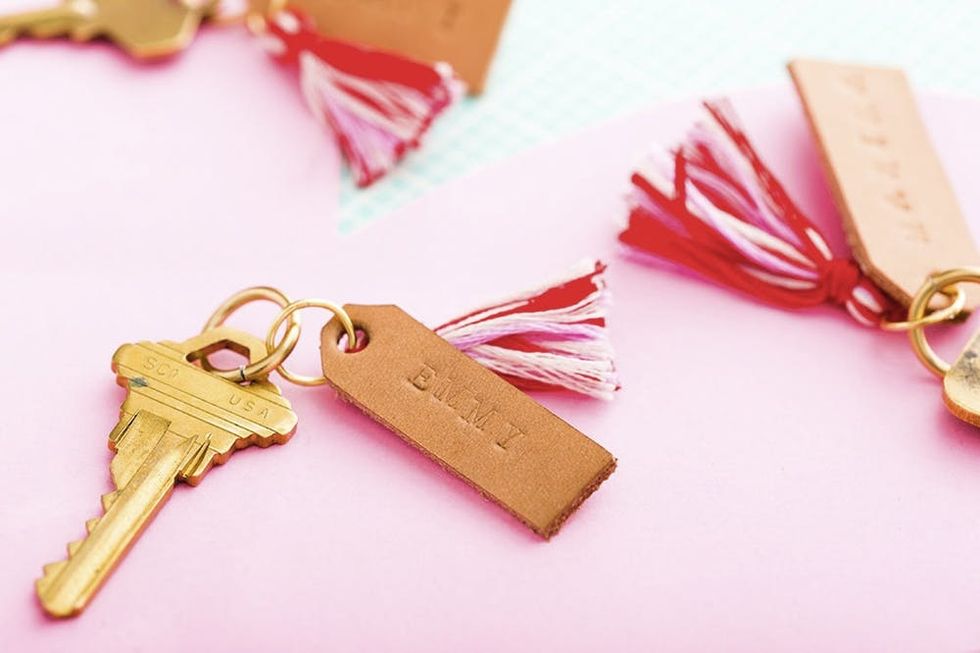
Remember the days of mass-produced Valentine’s Day cards? You know, those drug store cards and packs of candy you handed out in elementary school? It’s high time they get a grown-up refresh. And because you’re a supportive friend that respects your squad’s New Year’s resolutions to eat healthier, maybe we should skip the candygram this year too. Instead of a sugar bomb, go with something that’s thoughtful, unique *and* mass-produceable, like… leather stamped keychains! Read on for the tutorial.
Materials + Tools:
- — leather scraps
- — leather punch (an awl will also work)
- — embroidery thread
- — jump rings or key rings
- — alphabet stamps
- — stamping block
- — stamping hammer
- — X-ACTO knife
- — pencil
- — scissors
- — cutting mat
- — straight edge
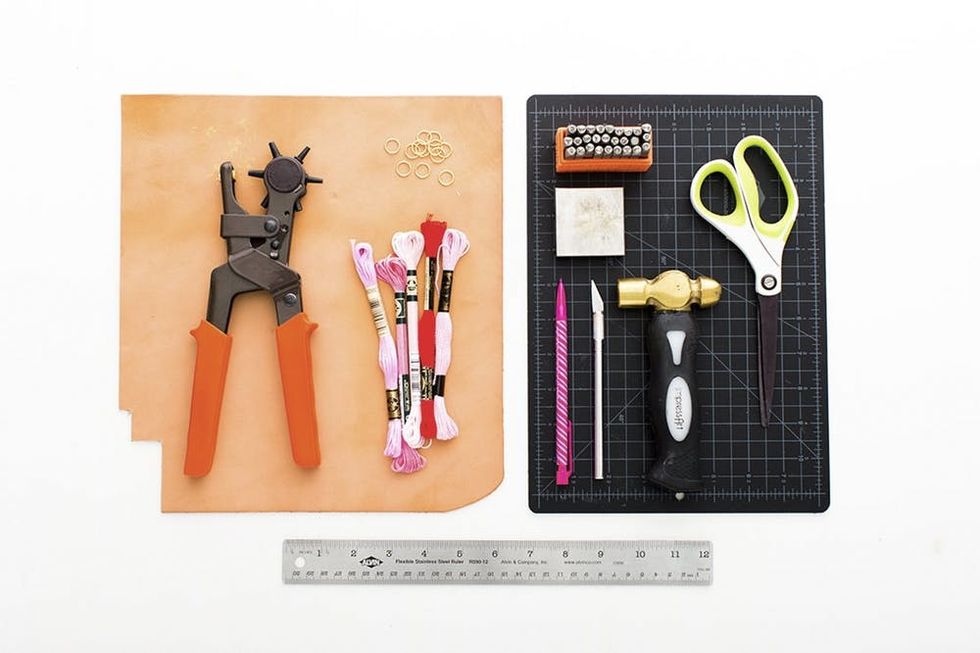
Psst: You can pick up the stamps, block and hammer in our Metal Stamping Tool Kit.
- First, use a straight edge to trace the tag on the back of your leather. Cut it out with an X-ACTO knife.
- Use a leather punch or awl to poke a hole at the top of your tag.
- Place the leather tag on the stamping block, then stamp in each letter by hammering with a swift downward motion.
Pro Tip: If you want to ensure you’re stamping the letters in a straight line, use a piece of tape as a straightedge.
- On to the tassel! Cut three 18-inch pieces of embroidery thread, then wrap around three fingers. Tie the jump ring around a section of the loop with another piece of embroidery thread, then add these ends to the rest of the thread.
- Bunch all of the embroidery thread below the jump ring, then tie another piece of thread around to make a neck. Double knot this thread, add it to the rest of the thread, then cut your tassel to size.
- Attach the leather tag to the jump ring and you’re set.
- Repeat, repeat, repeat for everyone in your crew, attach to a key ring and gift away!
Are you making these keychains? If so, we want to see how they turned out! Share photos with the hashtag #iamcreative on Instagram so we can take a peek.
DIY Production and Styling: Maddie Bachelder
Photography: Chris Andre