Reduce and reuse with these locally thrifted no-sew DIY accessories.
3 No-Sew Accessories to Make from Your Local Thrift Shop Tees


 Recommended for you
In the DIY department here at Brit + Co, we’re always keeping our eyes open for fresh inspiration, no matter where we look. Rifling through the racks of a thrift shop in search of that perfect fill-in-the-blank you always dreamed of owning is one of our favorite go-to’s for creative inspo.
Thrift stores are great for finding unusual patterns, textures and materials that you can breathe new life into. And bonus: You’re doing Earth a favor as well by reusing something that’s no longer needed by someone else! In fact, North Americans send over 10.5 million pounds of clothes to landfills each year, and 95% of that could have been recycled. Savers has a whole campaign called #IGiveAShirt that centers around your clothing footprint. Did you know that you can positively impact the environment by shopping thrift instead of new? Plus, no one else will have the same thing as you ;)
If you’re not familiar with Savers, it’s time to get in the know. This epic thrift store family includes Savers, Value Village, Village des Valeurs and Unique Thrift, boasting over 330 locations throughout the US, Canada and Australia.
Psst: Extra scraps from these DIYs can be used as rags for cleaning. Zero waste FTW!
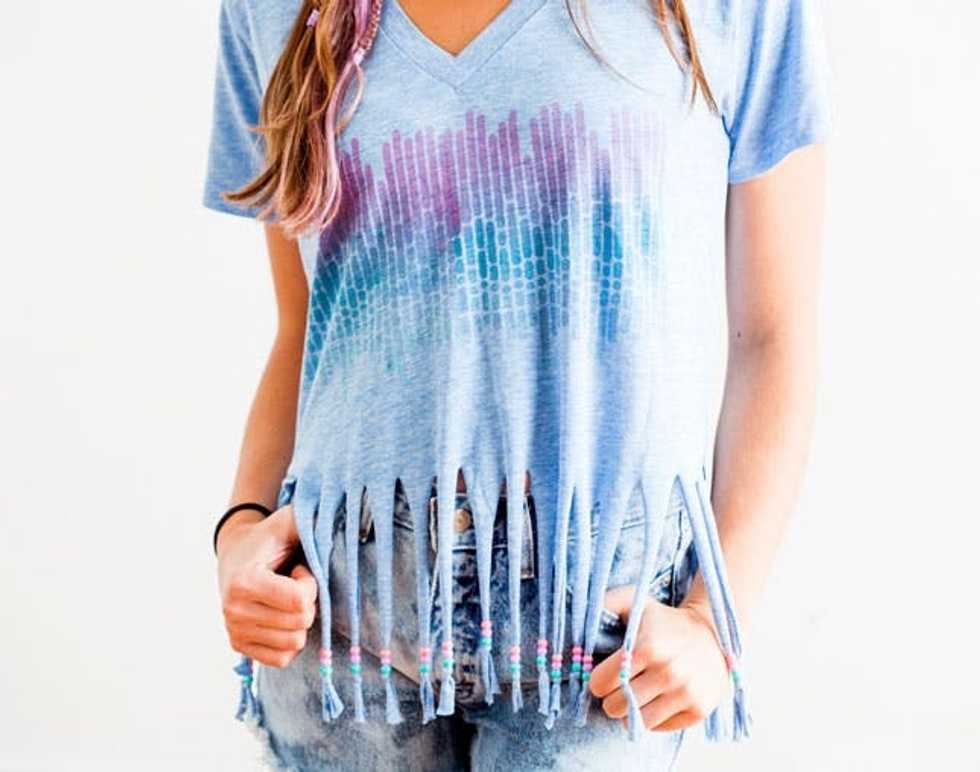
Jersey Tassel Key Chain
Add some colorful texture to your everyday accessories with these DIY key chain tassels. These babies take less than 20 minutes to make and would also make great accents on a purse or clutch if you’re less of a key chain gal. Let’s get started!
Materials + Tools:
- thrifted jersey shirt
- fabric scissors
- key ring
- glue gun
Instructions:
1. Cut thin strips of fabric out of your shirt.
2. Stretch out the strips so that the ends curl inward.
3. Cut off the middle seams.
4. Set one strip aside and gather the rest into a group. Loop the strands through the key ring.
5. Take the extra strip and wrap around the full bundle to create the head of the tassel. Knot to secure in place.
6. Wrap the strands a few more times and finish with a hot glue gun. Trim off any excess fabric.
7. Trim tassel ends for a clean finish.
Start off by cutting long, thin strips of fabric from your t-shirt. Pull at each end to stretch out the fabric so that each side curls inward. Remember to cut off those middle seams! Set aside one strand and gather the rest together. Loop them through a key ring.
Wrap and knot the extra strip of fabric around the full bundle to create the head of the tassel. Wrap a few more times and glue to secure in place. Trim off any excess fabric.
Trim your tassel to the length you prefer. There you have it ⏤ a cute, chic key chain tassel.
Add some keys or decorate your handbag with these darlings. They’re sure to be a happy sight. (Absolutely digging the pastel palette of these key chains!)
They also look amazing flowing in the wind!
Ascot (for you, or your pup!)
Our last ascot scarf tutorial was such a hit, we decided to bring it back to you with an even simpler method. This no-sew version will have you feeling so accomplished by its effortless process.
Materials + Tools:
- thrifted shirt
- fabric scissors
- pen
- ruler
- liquid seam sealant
Instructions:
1. Measure out a square shape from a section of the shirt. Note: A standard bandana is a 22-inch square. Because of the size of the shirt, I’m measuring out a 14-inch square for this tutorial. (Perfect for a dog!)
2. Cut out the square.
3. Apply a thin line of liquid seam sealant to the ends so that your ascot doesn’t unravel from those rugged edges! Let dry.
4. To tie your newly made ascot, fold the square diagonally.
5. Beginning at either end of the triangle, roll up and simply double knot to secure in place.
6. Wear it for yourself or give your pup a darling new accessory!
First things first, find a cute patterned shirt. Measure out a square shape from a section of the shirt. Note: A standard bandana is a 22-inch square. Because of the size of the shirt, I’m measuring out a 14-inch square for this tutorial. (Perfect for a dog!)
Next, cut out the square. When you’re done, apply some liquid seam sealant to the ends so that your ascot doesn’t come undone! Let dry.
Now you have a perfect square for the ascot. Proceed to learn how to fold it!
The ascot’s charm lies in its versatility — you can style it so many ways. We’ll show you two methods of folding. The first way is to fold your square into a triangular half, then roll from the long side down. This creates a textured look with the extra fabric layers on the side.
For the second method, we’re going to keep things a little more prim and proper. Start from the shorter end and roll up toward the longer end. Fold your ascot this way to achieve a cleaner and more polished look. It’ll also save you from the protruding triangular tail curse. (Phew!)
Feel free to play with different t-shirt materials and colors for a more dynamic collection.
Remember to double knot and zsuzh the ends for the most chic results.
I’m especially loving this pattern on Brie. Major cuteness overload!
Tote Bag
Tote bags are useful items to have on you at all times — especially living in San Francisco or Los Angeles, where they charge you a fee for every paper or plastic bag. This no-sew tote is not only easy to carry around, but also cute to wear on its own. Bring it out on your casual days to the grocery store or roll it up and tuck it into your purse for a day out on the town. (You never know when you might need one!)
Materials + Tools:
- thrifted t-shirt
- fabric scissors
- ruler
- pen
Instructions:
1. Snip off the sleeves, neckline and bottom hem of your tee.
2. Flip your t-shirt inside out. Determine where you want your bag to end and trace a line across.
3. Cut slits from the bottom of the shirt to the line marking the bottom of the bag. Cut both the front and back layers together so that the fringes line up. For faster results, cut slits at least one inch apart.
4. Tie together the front and bottom layers. Double knot for security. To close any gaps in between, tie the knotted fringes to each other when you’re done with the first layer of knots.
5. Turn your t-shirt right side out again, and voila — a tote bag!
6. Add a touch of personality with a stamp or some fabric paint. Don’t forget to heat seal it with an iron when you’re done.
Snip off the sleeves, neckline and bottom hem of your t-shirt.
Flip your t-shirt inside out. Determine where you want your bag to end and trace a line across. Keep in mind that, depending on the fabric used, your tote is likely to stretch and become longer when it’s filled with things.
Cut slits from the bottom of the shirt to the line marking the bottom of the bag. Cut both the front and back layers together so that the fringes line up. For faster results, cut slits at least one inch apart.
Tie together the front and back layers. Double knot for security. To close any gaps in between, tie the knotted fringes to each other when you’re done with the first layer of knots.
Turn your t-shirt right side out again, and voila — a tote bag! Add a touch of personality with a stamp or some fabric paint. (Don’t forget to heat seal the stamp with an iron when you’re done.)
There you have it — a new tote ready to be rocked.
Don’t worry, you can keep all your DIYs for yourself.
Or you can give some away as gifts to your friends.
Happy making :)
Are you doing any fun DIYs using thrifted finds? Show us your no-sew projects by tagging us on Instagram + using the hashtag #iamcreative and #igiveashirt!
Author, Production and Styling: Karen Pham
Modeling: Torii Burnett, Karen Pham and Brie
Photography: Chris Andre