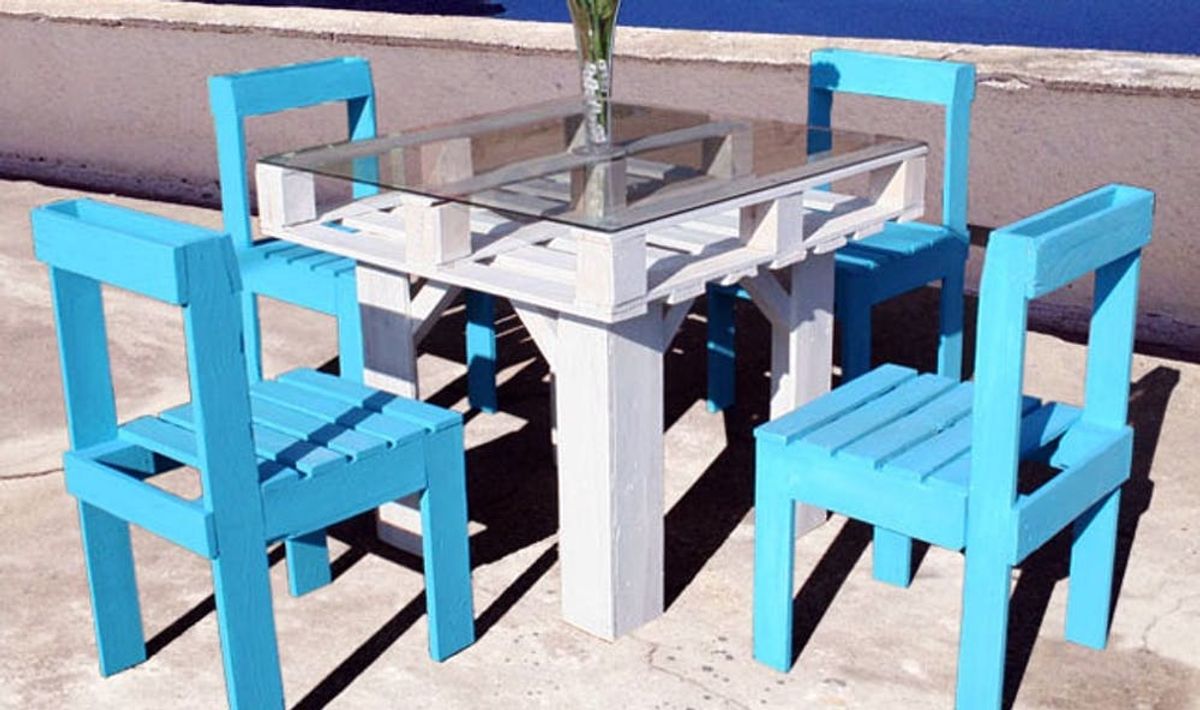
Create an Entire Dining Set from Recycled Pallets

Over the last couple of years, sustainability, recycling and repurposing have been trending like crazy. With an estimated 2 billion pallets being used every day, and many more sitting around, no wonder so many projects have been done using pallets.
For our second foray into pallet hacking (be sure to check out our pallet couch), we’re going to show you how to create a table and set of 4 chairs, perfect for a garden or balcony. File this under Weekend Projects, as it will definitely take more time than our average how-to.
Materials:
– 6 40-inch by 40-inch pallets (1 for each chair, 2 for the table)
– 348 2-inch wood screws (68 for each chair, 76 for the table)
– wood paint
– 6 1/2 yards of timber (for the table)
– a piece of tempered glass to top the table (measurements should match the pallet, around 40 inches by 40 inches)
Tools:
– crowbar
– wood saw
– drill
– claw hammer
– sanding paper / belt sander
We’ll start with the chairs.
As mentioned, the materials for these are 1 pallet for each chair, 68 wood screws per chair, and the usual suspects in terms of tools and paint.
Take the pallet apart using the crowbar and use a claw hammer to remove all of the nails. Then cut the slats to the following dimensions:
– 10 18-inch slats (2 for the front legs, 5 for seating, 1 for the back slat, 1 for the top front slat, 1 for the top back slat)
– 2 36-inch slats (back legs)
– 2 14-inch slats (side slats)
– 1 16-inch slats (front under slat)
– 2 8-inch slats (joining blocks)
– 4 1-inch by 5-inch blocks
Now, let’s make this thing!!
Step 1 – Using the joining blocks as shown in the picture, attach back leg and front legs. Don’t forget they need to be on opposite sides.
Step 2 – Screw the blocks onto the joining blocks as shown for support.
Step 3 – Screw under slat and back slat to brace front legs and back legs.
Step 4 – Spread the 5 slats evenly onto the chair and screw them down.
Step 5 – Screw on top front rail and top back rail to finish it off.
Step 6 – Sand it down and then apply an undercoat. Allow to dry and re-sand one final time. When the chair is smooth and to your liking, you can decorate it however you like. We chose this interesting turquoise matte paint.
Next up, the table!
To prep, take one of the pallets apart using a crowbar and claw hammer to remove all the nails. Then, cut the length of the slats to the following dimensions:
– 8 2.75-inch by 26-inch legs
You’ll also need to cut the timber to the following dimensions to create braces for your table:
– 4 2.75-inch by 26.75-inch slats (for the table frame)
– 8 12.5-inch braces cut at a 45 degree angle (as seen in the photo above)
Now, it’s time to assemble.
Step 1 – Piece the main frame together as shown above.
Step 2 – Make the legs by joining 2 pallet slats together.
Step 3 – Attach the end of legs to frame as shown.
Step 4 – Use the braces to add reinforcement to the table legs.
Step 5 – Screw legs and frame onto the pallet, and then turn upright.
And there you have it: A table and four chairs. Add colorful cushions to add a little extra comfort, and place magazines and books under the glass for storage and decoration.
We’d love to see what pallet projects you’ve created or added to your to-make list. Talk to us in the comments below!


