 Recommended for you

Some of the best things in life don’t last. Fresh cut flowers and donuts are a couple of these glorious, fleeting things. But if you know anything about Brit + Co, you know that we’re on a constant mission to keep the happy vibes alive all year round with a DIY (or two). That’s why we teamed up with Jo-Ann to make these DIY felt donut coasters and faux flower crowns in 15 minutes each, to brighten up our morning and yours!
FELT DONUT COASTERS

These little donuts take just 15 minutes to make and last much much longer! Keep your love of the dough alive 24/7 with these little felt coasters that brighten up your morning coffee and make THE CUTEST gifts. Scroll down to see a step-by-step of how I did it.
Materials + Tools:
Instructions:
1. Cut 3.5-inch diameter circles out of your felt sheets using scissors.
2. Cut a hole into the center of your round “frosting” felt piece by folding the felt circle in half and cutting out a small semi-circle. Give your frosting piece a wavy shape by trimming a curvy line around the edges with your scissors.
3. Glue your frosting rings onto your donut base with a generous line of felt glue and then firmly press the two layers together.
4. Draw polka dots or wavy icing lines all over the top of your frosting layer in felt glue. While the glue is still wet, sprinkle a generous amount of coarse glitter on top of your donut coaster.
5. Lightly tap off the excess glitter and set your donut coaster aside to dry overnight before use.
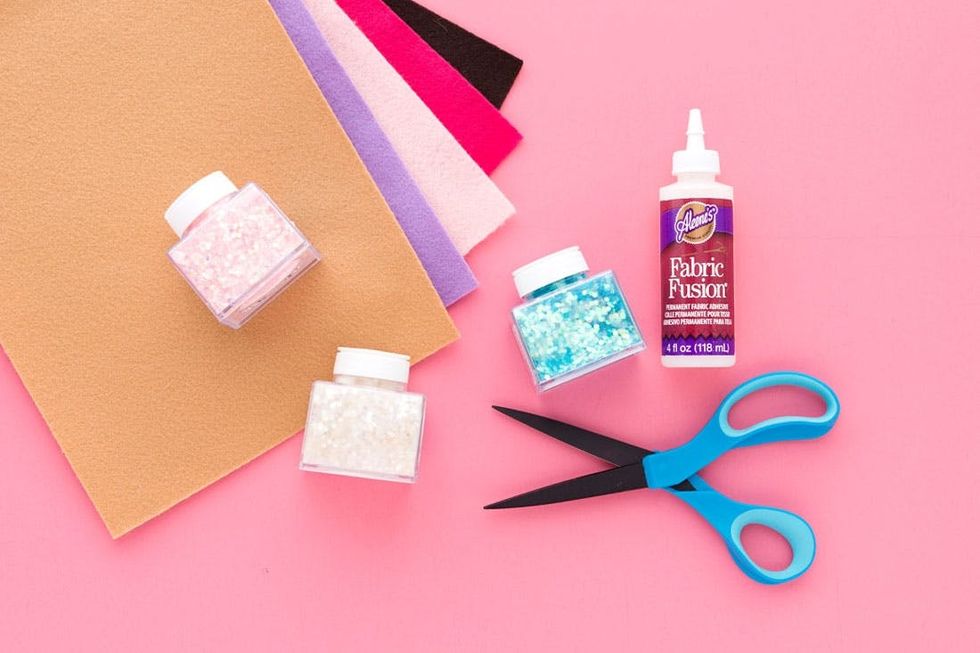
Grab your felt (the colors above are perfect for donuts!), glitter, glue and scissors at Jo-Ann and get started.
- felt in assorted colors
- coarse glitter
- felt glue
- scissors

Cut 3.5-inch diameter circles out of your felt sheets using scissors. If you’re making multiple donut coasters, you’ll want one light brown circle for each donut base, plus an assortment of other colors for the frosting pieces.
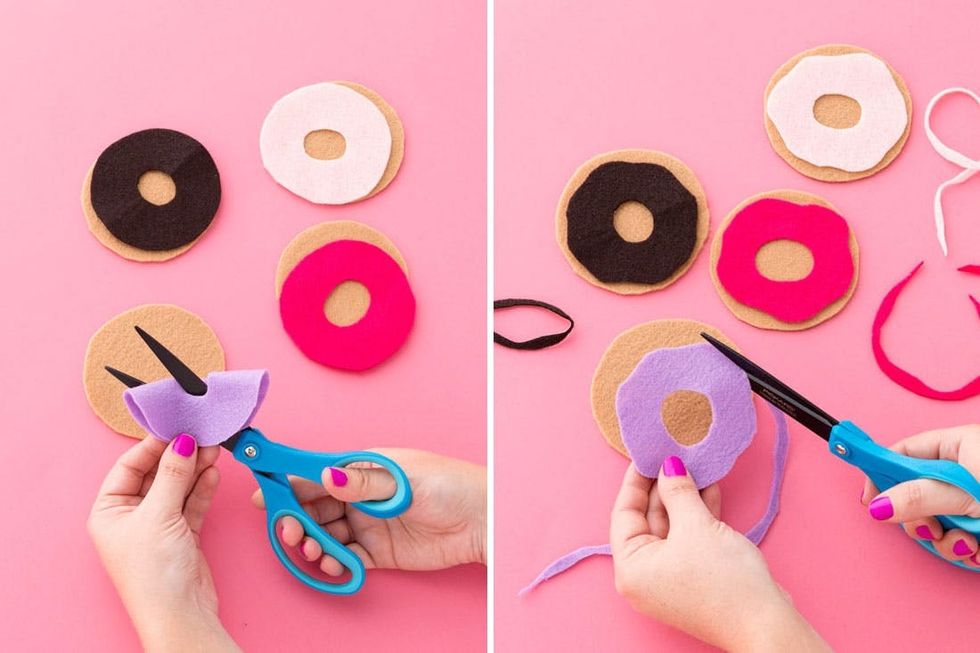
Cut a hole into the center of your round “frosting” felt piece by folding the felt circle in half and cutting out a small semi-circle. Give your frosting piece a wavy shape by trimming a curvy line around the edges with your scissors.
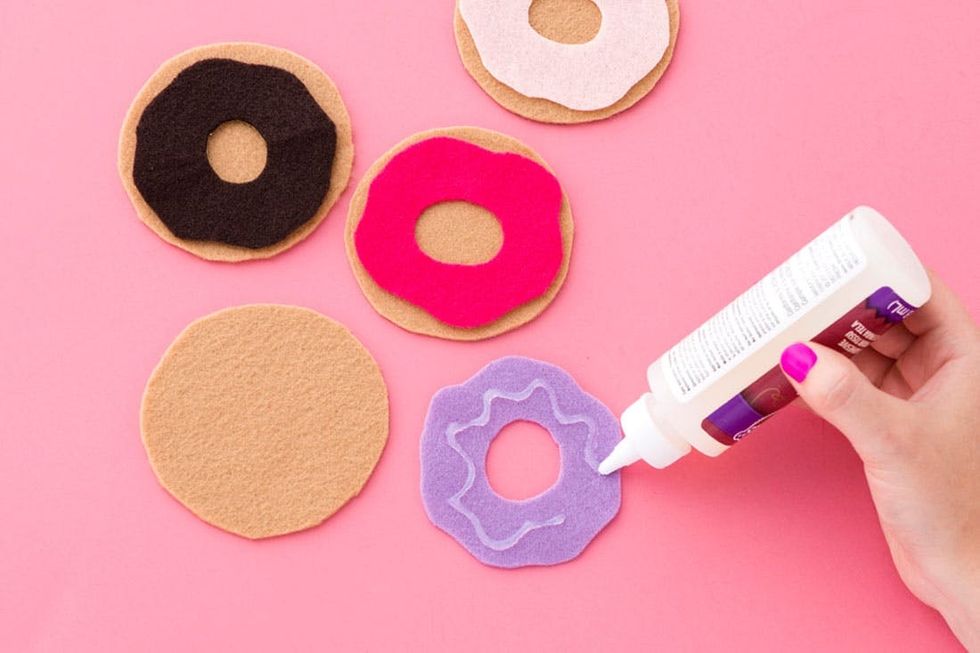
Glue your frosting rings onto your donut base with a generous line of felt glue and then firmly press the two layers together.

Draw polka dots or wavy icing lines all over the top of your frosting layer in felt glue. While the glue is still wet, sprinkle a generous amount of coarse glitter on top of your donut coaster. Lightly tap off the excess glitter and set your donut coaster aside to dry overnight before use.
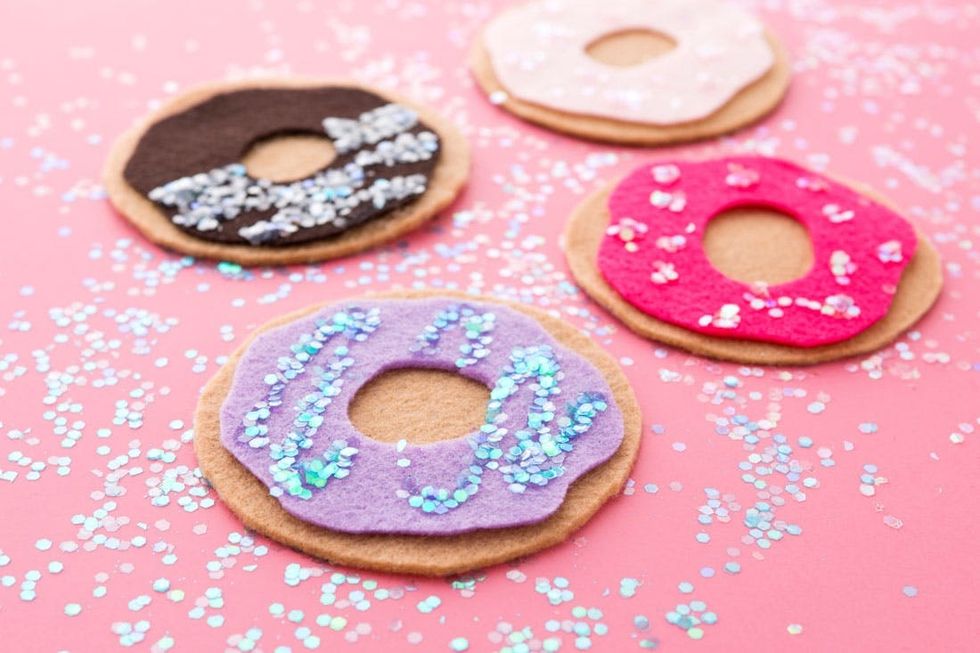
Too cute to eat! But like, for real, don’t eat these ;)

Armed with boxes and boxes of felt and glitter, Jo-Ann brought this fun project to our Re:Make conference and festival so everyone there could make a donut or two. Safe to say it was very popular with our attendees!

FLOWER CROWNS

Now we know that summer has come and gone, but we’re not ones to shy away from florals at any time of year. These faux blooms keep the warm-weather dream alive all year long. Switch up the brighter florals for whites, reds and deep green leaves for a winter spin on these!
Materials + Tools:
Instructions:
1. Cut a piece of fern garland to fit your head comfortably and then cut a slightly longer piece of floral wire with the wire cutters.
2. Loosely wrap the floral wire around your fern garland, connecting the two loose ends and pinning down the ferns all the way around.
3. Cut the flowers of your choice with wire cutters and attach them to your fern crown by wrapping another piece of floral wire around them.
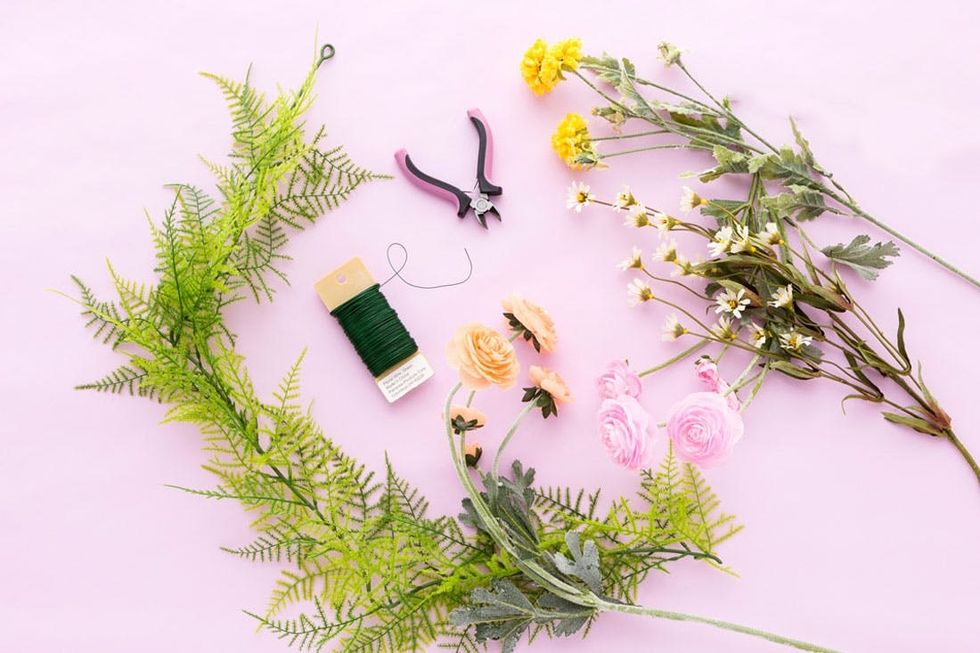
Head down to your local Jo-Ann, grab these supplies and you’re good to go!
- faux fern garland
- floral wire
- assorted silk flowers
- wire cutters
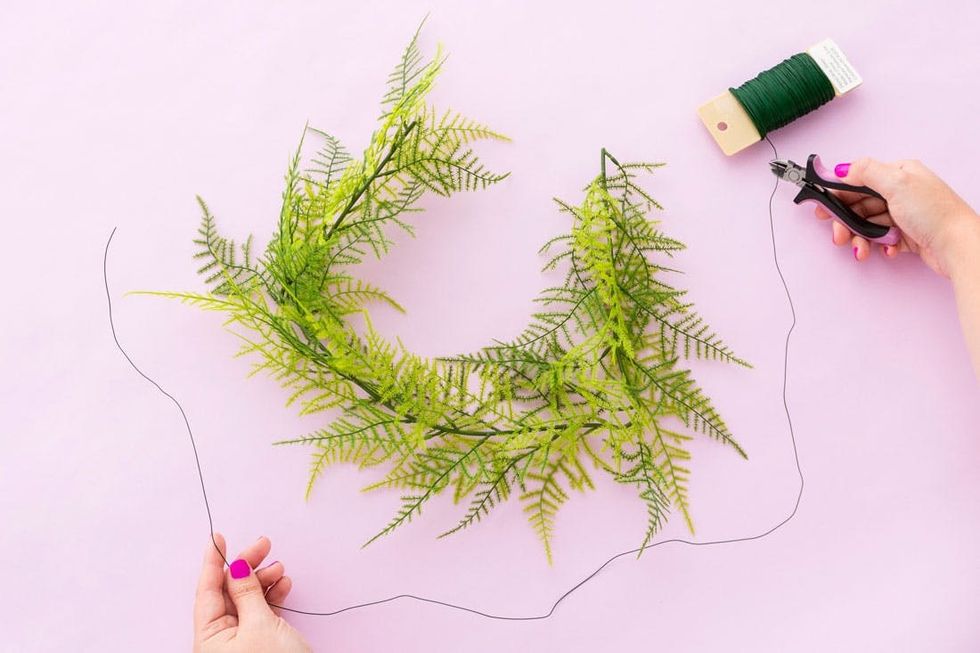
Cut a piece of fern garland to fit your head comfortably and then cut a slightly longer piece of floral wire with the wire cutters.
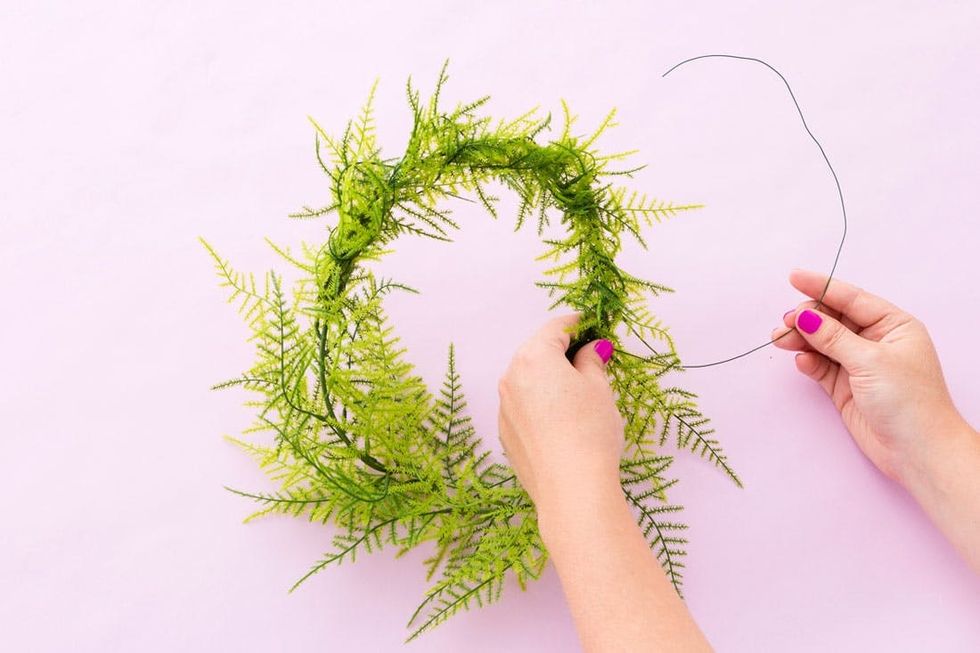
Loosely wrap the floral wire around your fern garland, connecting the two loose ends and pinning down the ferns all the way around.

Cut the flowers of your choice with wire cutters and attach them to your fern crown by wrapping another piece of floral wire around them.

Easy as that and looking fresh all year round!
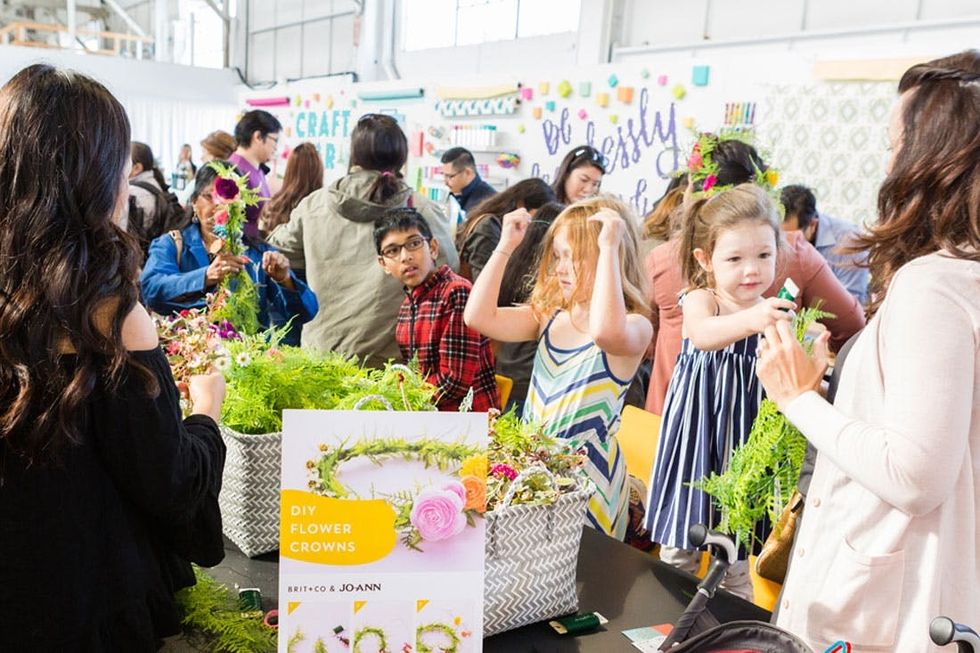
Jo-Ann also set out enough supplies for everyone at Re:Make SF to make one for themselves, and it was a HUGE hit! Good news for the flower children out there, these crowns are here to stay!