


You’ll Never Believe What Strange Household Item We Used to Curl Hair


There are so many different ways to curl your hair, from the tried-and-true ways that result in classic, touchable curls to innovative hair straightener waves that yield of-the-moment tresses (and go totally viral) to old school, no-heat beach waves that give you ‘Gram-worthy hair like you wouldn’t believe. Bottom line? Don’t discriminate methods. Did you know that you can use a popular household item to place a unique wave into your hair?! The secret wave-maker is… aluminum foil! It’s a trick that hair pros have used forever to get quick curls with lots of hold for fashion shows, and also one that any beauty hacker should have up their sleeve — especially if you’re the kind of girl who wants to save space in your bathroom and ditch the curling iron all together. I’ll show you how to DIY curls with aluminum foil IRL — here’s how to get into this strange method!
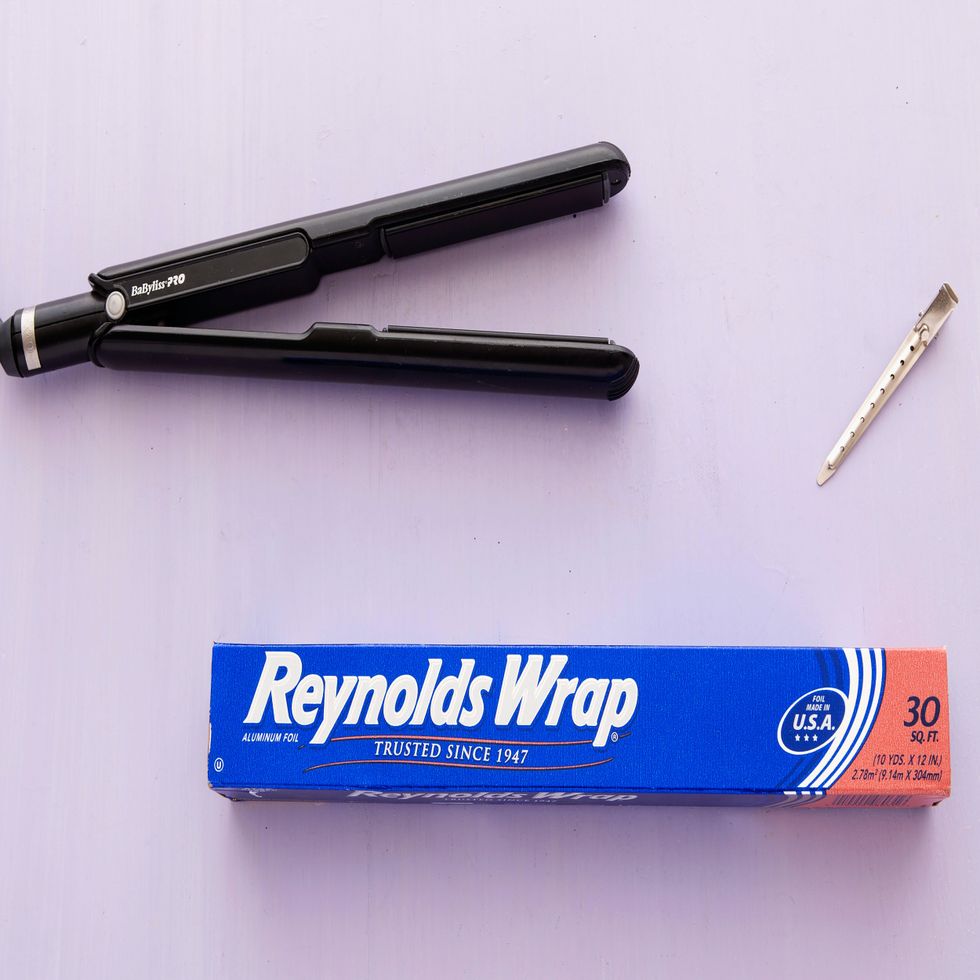
Materials:
— aluminum foil
— flat iron
— duckbill clip
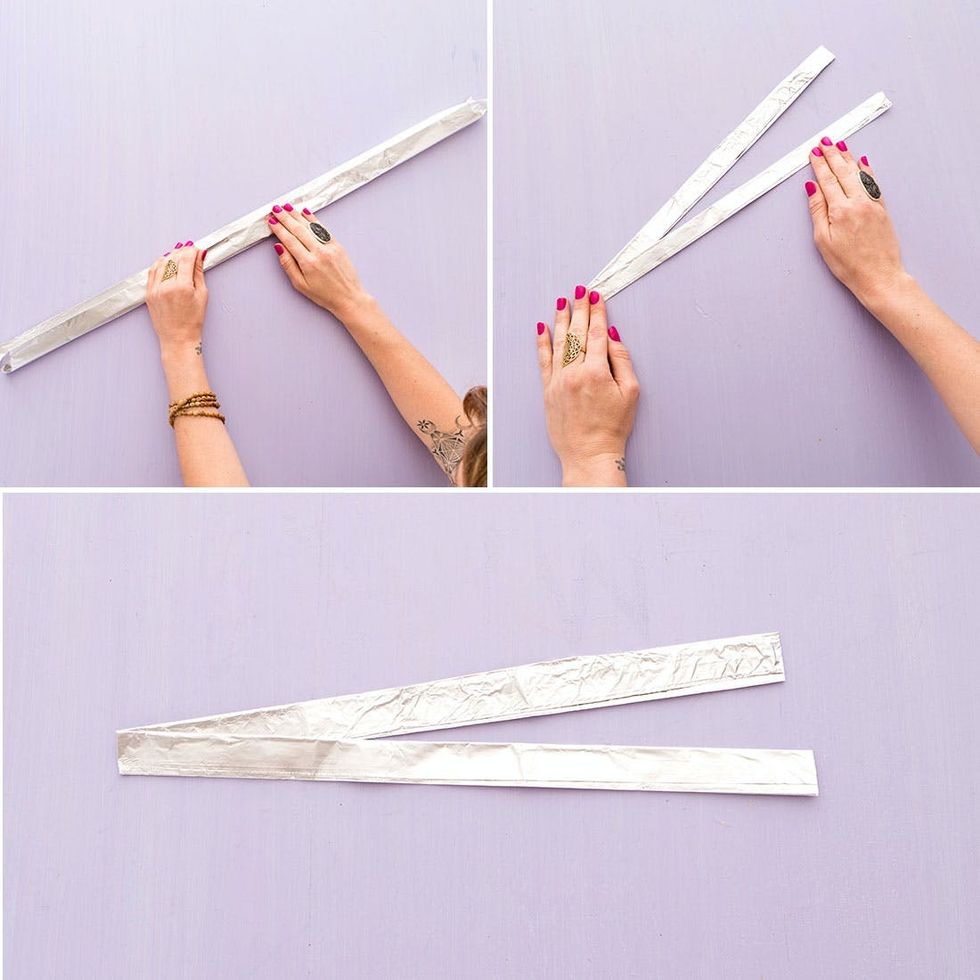
Lay out your foil and fold until you create a 1-inch by 1 ½-inch-wide strip. Then, fold it in half to create a “V” shape. You’ll need just one of these to curl your entire head.
Foil Prep
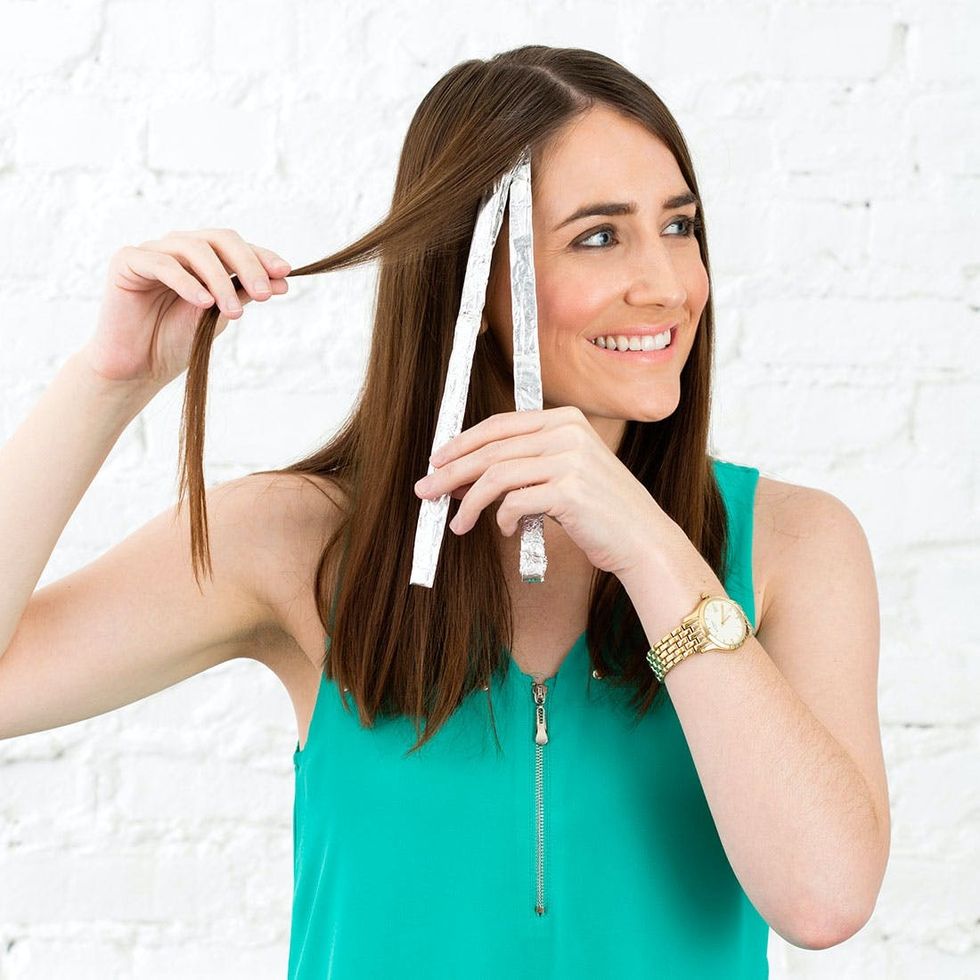
Place the foil at the base of your first section of hair. Depending on the size of your desired wave and the texture of your hair, the size of the section will vary. If you have thick hair, take a smaller section so you can get a stronger curl. If you wish to have a small crimp, take thinner sections, and for a wider, wave-like pattern, go a little wider.
Step 1: Position Foil
Begin by weaving the strand of hair over the top and under the lower part of the “V” foil. Continue to weave your hair until you get to the end. Then gently tap your flat iron over the weaved hair. For best results, wait a moment before removing the foil, so the hair can cool a little.
Step 2: Weave Hair + Flat Iron
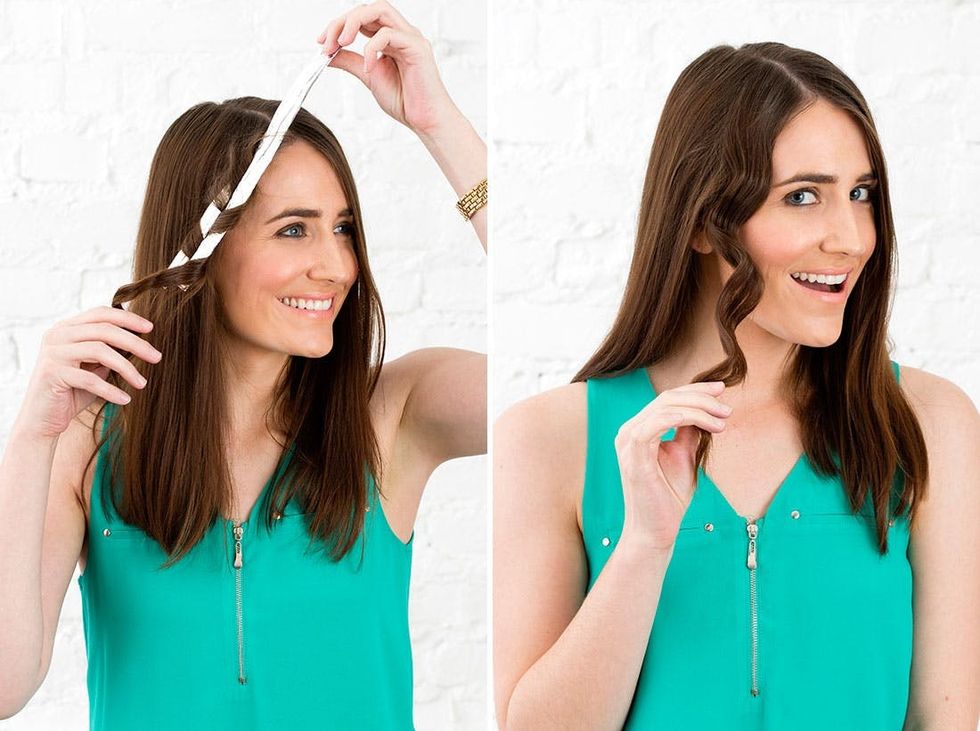
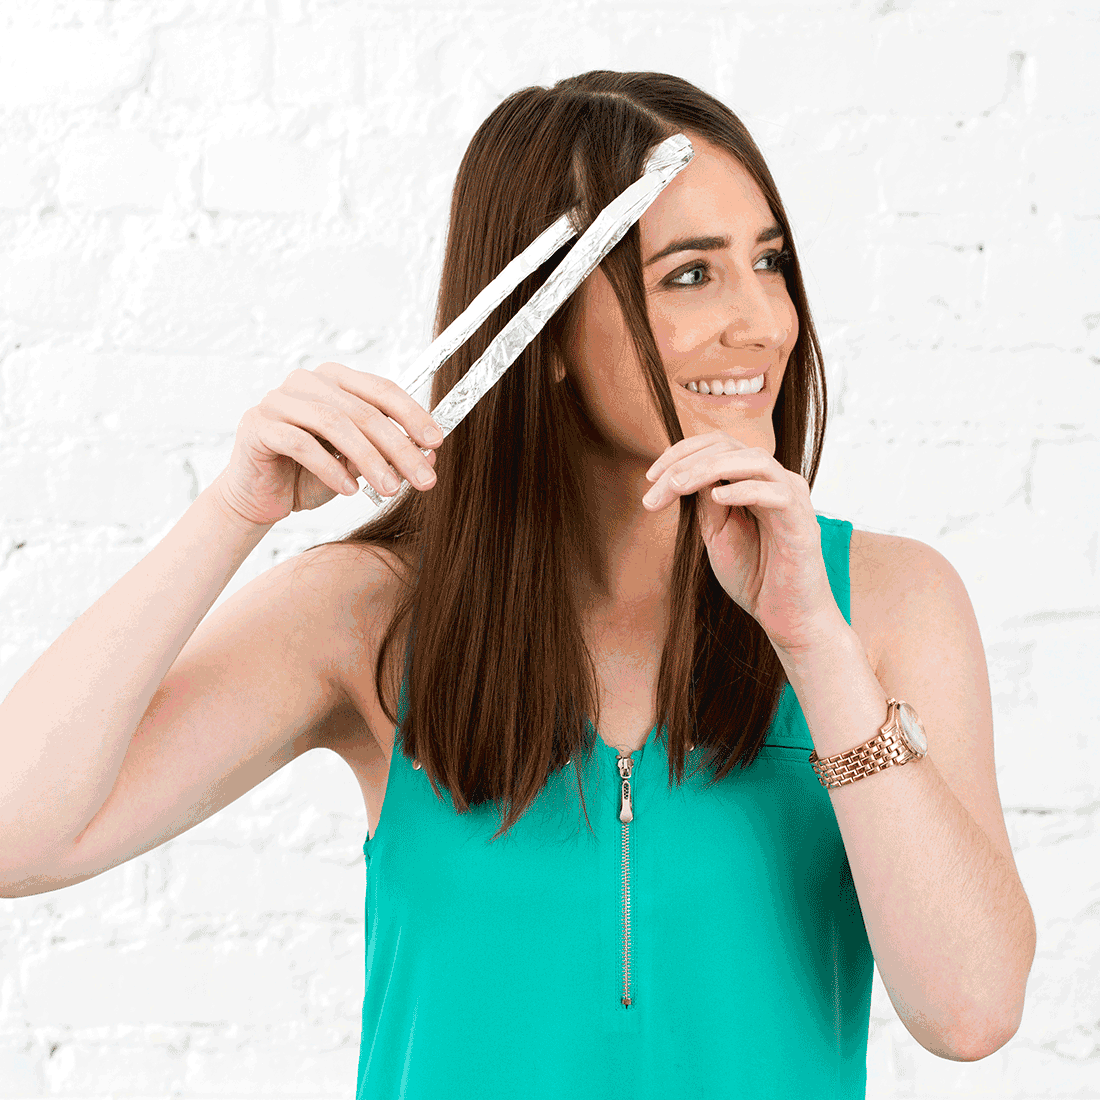
To remove the foil, simply hold the ends of your hair and pull from the top of the “V” foil sliding the weaved hair down and off as you go.
Step 3: Remove “V” Foil
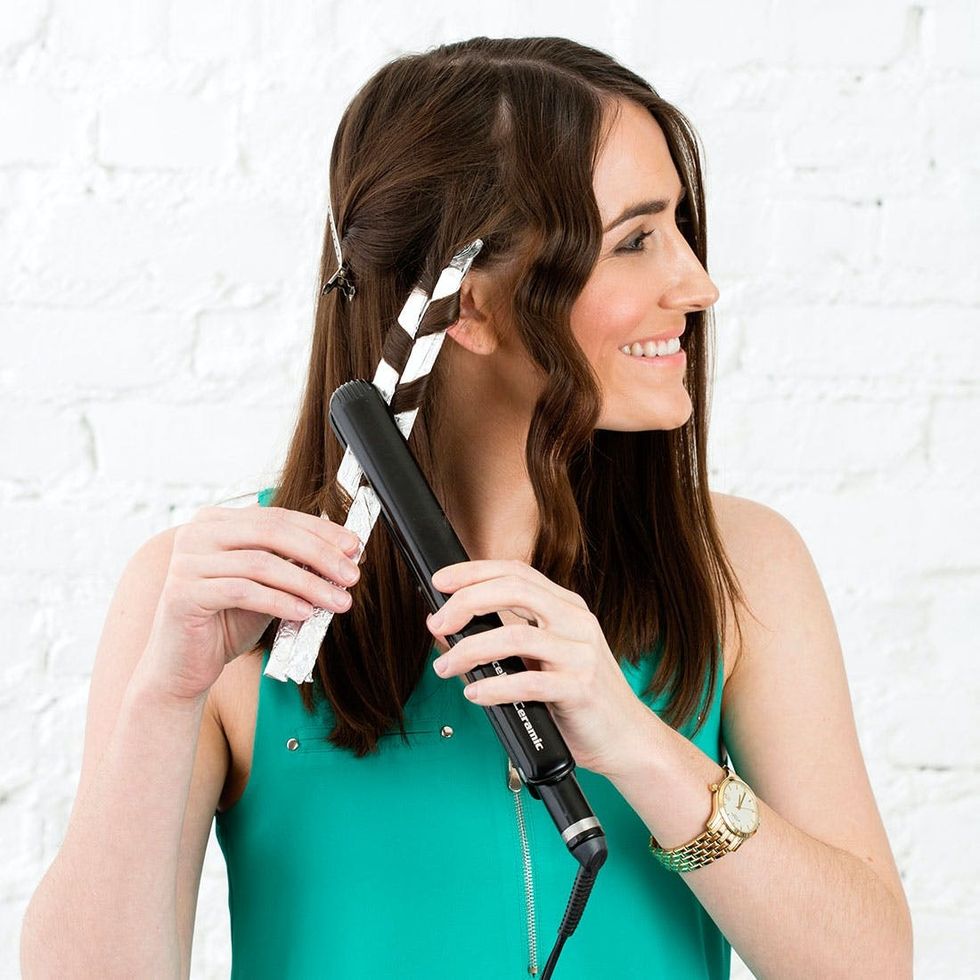
To keep your sections clean and to have an easier time working with each strand of hair, use your duckbill clip to keep the hair you aren’t working with out of the way.
Step 4: Pin + Repeat

When you’re done, you can either rock as-is or add a a styling cream to make it a little more wild and unkempt!
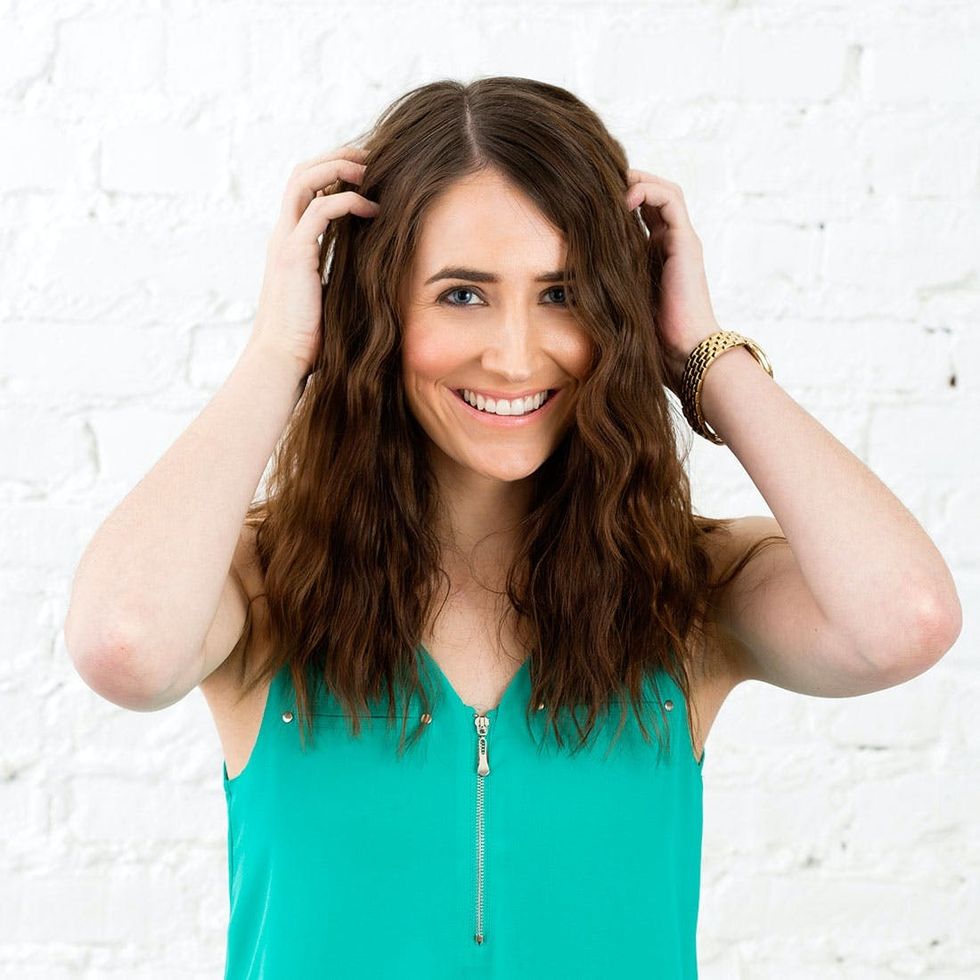
This technique can go in so many directions; try a narrower “V”-shape foil for an even tighter, crimped finish. You can do partial pieces throughout your hair for a wild boho look, or even do extremely large sections on a really wide “V” foil for a natural, barely there wave. The possibilities for DIY curls — without owning a collection of curling irons — are endless.
