13 DIYs to Make Your House Smell like Christmas All Year
Ask any Christmas lover what their favorite part of the season is, and chances are, “scent” will come up as one of their top three faves. From freshly baked Christmas cookies to a sappy Christmas tree to those ridiculously fake cinnamon-smelling pinecones, the holidays are all about the smells. Unless you plan on baking treats for the entire week — and if you are, we’re coming over right now — here are 13 DIY ways to keep your house smelling as festive as you’re feeling.

1. Mulled Apple Cider: Our recipe for mulled cider serves double duty. Whip up a batch and your home will smell amazing, and you’ll have a cozy beverage to enjoy along with your Netflix binge. (via Brit + Co)

2. DIY Peppermint Soap: Set out festive suds in the bathroom and kitchen or wrap these little bars up for much-appreciated DIY stocking stuffers. (via A Pumpkin and a Princess)

3. Stove Top Potpourri: If you like candles, you’ll love this potpourri. The best part is that you can use whatever you have on hand, although the must-haves are cinnamon, citrus, ginger and vanilla. (via Half Baked Harvest)

4. Cinnamon Scented Ornaments: A dash of cinnamon scent in this clay recipe makes these smell so good. Add some scent to a fake tree or really win at gift wrapping by using these as gift toppers. (via Northstory)

5. DIY Scented Candle: If you can’t find just the right candle scent, make your own. Use essential oils like pine needles, orange and sage. (via Francois et Moi)

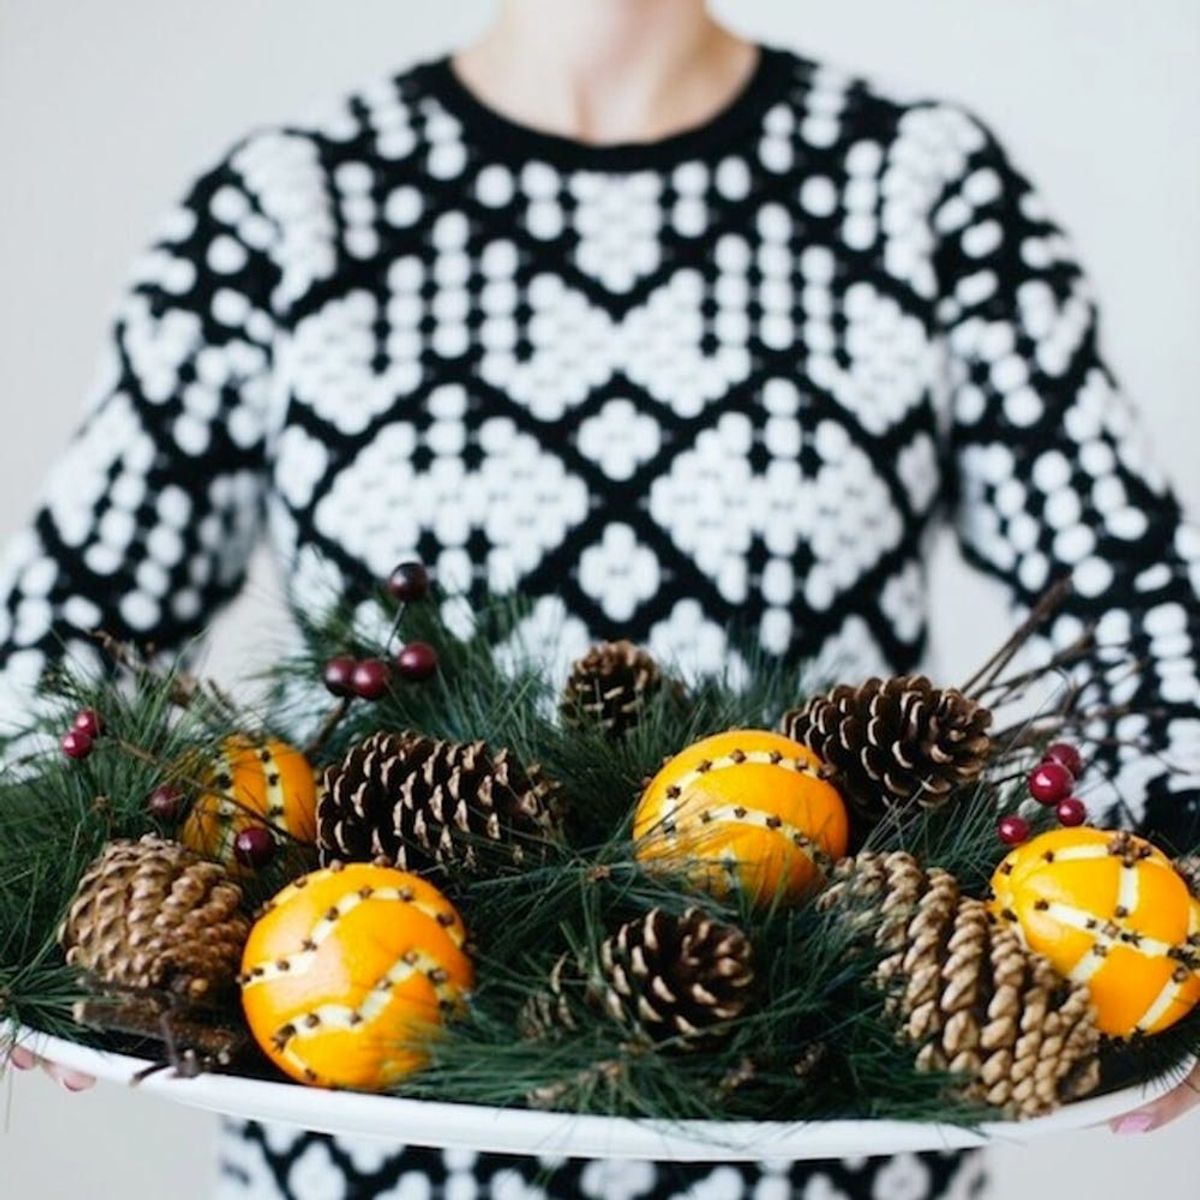
6. Orange Clove Centerpiece: Flowers tend to fade quickly, but this simple centerpiece will last all week long. Mix greenery, pinecones and clove-studded oranges for a festive platter that also smells delicious. (via Let’s Mingle)

7. Dried Citrus Wreath: It’s really easy to dry oranges… just slice and bake. Stick them together to make a wreath or string them together into a garland for the tree. (via Twine and Table)

8. Sweet Cinnamon Fir Room Spray: Spritz this all-natural spray in every room, and maybe a little extra on your faux tree if you’re craving that sappy scent. (via Little Green Dot)

9. Pinecone Scented Soy Candle: The best part of having a freshly cut tree in your home is the smell. Make that holiday smell stick around a little longer with these all-natural pine-scented candles. (via Evermine)

10. Pomegranate and Cranberry Stovetop Potpourri: Artificial cinnamon scent has a certain charm, but nothing beats the natural deliciousness of actual spices brewing away in the kitchen. (via Boxwood Avenue)

11. Layered Candles: Peppermint tops off these DIY votives, but you can customize the layers with your favorite essential oils. Best of all, making your own candles is super easy. Last-minute gifts, anyone? (via Hello Natural)

12. Cinnamon-Scented Fabric Ornaments: Sneak a favorite seasonal fragrance into your Christmas decor by adding cinnamon-scented ornaments to your tree. You could also use these to your linen closet to lend a Christmassy scent to your guest towels. (via eHow)

13. Stovetop Potpourri Gifts: These scent recipes are sweet, festive and really inexpensive, especially if you have a pine tree in your yard. Mix up the ratio to get the perfect scent for you. (via Delia Creates)

Which of these DIYs will you try? Follow us on Pinterest for more inspo.

As cute and clever as store-bought greeting cards are, there's something incredibly thoughtful that can be felt in a homemade birthday card from a friend or loved one. Not only does the act of creating DIY birthday cardsgive you the chance to slow down from the business of life and reflect on what you cherish most about the people you're celebrating, but the one-of-a-kind touch will be super memorable for your recipients as well.

Even if you're not the craftiest person, don't fret, because we've put together a straightforward guide on how to craft your own DIY birthday card for your besties and S.O.'s. Step into the world of DIY magic as we embark on a quest to create birthday cards that will leave your recipients in awe. From unexpected pop-up surprises to mind-bending interactive features, discover fresh ways to make birthday cards burst with fun and excitement. Prepare to unleash your inner artist as we dive into all the tips to help you craft unique and captivating birthday cards. And keep reading for some thoughtful text ideas to ensure that your birthday wishes are just as fun as the card design they're on.

Step 1: Gather Your DIY Birthday Card Supplies

Image via Karolina Grabowska/Pexels

Before embarking on your DIY birthday card adventure, gathering all the necessary supplies is essential. A well-prepared crafter is a confident crafter! So, let's make sure you have everything you need to bring your imaginative card ideas to life.

  1. Start with colored cardstock or paper as the foundation of your cards. Choose a variety of vibrant hues to suit different themes and moods. Scissors are your trusty sidekick, enabling you to precisely cut out shapes, create borders, and trim your cardstock.
  2. Grab glue or adhesive tape to hold everything together securely. Opt for a glue stick for a mess-free experience or double-sided tape for a clean and seamless finish.
  3. Round up all the art supplies you have, from markers and colored pencils, or pens. These magical tools will be your gateway to adding personalized messages, whimsical doodles, and vibrant colors to your DIY creations.
  4. Stock up on a dazzling array of embellishments for an added dose of flair and personality. Let your creativity soar as you explore the boundless possibilities of stickers, sequins, ribbons, twines, buttons, beads, and more. Watch your creations come alive with vibrant colors, textures, and eye-catching details. With these delightful elements at your fingertips, there's no limit to the magic your birthday cards can be infused with.

Step 2: Choose Your Card Design

Image via George Dolgikh/Pexels

The card design will function as the first impression that sets the tone for the entire experience. A well-designed card can evoke emotions ranging from joy and excitement to nostalgia and warmth, leaving friends and family in awe of the thoughtful gesture.

Handmade Watercolor Design:

Express your artistic side by creating a handmade watercolor masterpiece for a genuinely one-of-a-kind birthday card. Start with a blank cardstock or watercolor paper as the base, and let your creativity flow. Use watercolors to paint a vibrant and personalized design, such as flowers, balloons, or a recipient's favorite hobby or color palette. Add a heartfelt birthday message inside to complete the card.

Pop-Up Surprise:

Add an element of surprise and delight to your card with a pop-up feature. Cut out a simple pop-up mechanism using cardstock or colored paper and attach it to the inside of the card. Then, unleash your creativity by designing and cutting out fun shapes, such as cakes, candles, or balloons, and attach them to the pop-up mechanism. When the card is opened, the surprise element will make the birthday celebration of your loved one even more memorable.

Quilled Creations:

Quilling is a paper art technique that involves rolling and shaping thin paper strips to create intricate designs. Use quilling techniques to create beautiful and delicate patterns, flowers, or even personalized messages on your birthday cards. Experiment with different colors and shapes to bring your design to life and make it truly unique. The recipient will appreciate the time and effort put into crafting such an elegant and artistic card.

Hand-Stitched Greeting:

Consider incorporating those skills into your DIY card if you enjoy sewing or embroidery. Use a needle and thread to create hand-stitched designs or patterns on fabric or cardstock. You can stitch the recipient's name, a birthday message, or even cute motifs like balloons or cupcakes. The texture and charm of a hand-stitched card will make it a cherished keepsake.

Interactive Slider Card:

Create an interactive slider card to take your birthday card to the next level. Use cardstock to make a slider mechanism that reveals a hidden message or image as it is pulled. Write a heartfelt message or attach a memorable photo that slides out when the recipient pulls the tab. This interactive element adds a playful touch to your card and makes it truly engaging.

Step 3: Write A Clever Message

Image via June/Pexels

Elevate your birthday card by personalizing it with a heartfelt note to enrich the receiver's experience. Share warm wishes, inside jokes, or memories that make the card even more special and meaningful. Not sure where to start? Here are a few ideas for what to write inside your DIY birthday card!
  1. "Happy birthday, queen of the hashtags! May your day be as fabulous as your Instagram feed."
  2. "You're the avocado to my toast, the squad to my goals. Happy birthday, superstar!"
  3. "It's your birthday, so let's turn up the 'Lit' level and celebrate like it's 1999... or 2023!"
  4. "Birthdays are nature's way of telling us to eat more cake. Enjoy your special day!"
  5. "May your birthday be filled with good vibes and a bottomless brunch. Cheers to another fabulous year!"
  6. "Sending you birthday wishes with all the heart emojis. You deserve all the love and happiness today and always."
  7. "Happy birthday to my favorite extremely online friend. May your Wi-Fi always be strong and your battery never die."
  8. "Time to celebrate another trip around the sun. Let's make this year even more epic than the last!"
  9. "You're not getting older, you're leveling up! Happy birthday, gamer!"
  10. "Happy birthday, trendsetter! May your day be filled with selfie-worthy moments and viral-worthy adventures."

Step 4: Add The Perfect Finishing Touch

Brit + Co

As a bonus, consider creating a DIY envelope to complete the package. Choose decorative paper or repurpose materials like magazine pages or fabric scraps to craft a unique envelope that adds creativity and thoughtfulness to your handmade card. Personalize it by adding hand-drawn designs, stamps, or calligraphy for an extra special touch.

So, there you have it! DIY birthday cards offer endless possibilities for fun, creativity, and the chance to unleash your imagination. With just a few simple steps, you can create customized and sincere cards that will bring joy to your loved ones on their special day. Remember, the beauty of DIY is that there are no limits or rules. Let your creativity run wild, experiment with different techniques, colors, and textures, and, most importantly, have fun. Happy crafting!

For more crafty ideas, check out all of our DIY ideas on Brit + Co.

I can't be the only one who dreads deal with TSA during security checkpoints, so it's important for me to find small rolling suitcases that make traveling 10x easier. I can't tell you how many times my items have been haphazardly ransacked during 'random' security checks only for me to curse my packing skills — ugh!

There's one bright side to my dilemma though: small rolling suitcases that have study exteriors and well-proportioned interiors. This is the key to making sure my travel essentials stay in one place. Tired of tripping over your suitcase because of its unstable wheels or fearing that you still won't do everything TSA agents ask? I've got 8 chic small rolling suitcases that'll help you navigate the airport without breaking a sweat in no time!

Shop Small Rolling Suitcases Here!

Herschel Heritage Hardshell Carryon Luggage (Ivy Green Topography)

One of the most important features of small rolling suitcases is their exterior. Since you'll likely be sprinting through the airport or jogging down escalators if they're not busy, you need something that can withstand being dragged. Herschel is known for creating luggage that's travel-tested

This carryon luggage is made with 70% recycled polycarbonate and it has silent wheels. It's like your travel companion that truly understands you have places to be and doesn't complain as you're navigating your busy airport.

CALPAK Ambeur Mini Carry-On Luggage (Rose Gold)

Here's your sign to get a rose gold rolling suitcase that can serve as your carryon item. It has 360-degree spinner wheels that'll work with you and not against you (IYKYK), plus the internal pockets make it easier for you to pack efficiently. You may want to check with the attendants on your flight, but this suitcase is designed to fit under your seat so you don't have to fight with an inconsiderate person for a space in the overhead storage bin.

Monos Terracotta Carryon

Sometimes you just want something cute and floral like this limited edition rolling suitcase. It's water-resistant and has an internal lining that's made from 100% recycled polyester! The internal features I like are the buckle straps that makes sure your clothes won't slide all over the place and the removable compression pad with zippered pockets to store flat items.

BÉIS The Carry On Roller (Atlas Pink)

We've all had experience with the dreaded TSA line that makes us question our sanity and age. But, BÉIS wants to eliminate your stress with their pink carry on rolling suitcase. It also have 360-degree wheels that'll happily go wherever you do and the interior? Well, let's just say you'll be able to find what you need when it's time to place everything on the conveyor belt.

Take that TSA agents!

OLOV 18” Underseat Carry-On Small Suitcase (Blue)

Embarking on a few quick getaways this summer and don't want to be weighed down by heavy luggage? You'll need to consider small rolling suitcases that are sturdy, yet lightweight. OLOV'S under seat carryon features an interior buckle to keep your items secured and allows you to pack the basics.

It also has a three digit combination lock in case someone decides to press their luck if you happen to fall asleep during your flight.

Vera Bradley Small Spinner Luggage (Fresh-Cut Floral Green)

In need of a portable rolling suitcase that can hold your clothes and serve as a charging dock for your phone? Vera Bradley already read your mind and has just the thing for you. The interior has two zippered sides that allow you to separate your necessities from each other based on function (clothes on one side and sandals on the other).

This spinner luggage also has an integrated lock that makes your time in TSA go a little smoother. If it's not obvious, we've had some rather unpleasant experiences with agents mishandling our items 😖.

Bric’s By Ulisse Carry-On Expandable Spinner with USB Port (MANGO)

If you thought we were done showing you chic and functional small rolling suitcases, you're almost right. Besides reminding us of the sunny weather we've been experiencing during spring, this carryon has a three stage telescopic handle that makes holding on a breeze!

From there, the interior has a pretty printed lining, full zipper section and mesh pocket, a stretchable strap to protect your items, and a shoe/laundry bag!

And just when you thought the features stop there, the carryon wants you to know it has a TSA-approved lock that comes with a universal key that only security can use to carefully inspect your items.

Sigh, we just love thoughtful designs!

BKYLN Tees Mint Gardenia Carry On Suitcase

Doesn't this cute mint green and floral suitcase seem like it was made to store all your vacation outfits? Designed in none other than Brooklyn, NY, this beauty is available in three sizes and is as functional as it's chic. It also has spinner wheels that make traveling a breeze and will look good no matter how it's stored.

Follow our storefront for more travel inspo!

Brit + Co may at times use affiliate links to promote products sold by others, but always offers genuine editorial recommendations.

Lead image via Monos

We're all about colorful Easter egg dye come spring, but if we're honest, we're not always thrilled with the cleanup. Whether you're dyeing with or without a kit, there are tons of bowls, spoons, and paper towels to scrub once your finished. And don't even get us started on what happens if you spill the dye!

If you want to dye eggs this year but are feeling hesitant about everything it entails, don't worry because this hack from Reynoldsis here to save the day. We like to hard boil our eggs before dyeing, but blown eggs work just as well. Then just grab your slow cooker and get dyeing!

An Easy + Clean Egg Dye Hack

Image via Reynolds Kitchens

First, make some DIY slow cooker dividers with cardboard wrapped in aluminum foil.

Once your slow cooker is divided into four sections, line each section with saran wrap, plastic bags, or slow cooker liners. This will let you use more than one color, but still gives you enough space to dye multiple eggs at once!

Next, fill each section with water. Make sure that, while you want to fill them enough for multiple eggs to be submerged, you don't fill them too high. You don't want the water to overflow — that's definitely not mess-free!

Image via Reynolds Kitchens

Add your Easter egg dye to each section. Pink, purple, and blue are classic shades!

Image via Reynolds Kitchens

Gather your hard boiled or blown eggs to add to the water. You can use strips of tape or string to make all kinds of striped and dotted designs. Then all you have to do is just drop them in the water and wait! This is the perfect opportunity to make a colorful Easter cocktail ;).

The longer the eggs sit in the dye, the darker the color will turn out. So if you prefer pastel eggs, only leave them in for a few minutes.

Image via Reynolds Kitchens

When you remove your eggs from the dye, let them dry on a cookie rack before you remove the tape and the string. Display them on a pretty plate along with your Easter desserts, or as a centerpiece!

Image via Reynolds Kitchens

Voilà! A rainbow of colorful eggs, all boasting different designs. And the best part is, all you have to do to clean up is throw away the liners and the cardboard, then put your slow cooker back in your cabinet. We'll definitely be doing this from here on out.

How To Dye Easter Eggs: More Colored Egg Dye Ideas For Display

Marbled Nail Polish Eggs

If you're not too keen on buying food coloring that you'll only use every once in awhile, just use your nail polish! Instead of adding dye to the sections, pour in your polish. You can use a toothpick to swirl everything around and achieve that marbled look. Have some nail polish remover nearby because your fingers will get messy.

Mosaic Easter Eggs

This hack is a great option for using up hard boiled eggs because you have to peel one to make it! (AKA, you'll have a snack to accompany your DIY). After you peel an egg that you've already dyed, use a hot glue gun to attach the broken shell pieces to a second, plain egg. Easy-peasy.

Sharpie Tie Dye Eggs

This Easter egg design only takes ten minutes, which makes it perfect for busy evenings or for kids who can't sit still for too long. Fill your slow cooker sections with nail polish remover instead of water, then color your eggs with as many Sharpie colors as you want. Dunk them into the nail polish remover (or smear with a wet Q-tip) to give them that tie-dye look.

Housefront Easter Eggs

Paint your favorite TV characters' apartment building or your childhood home onto eggs for a fun and nostalgic DIY. Once you've drawn your design, you'll want to tape up the rest of the egg to make sure the dye stays where you want it. Paint the house with the egg dye, or submerge the whole egg in a slow cooker section. Set to dry.

Enjoyed learnign how to dye Easter eggs? Follow us on Pinterest and subscribe to our email newsletter for more Easter egg dye hacks!

Brit + Co may at times use affiliate links to promote products sold by others, but always offers genuine editorial recommendations.

What you eat can greatly affect your skin, causing different side effects, both good and bad. Luckily, there are so many foods that can revitalize your skin and get it back to feeling radiant and looking glowy from the inside out — and just in time for summer! If you don't know where to start, we've got you covered with expert advice on all the best foods for your skin, plus all those bites you might wanna avoid.

Best Foods For Your Skin

Photo by Olena Bohovyk/Unsplash

Grapes, Strawberries, Blood Oranges, and Watermelon

Elina Fedotova of Elina Organics, says that colorful fruit are key to achieving good skin! She says, "Colorful fruits and vegetables are rich in antioxidants, and healthy fats like butter or plant oils help improve skin immunity and protect against environmental UV damage. Liquid collagen is popular as a skin-rejuvenating food or supplement, but when you do that, make sure you are making the smoothie with collagen peptides. The collagen is broken into small pieces called peptides which absorb much better and signal your body to regenerate collagen." So clearly, collagen is vital if you want to have glowy skin.

Elina also says, "It is a scientifically proven fact that people who eat very high levels of antioxidant-rich diets with fruits and vegetables and anthocyanosides — they can stay in the sun without any protection much longer because their body can protect them naturally from UV damage." Her three rules for healthy skin?

  1. No processed foods.
  2. Eat tons of antioxidants.
  3. Use an SPF — preferably one that is a mineral Zinc Oxide based — alongside protective hats in the sun.

So not only can certain foods make your skin look radiant, they can also protecting you from the sun with proper precautions! We love to hear that!

Photo by Dose Juice/Unsplash

Leafy Greens, Broccoli, Asparagus, and Edamame

Leafy greens, broccoli, asparagus, and edamame are some of our favorite foods to eat that will give you that inside-out glow. Nutritionist and wellness expert Jessica Green says, "Silica rich foods are a great place to start — these include celery, asparagus, banana, cucumber, green beans to name my favorite. When you juice some of these, they can become more bio-available. Celery juice for instance is excellent at giving your skin a beautiful natural glow. Collagen rich foods can help improve skin elasticity — bone broth is my absolute favorite for not only its skin benefit but bone broth is also very calming for the gut."

Skin elasticity can easily be improved through these foods and can make you look 10 years younger! I definitely notice a significant difference in my skin when I regularly eat collagen-rich foods than when I don't!

Photo by Thought Catalog/Unsplash

Avocado and Olive Oil

Avocados and olive oil are really going to up your skin game, and giving you that gorgeous glow for summer we're really looking for. Kristen White, RDN, CLT, says, "Clean fats like olive oil, avocados, coconut oil, and tallow in our diet help replenish needed vitamins and fatty acids to help skin look its vibrant best." That's exactly what we want!

In regards to olive oil, it really is the must-have when it comes to achieving a glowy complexion. Jenny Jiles, a holistic nutritionist says, "Olive oil is the GOAT. We know why all of those women in the Mediterranean look so vibrant and sexy as they age, because olive oil is such a staple in their diet. Don’t be afraid of this healthy fat, it’s filled with antioxidants and omega 3 fatty acids which help protect your skin from free radicals to reduce those fine lines and help you glow from the inside out. Add olive oil to any and all of your meals, savory or sweet (yes, trust me on that)." So I guess the key to looking like an Italian goddess this summer (and always) is olive oil!

Photo by Maddi Bazzocco/Unsplash

Chia, Flax Seeds, and Sunflower Seeds

Many seeds and grains are going to be crucial in giving you radiant skin. Plus, they have so many healing properties that can help reduce redness and inflammation in the skin. Christine Glaser, CEO of DIY Skincare Business, says, "Chia and flax seeds are also helpful for all skin types and can aid in toxin removal." And sunflower seeds actually have antibacterial properties too that help get rid of toxins in order to keep your skin looking fresh and clear; thus the radiant skin we're trying to achieve here!

Photo by María Sainz Cabezalí/Unsplash

Red Bell Peppers, Carrot, and Tomatoes

You always want to have a variety of colors when eating fruits and vegetables because this will help you get the most out of your diet and achieve maximum radiance. A health expert and dietician, Chrissy Arsenault of Kori, says, "Eat lots of fruits and veggies. Choose 2-3 colors of fruits and veggies at every meal – fruits and veggies are rich in antioxidants (vitamins A, C, E) that protect your skin from damage." And tomatoes, carrots, and bell peppers are very rich in color so they will give you so many great nutritional benefits that will assist in giving you a perfect inside-out glow!

What foods should I avoid for my skin?

Photo by MART PRODUCTION/PEXELS

If you want radiant, clear, acne-free skin then you definitely want to avoid foods high in dairy or sugar. Jessica Green says, "When it comes to foods to avoid for radiant skin, sugar and dairy float to the top. Both are inflammatory. Sugar causes glycation which damages the skin's elasticity. Dairy (cow dairy specifically) tends to be one of the most common foods that cause reactions for people including acne and puffiness." I'm definitely taking note to try and cut our these foods now!

Sign up for our newsletter for more health tips and tricks!

Lead image via Pexels/Sora Shimazaki

If there are two things you can count on, it's that I'm always thinking about Gilmore Girls and I'm always listening to Taylor Swift. As soon as I pressed play on The Tortured Poets Department, I could tell this album would resonate with so many experiences I had a child and a teenager. I've always been imaginative (and, admittedly, a bit spacey), and to this day, I never leave home without a book.

I've built thousands of imaginary worlds and crafted endless stories, but have always had difficulty keeping up with real-world relationships. So, needless to say, when I listened to Taylor Swift's new album and heard "I Hate It Here" and "The Bolter," I felt seen. I also realized these two songs would speak to Rory Gilmore in the same way!

Rory Gilmore Would Love "I Hate It Here" By Taylor Swift...

Image via Warner Bros. TV

"I Hate It Here" totally showcases Taylor Swift's ability to express raw emotions, and it also perfectly captures Rory Gilmore's struggles during certain periods of her life. The lyrics reflect frustration and dissatisfaction we can all feel sometimes (I know I've definitely felt them), and while Rory and Taylor's dreams in and of themselves are different, they both want to leave their small towns to achieve them. Whether it's feeling overwhelmed by expectations or facing setbacks in her career in Gilmore Girls season 5, Rory has moments throughout the series where she feels a bit trapped.

But even more than the physical meaning of the song is the imaginary one. Taylor sings about creating worlds in her mind and diving into books to escape the mundane. Rory reads more than any fictional character I've ever seen before because she also craves that escapism! The lyrics of "I Hate It Here" resonate with Rory when she wants to live different lives, and it encapsulates the moments when she struggles or questions her decisions — relatable!

...And She'd Feel Attacked By "The Bolter" By Taylor Swift

Image via Warner Bros. TV

TBH, I'm half convinced "The Bolter" is referencing Amy March (after all, Amy has been "reviled" by readers for hundreds of years, and she "almost drowned...in frigid water" like Taylor sings), which is just another literary reference Rory would pick up on.

In "The Bolter," Taylor Swift captures the essence of a woman constantly seeking adventure and change, just like Rory Gilmore, and it's all about the idea of a restless spirit. While the lyrics can be taken from a hypothetical standpoint (feeling trapped by relationships or other people's expectations), we can also talk about it literally considering Rory physically runs away from Jess.

Rory might desire love, but the idea of it also scares her — two facts that don't cancel each other out! Just like Taylor Swift, I think Rory's thrilled by the idea of escape simply because she's so risk averse in other areas of her life. Once again, I say, relatable!!

"The Bolter" and "I Hate It Here" are both incredibly engaging songs because they highlight just how complex we are as humans — both in the ways we relate to ourselves and other people. And they're just two Taylor Swift songs Rory would definitely add to her playlist.

Which Taylor Swift and Rory Gilmore parallels do you see? Follow us on Facebook for more pop culture musings!

Lead image via Warner Bros. TV