
 Recommended for you

Alright, no doubt about it. We LOVE a good photo booth. We’ll take any chance to snap a few selfies or pics with our gals. Today we’ve stepped up our photo booth game with this origami Valentine’s Day-themed photo backdrop. Bonus — once you’re done with the backdrop, give out the origami hearts to your favorite valentines.
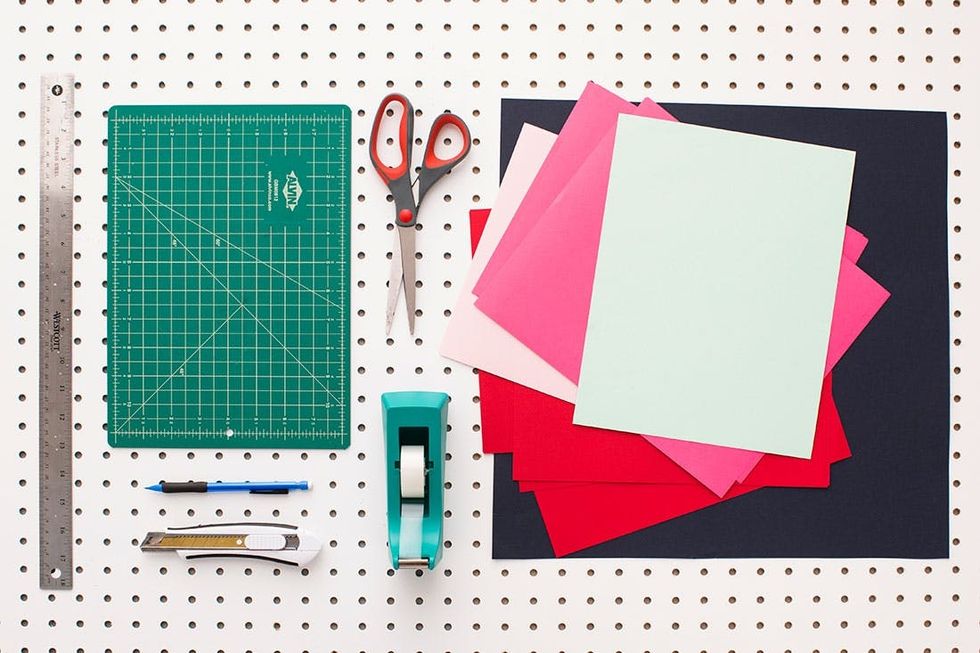
Materials:

– paper in various colors
– tape
Tools:
– cutting mat
– ruler
– scissors
– Scotch box cutter or X-acto knife
– pencil
Instructions:
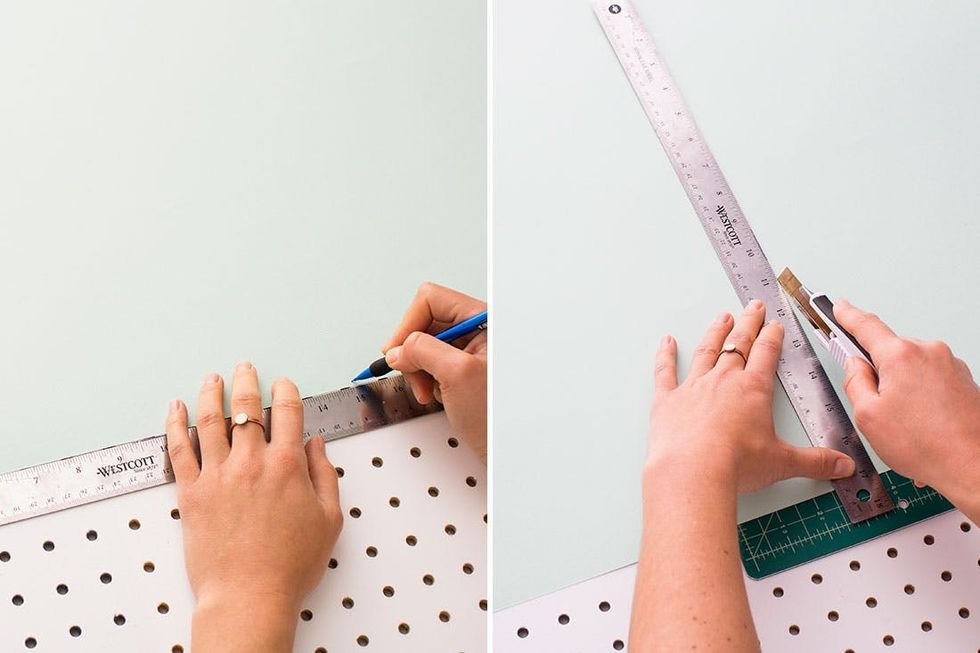
1. Trace or draw a heart to your desired size.
2. Cut a line a third of the way down the center in between the two curves of the heart.
3. Fold one over the other and tape.
We’ll start you off with the easiest heart. First, you’ll trace or draw a heart on a sheet of paper. Then cut a line about 1/3 of the way down the heart, and fold over and tape to create a three-dimensional heart.
3D Heart
Instructions:
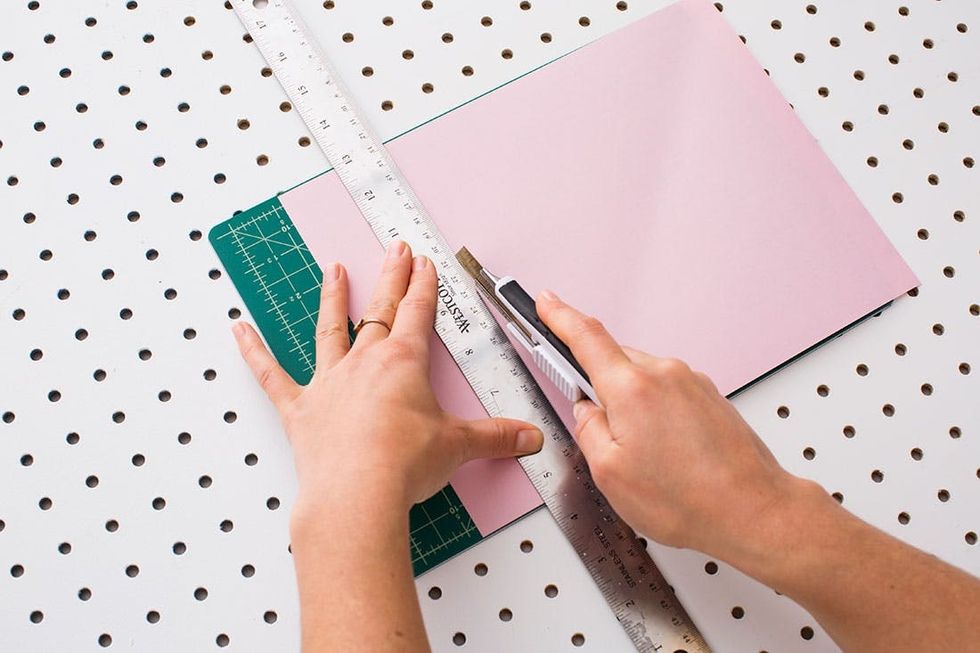
1. Cut a square to your desired dimension.
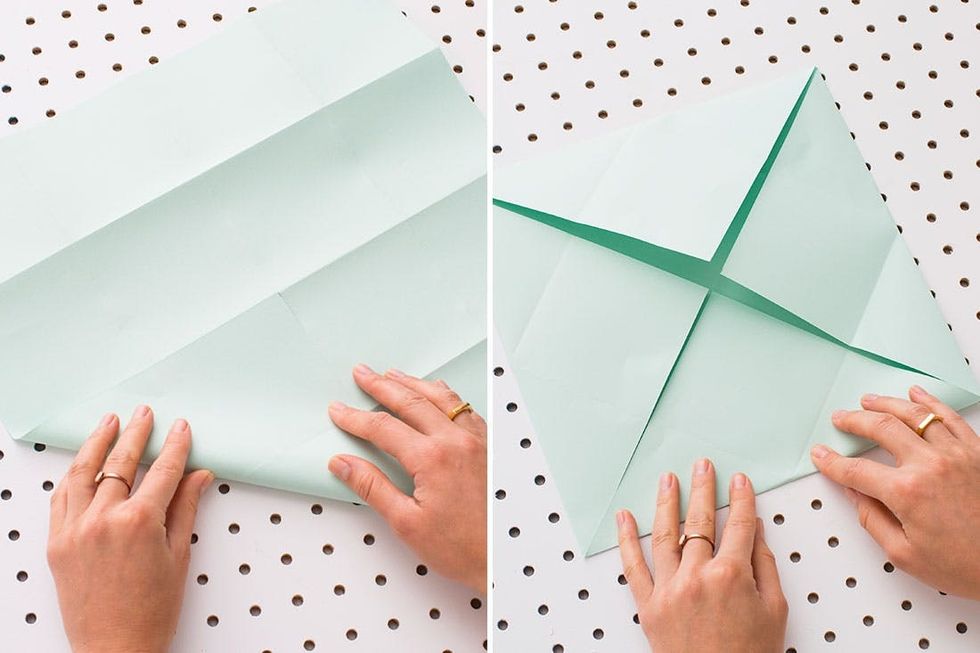
2. Fold once horizontally and once vertically to divide the square into four squares.
3. Fold the bottom edge of the large square to the middle fold line. Take the new bottom left edge and fold it into the vertical center line to form a triangle. Repeat this on the right side.
4. Flip the piece over to the front and fold the point to the top line of the square.
5. Turn the piece over again and press down the bottom fold to form a triangle.
5. Fold new square pieces to form triangles. Then fold the point of that triangle to form a flat edge.
6. Bring the outer edges together to meet in the center fold line.
7. Flip to the front and fold the triangles into the heart to reveal the heart shape.
8. Cut a rectangle shape that suits the size of your heart. Slice the edges on a slant to create a polygon shape.
9. Fold the polygon into an accordion. Pinch the accordion at the center and tape it together. Then tape your wings to the back of the heart.
When shopping for paper, try to pick the lightest weight sp it’s easy to fold. To start this heart you will need to cut a square.
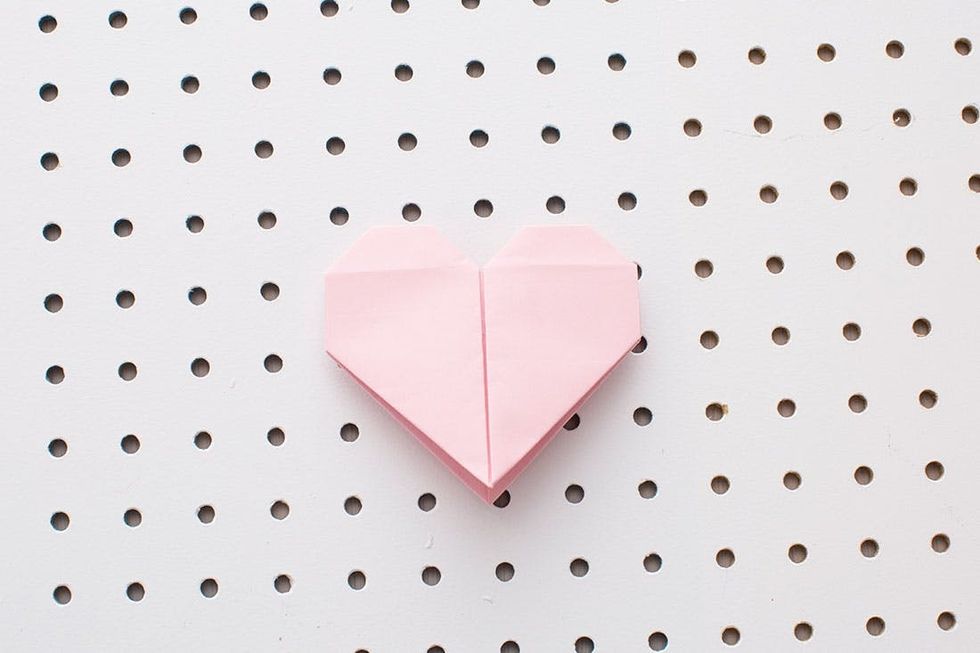
Winged Heart
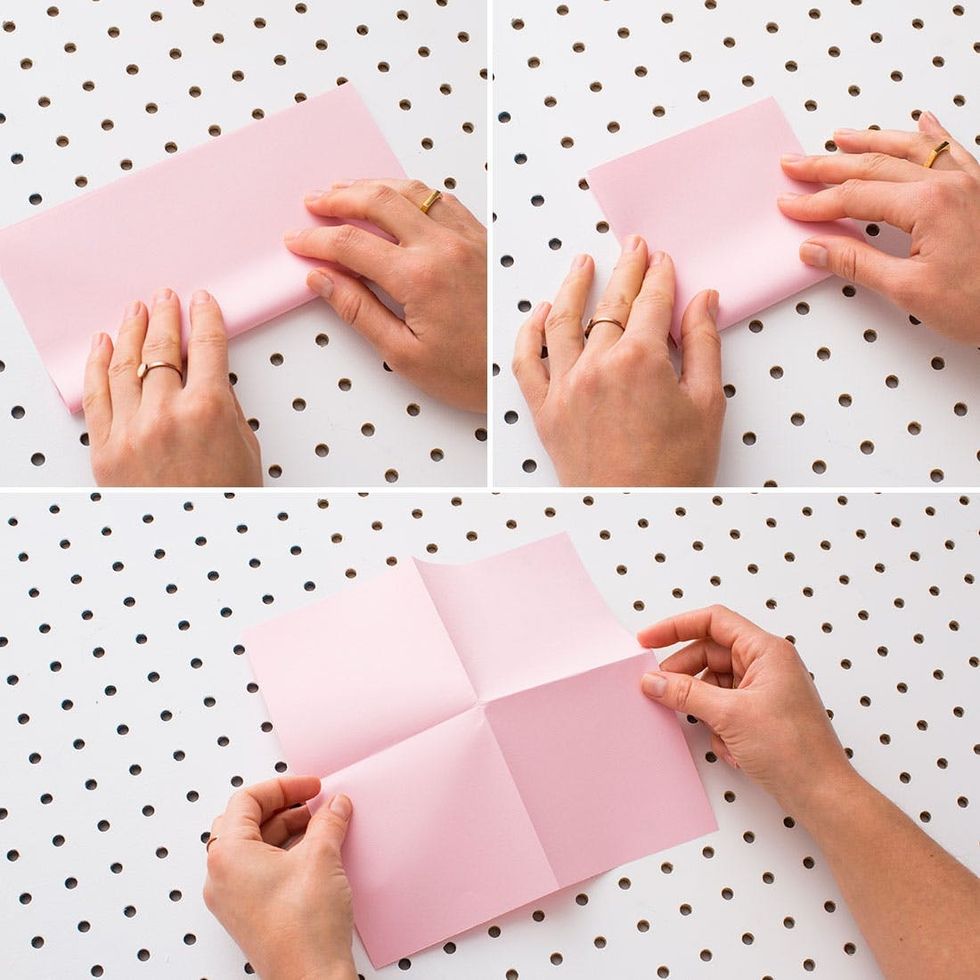
Fold the square in half vertically and horizontally. This will divide your square into four even squares.

Bring the bottom edge to meet the center fold line and crease down. Then bring the new bottom edge to meet the vertical fold line. This will create a triangular shape.

Flip the piece over to the front side and fold the point to the top edge of the paper.
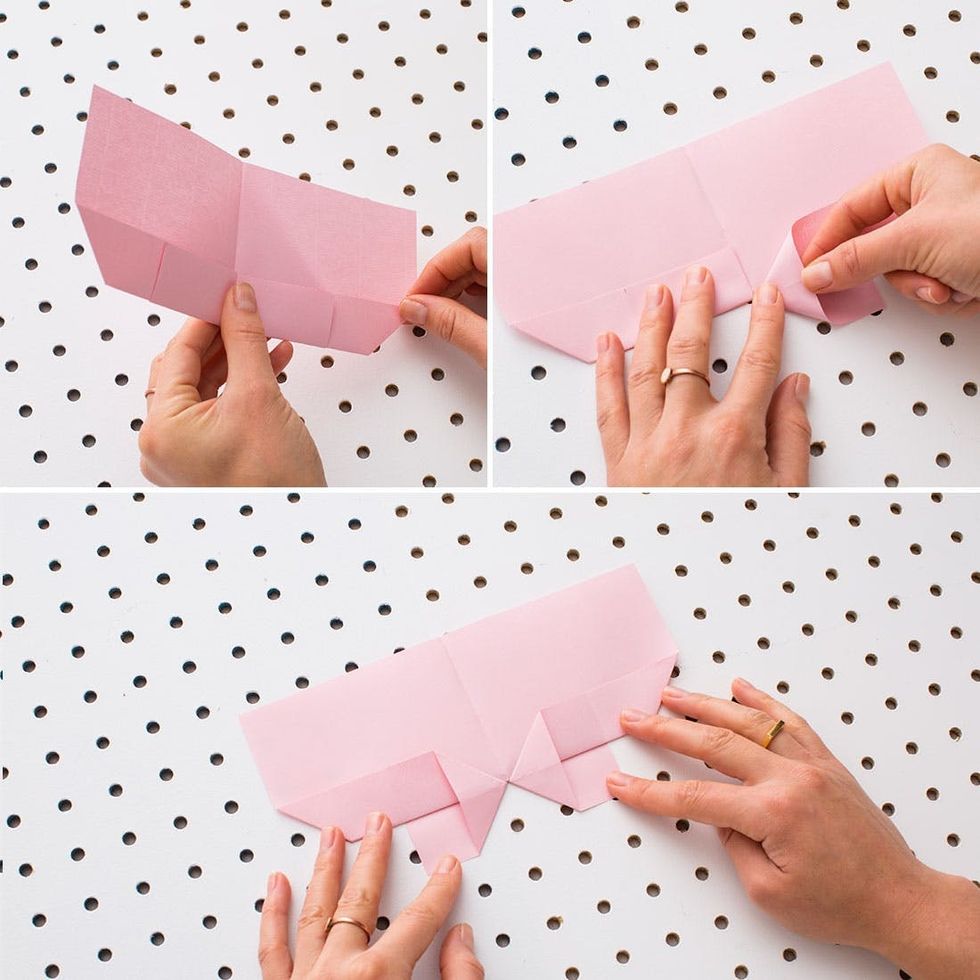
Turn the piece back over and press down the folded piece into triangles. It should look like a bowtie.
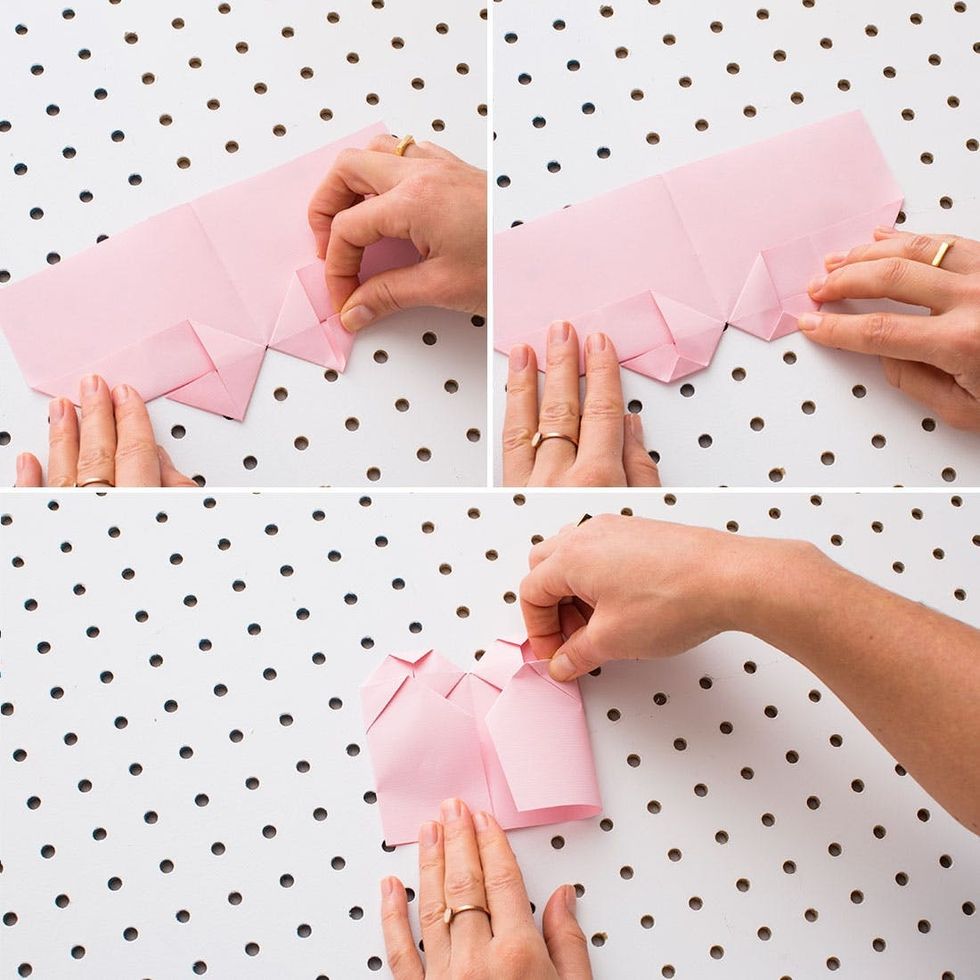
Fold the tabs in to form triangles, and then fold the points of the triangles to form flat edges. Bring the outer pieces to meet in the center.
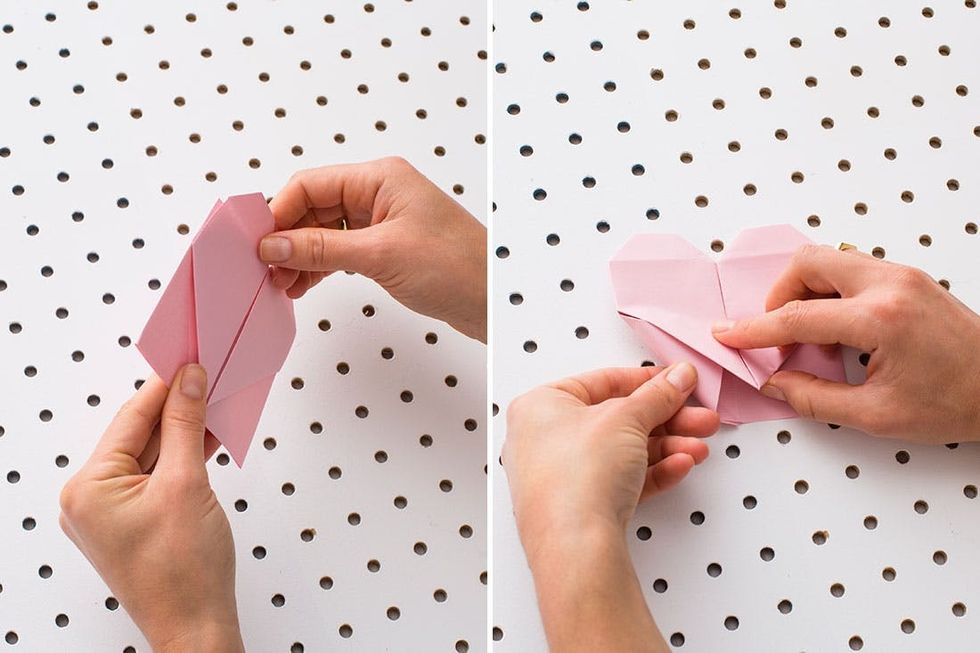
Tuck the pieces into the heart to reveal the heart shape.
This heart was inspired by a tutorial from The Glue Gun Girl, but we changed it up a little by adding wings! How very Pan Am of us.

Cut a rectangle to suit the size of your heart.
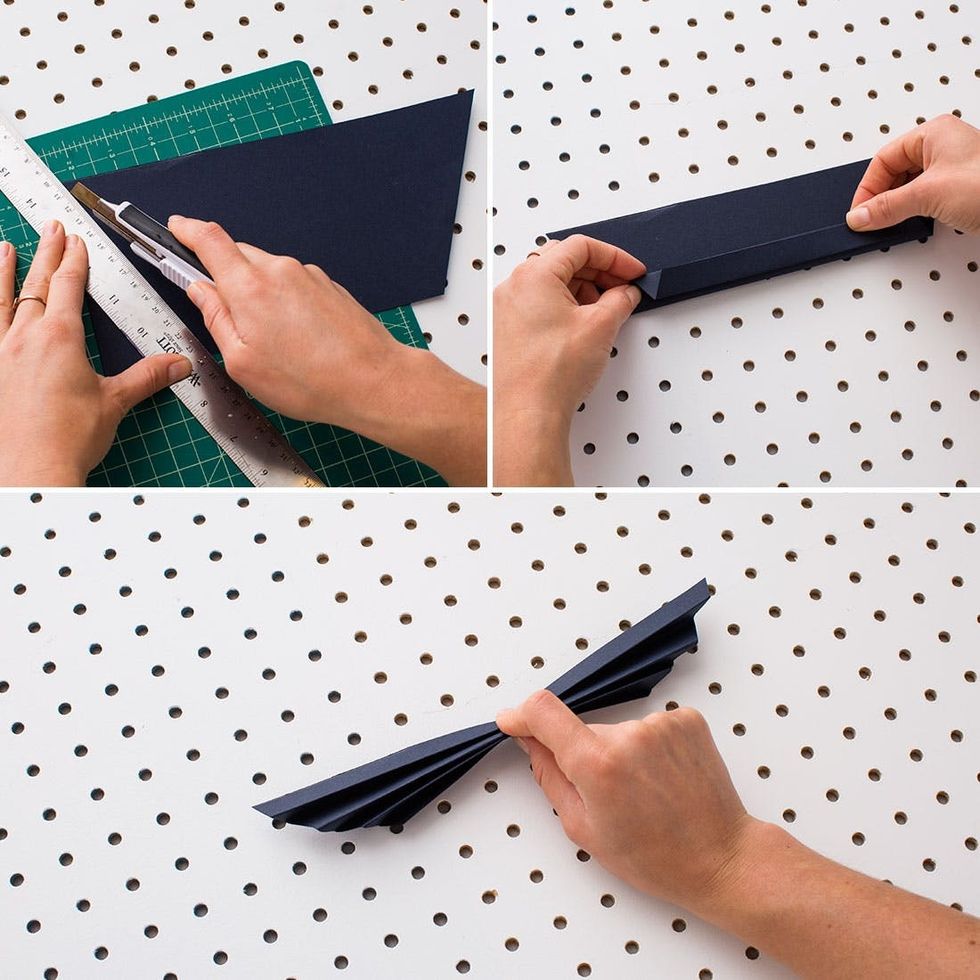
Trim the edges on a diagonal and then fold into an accordion.
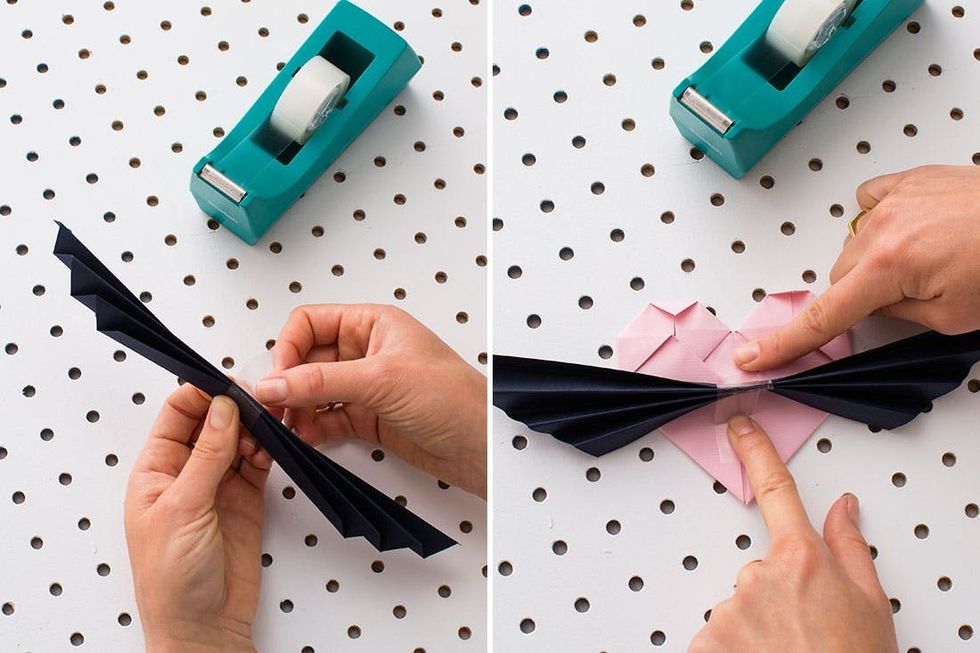
Secure together with tape and attach to your heart.
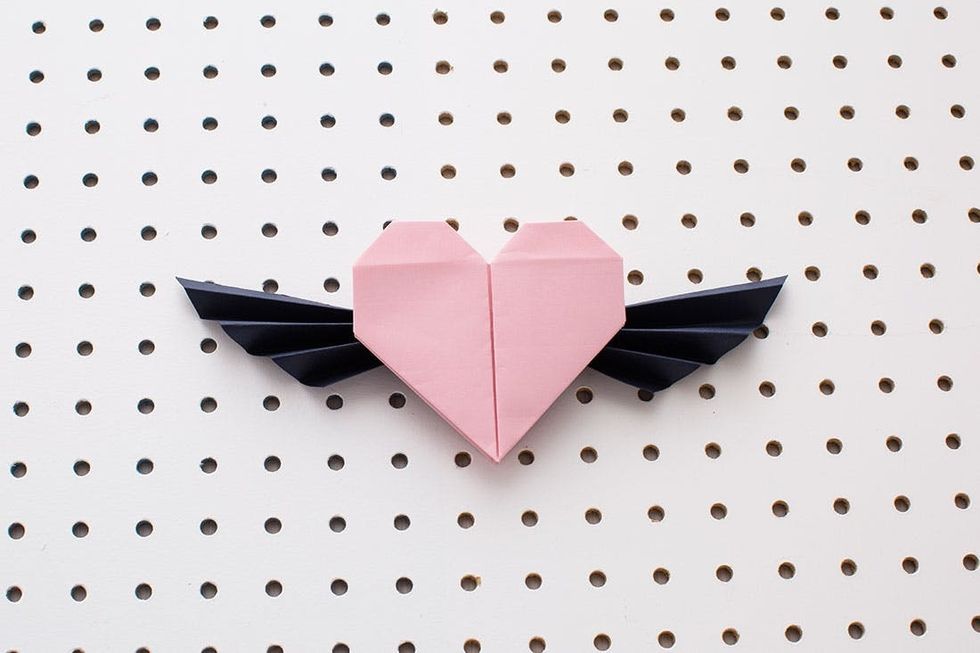
We are loving the retro feel of this origami heart.
Instructions:
1. Cut a square to your desired size.
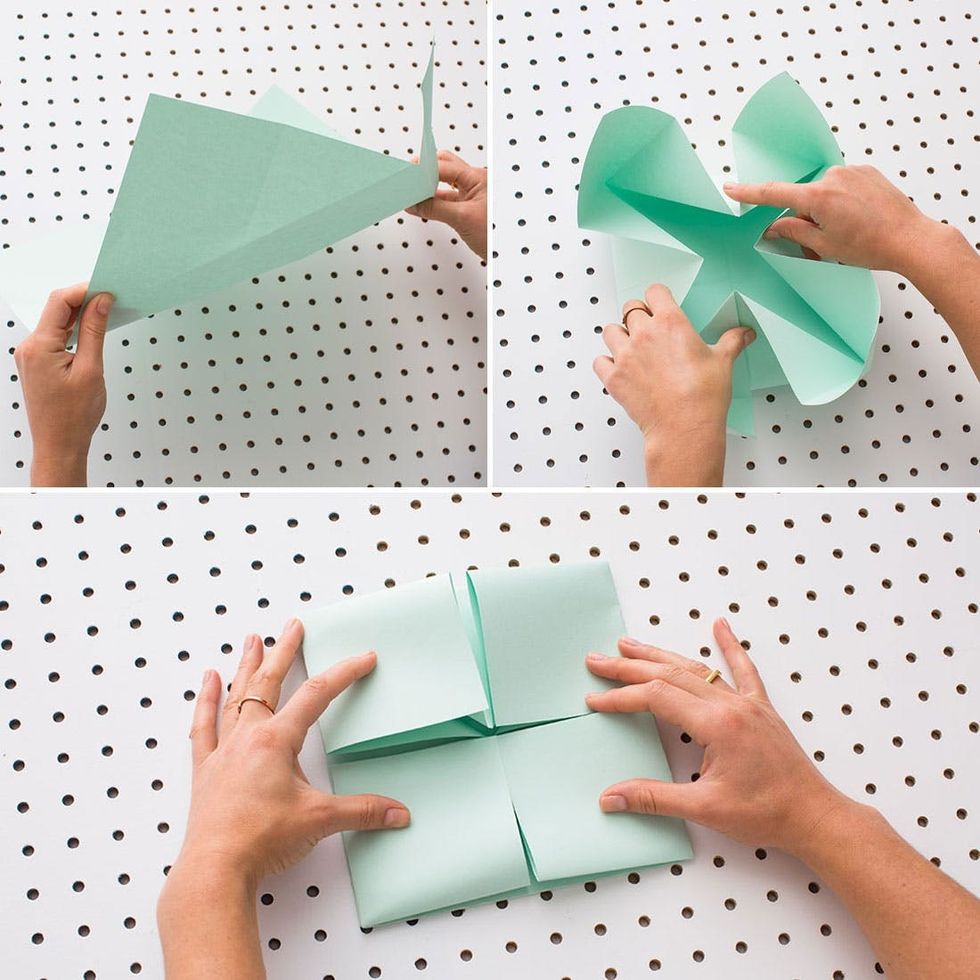
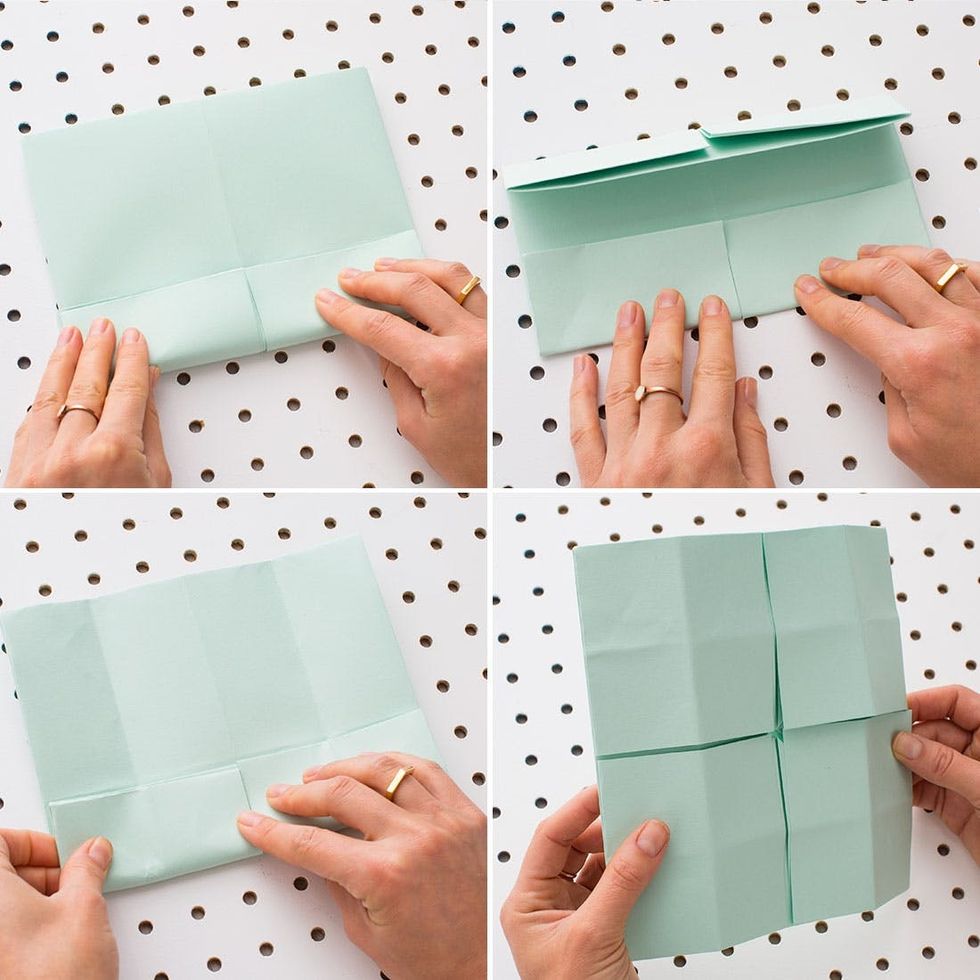
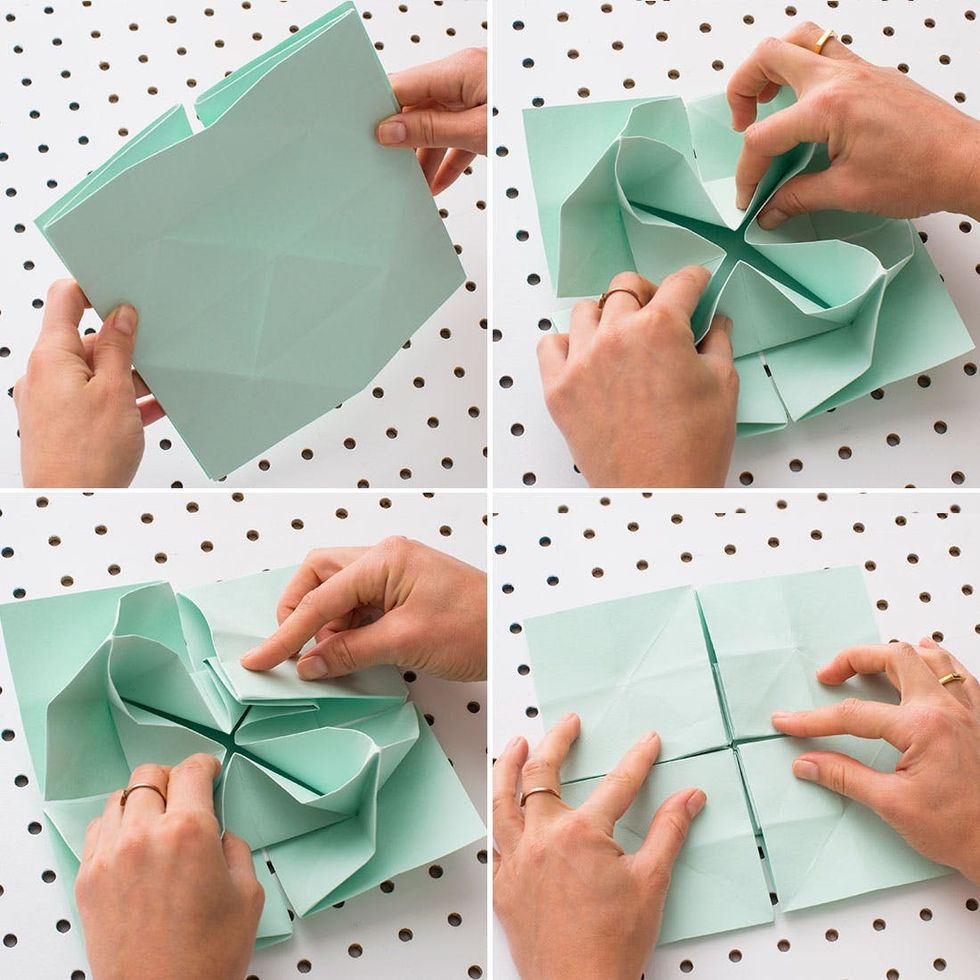
2. Fold the square in half and then in half again in both the vertical and horizontal directions. This will create 16 equally sized boxes.
3. Bring the outer points to meet in the center of the paper, crease, and then unfold.
4. Flip the paper over, pinch and lift the center outer edges of the paper, and press down. The paper will naturally fold into a square due to the way you creased it earlier.
5. Turn the piece over again and fold in both the vertical and horizontal directions to create the 16-box grid.
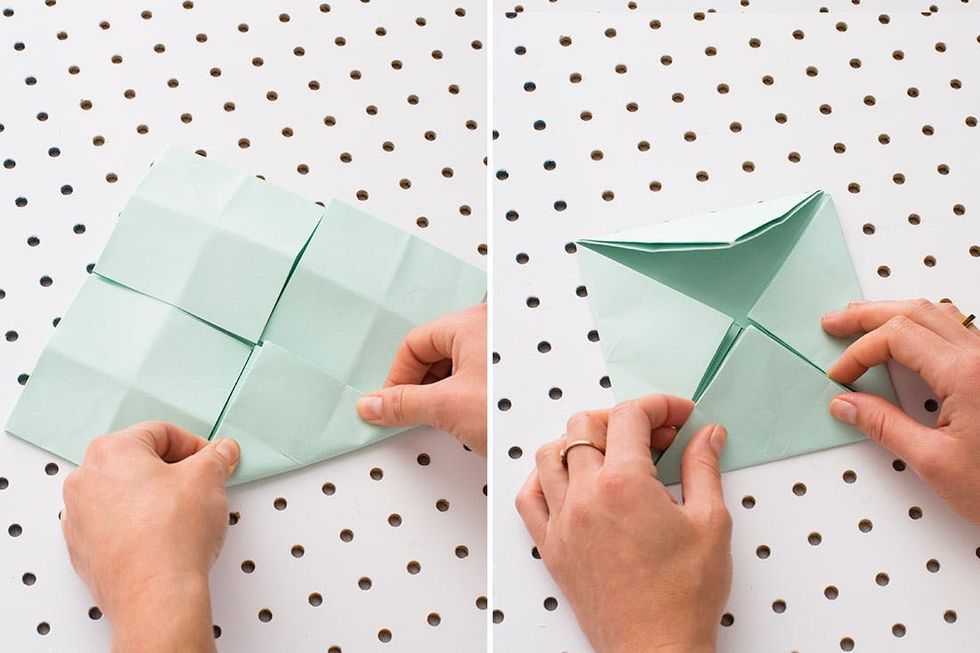
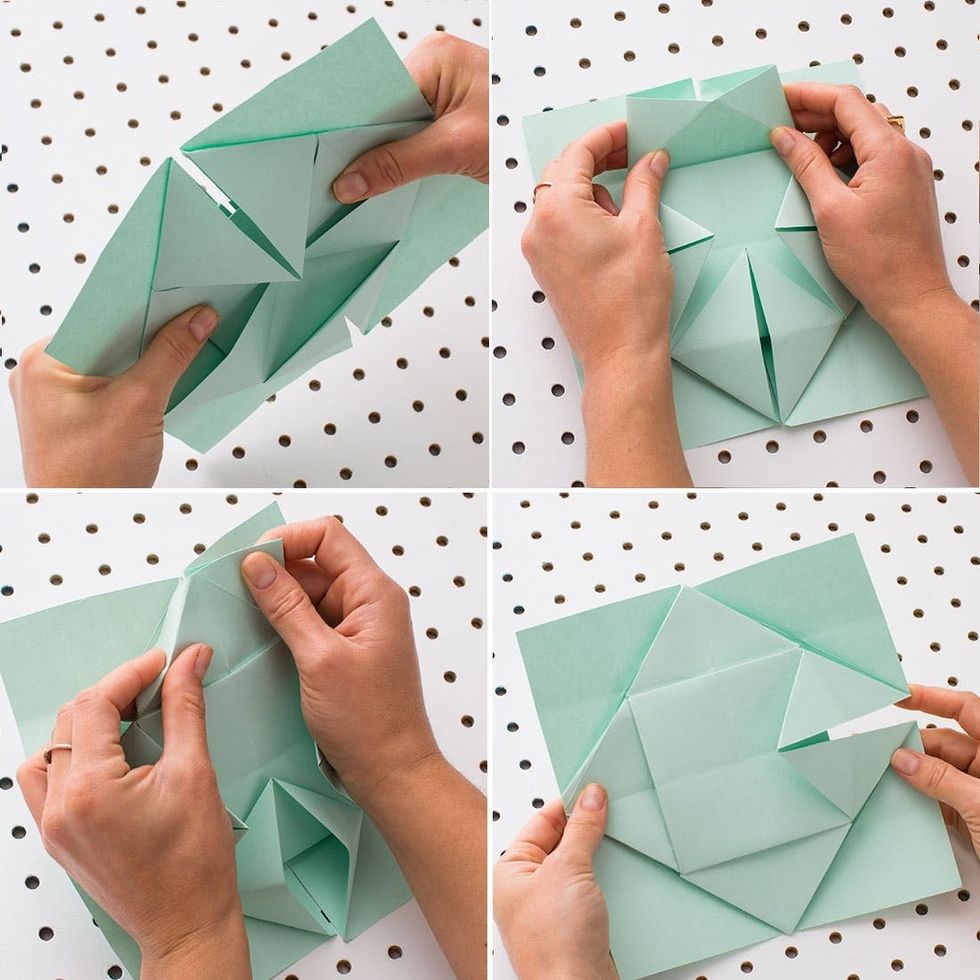
6. Bring the outer points into the center of the square.
7. Fold back the top layer of the four squares.
8. Flip over and peel back the first layer. Let the paper fold naturally and the four outer corners will meet in the center.
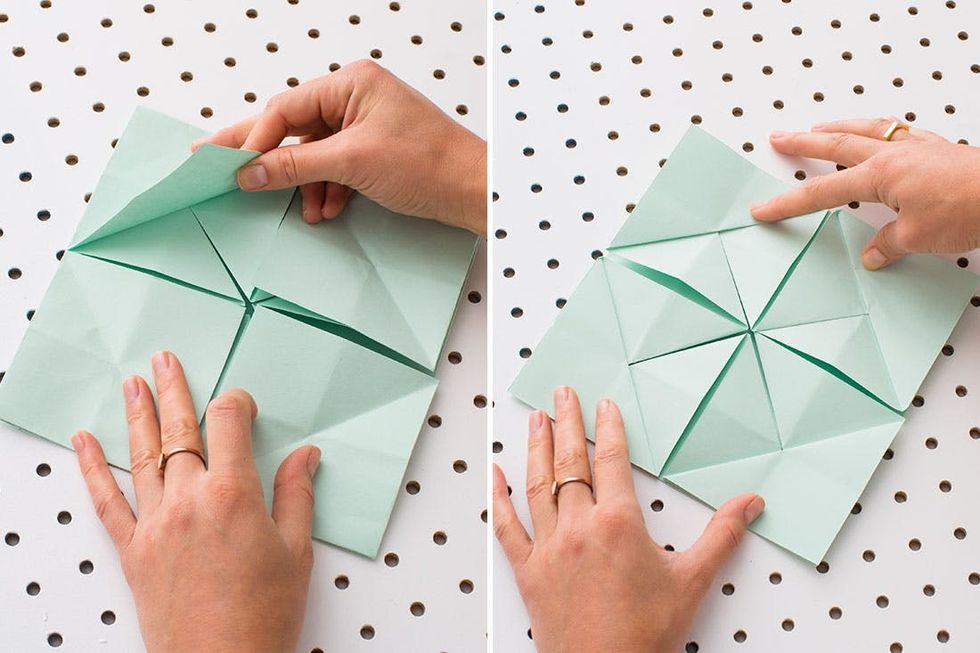
9. Turn the piece over again, and pinch the area that looks like a mouth. Fold these pieces into themselves to form a triangle. Fold three sections, leaving one still in the mouth form.
10. Tuck the points of the mouth into a square base.
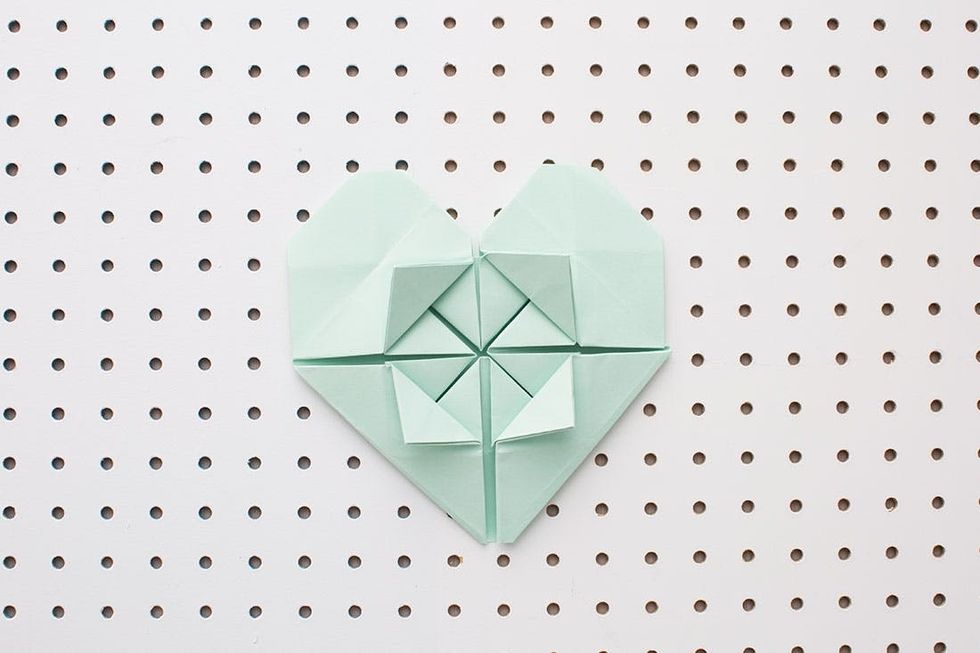
11. Using the photo below, fold the large square into a heart shape.
12. Flip to the front side and fold back the center pieces to reveal the hidden geometry.
Take a deep breath and let’s get started.
Cut your piece of paper into a square.
Geometric Heart

Fold the square in half and then in half again in both the vertical and horizontal directions.
Bring the outer corners of the square into the center, crease and then unfold.
Flip the paper over and then pinch the outer edges. Let the paper fold naturally into a smaller square. Don’t worry, with a little guidance this will happen on its own due to the previous folds.
Turn the paper over again and fold to create 16 even boxes. *Hint — fold twice in the vertical and horizontal directions like we did in step two.
Bring the outer corners to meet in the center. Crease and then unfold.
Fold back the first layer of the small squares.
Flip the piece over and pinch the first layer to bring the outer corners into the center.
Now we’re going to flip the piece over again. Pinch the section that looks like a mouth and fold the outer edges in to make a triangle. There will be four mouths — only fold three of them.
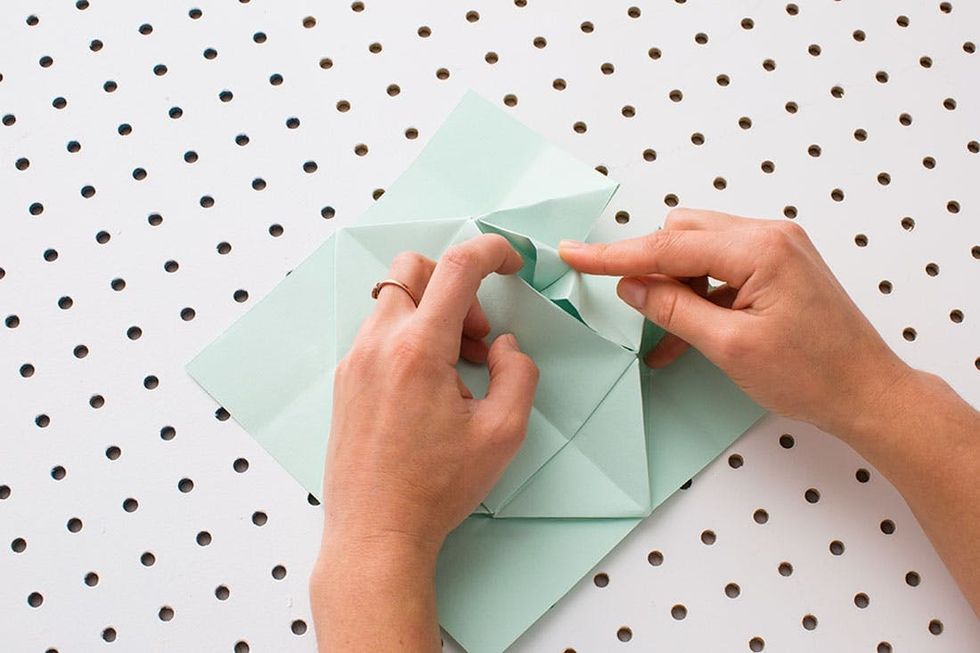
Tuck the edges of the last mouth into the square center.

All I have to say is, fold accordingly. =)
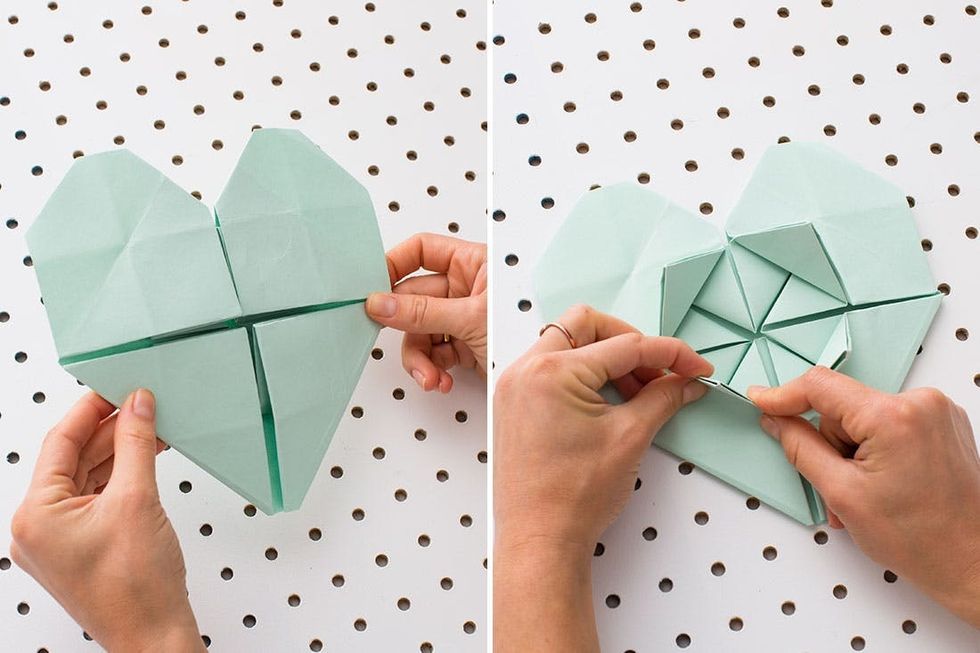
Flip your heart over and fold back the center pieces to reveal the hidden geometry.
Congratulations! You did it! Cheers to you! If you prefer video guidance, check out the tutorial from Love Origami.
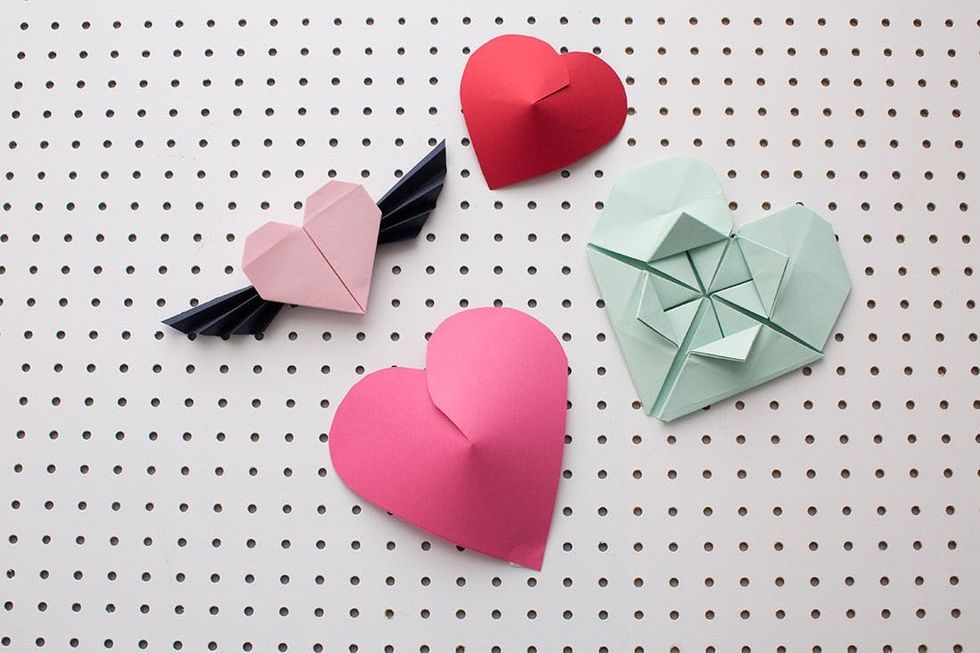
Here’s a few, but we’re going to need more for our backdrop!
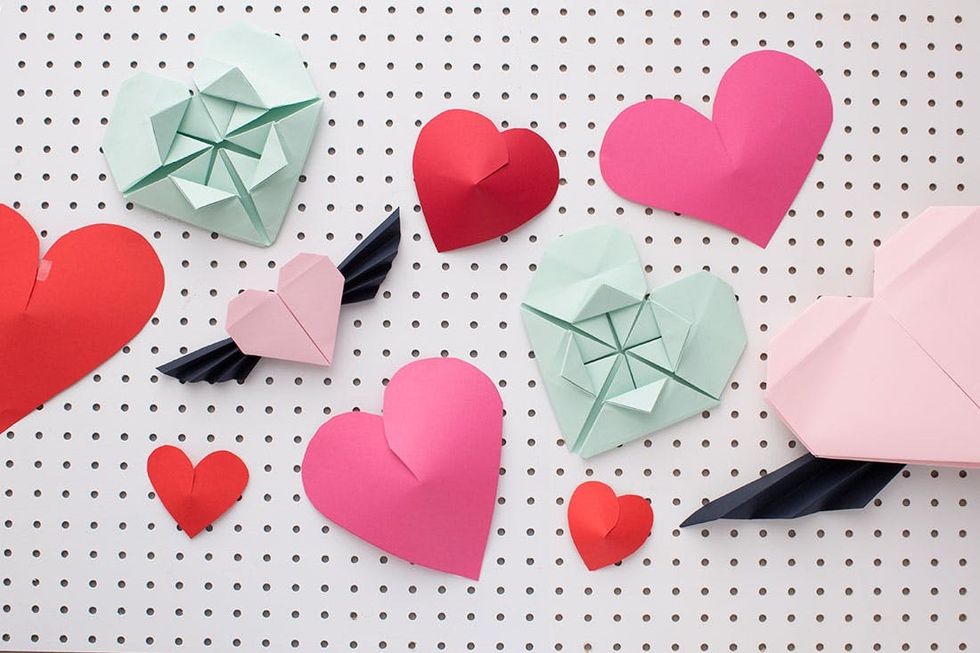
Make them all different sizes to create a really dramatic backdrop.

Use sticky tack or tape to adhere them to the wall.

Set up your hearts in a cute pattern.

Ready, set, smile!

Create cute props for your photo booth. Props always bring your photo booth up to the next level.
Hi Cutie =)

Hey, I like your face =)

XOXOXO