
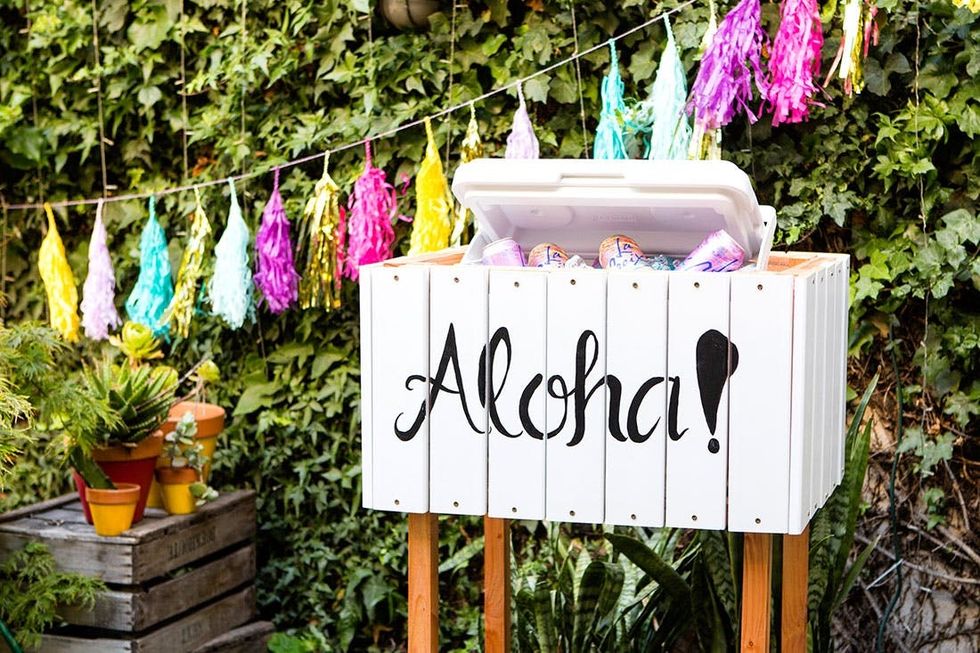
Summer is approaching, so that means it’s time to host friends and family outdoors. Whether it’s graduation, Father’s day, or Fourth of July, you’ll have plenty of reasons to spruce up your outdoor space. We created an outdoor cooler box to hold all of our favorite beverages (read: beer) and keep them cold in the hot months. What’s great about this piece is that the cooler is removable, so it’s extremely easy to pull out and use for a day at the beach.
Materials:
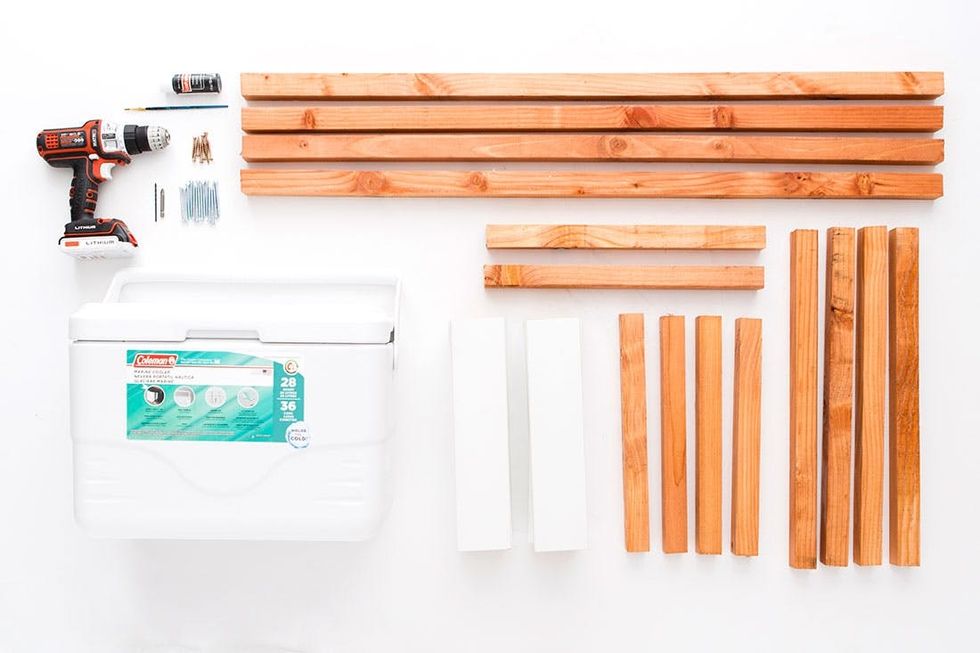
— (4) 38-inch pieces of 1 3/8-inch square wood
— (4) 16-inch pieces of 1 3/8-inch square wood
— (4) 25.5-inch pieces of 1 3/8-inch square wood
— (2) 18.75-inch pieces of 1 3/8-inch square wood
— (24) 15-inch pieces of wood 3.5 inches wide
— 2-inch wood screws
— 1.5-inch wood screws
— black paint
— cooler
Tools:
— 1/64-inch drill bit
— electric screwdriver
— paint brush
Instructions:
1. Drill holes at the ends of all four pieces of wood that measure 16 inches, 25.5 inches and 18.75 inches.
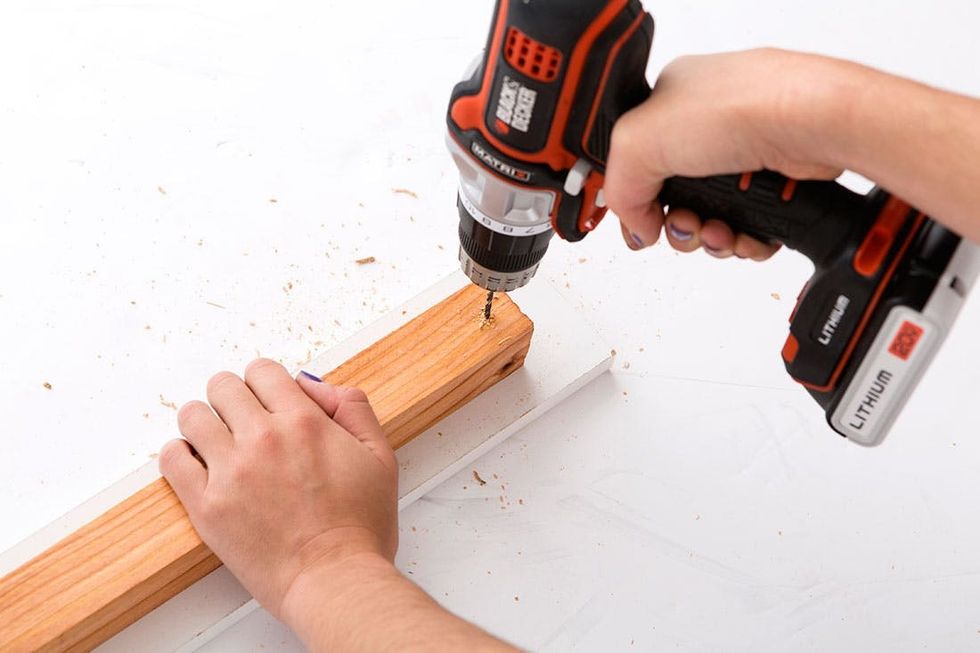
2. Using the screwdriver, attach the 16-inch piece of wood to the top of two 38-inch pieces of wood. Measure 15 inches down the 38-inch piece of wood and drill in the second 16-inch piece of wood.
3. Lay the two pieces you just created on their sides and drill the 25.5-inch piece in place to finish off your box.
4. Stand your cooler box upright and screw the last two 18.25-inch pieces along the bottom. This will hold your cooler in place.
5. Tape together seven 15-inch boards and hand letter a cute saying to spruce up your container.
6. Drill holes on the top and bottom of each 15-inch piece and then drill onto the outside of the box. Drill seven on the length and five on the width.
Now, this first step is a pain but totally necessary to avoid having your wood split when screwing it together. Drill holes at both ends of all pieces that measure 16 inches, 18.75 inches and 25.5 inches.
Lay a 16-inch piece across two 38-inch pieces and screw into place. Measure 15 inches down the 38-inch piece of wood and screw your second 16-inch piece in place. Do these same steps to the other two pieces of 16-inch and 38-inch wood poles. You should finish with two pieces that look like rectangle boxes with long legs.
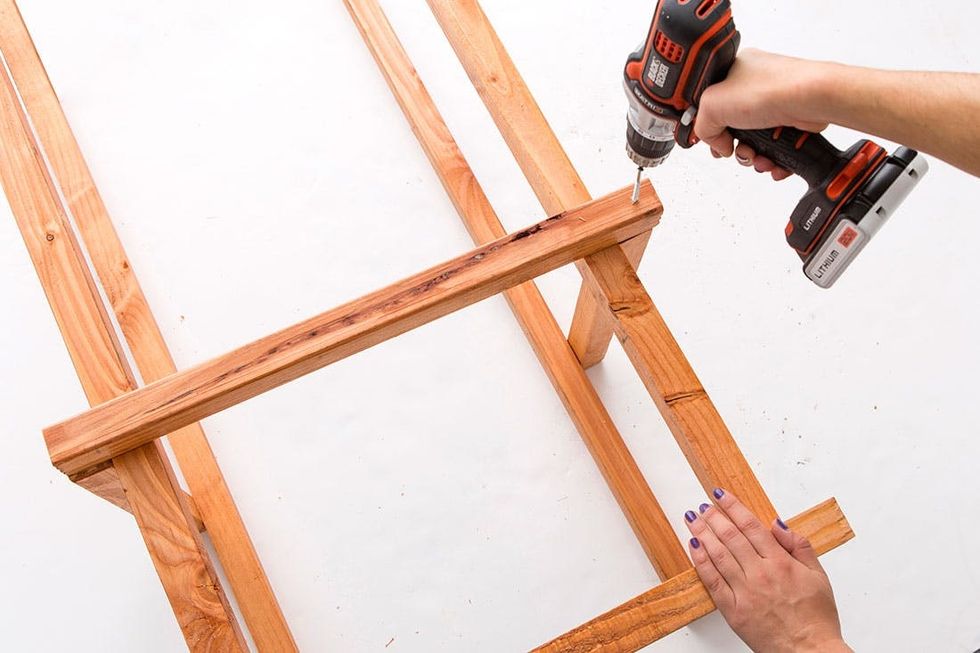
Lay the pieces you just drilled together on their side and screw the 25.5-inch piece across to create the box shape.
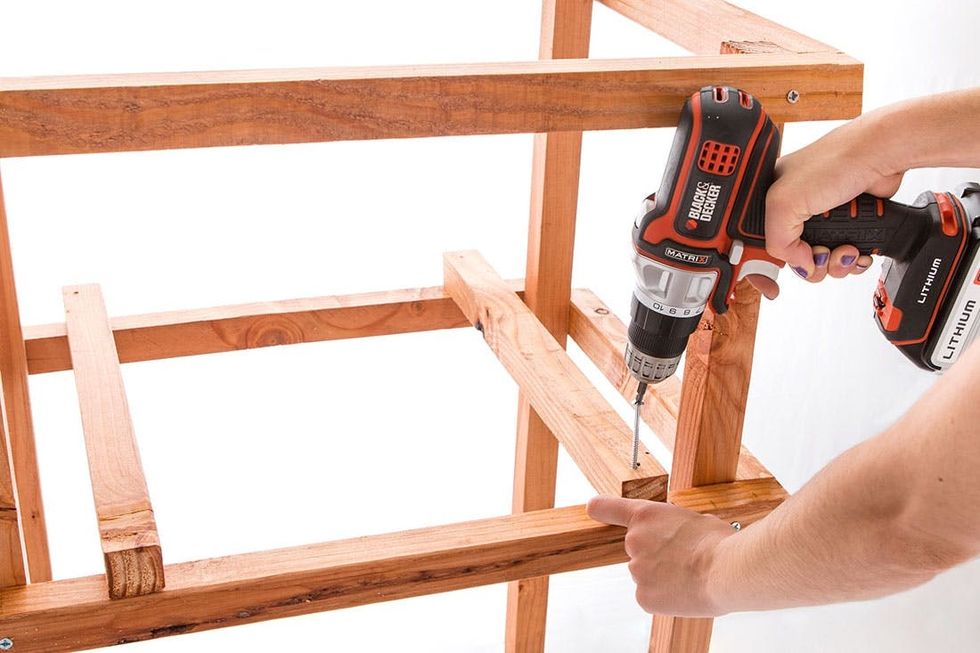
Stand your box upright and screw your last two 18.25-inch pieces across the bottom. Your piece may be a bit wobbly but it will sturdy up in the next couple steps.
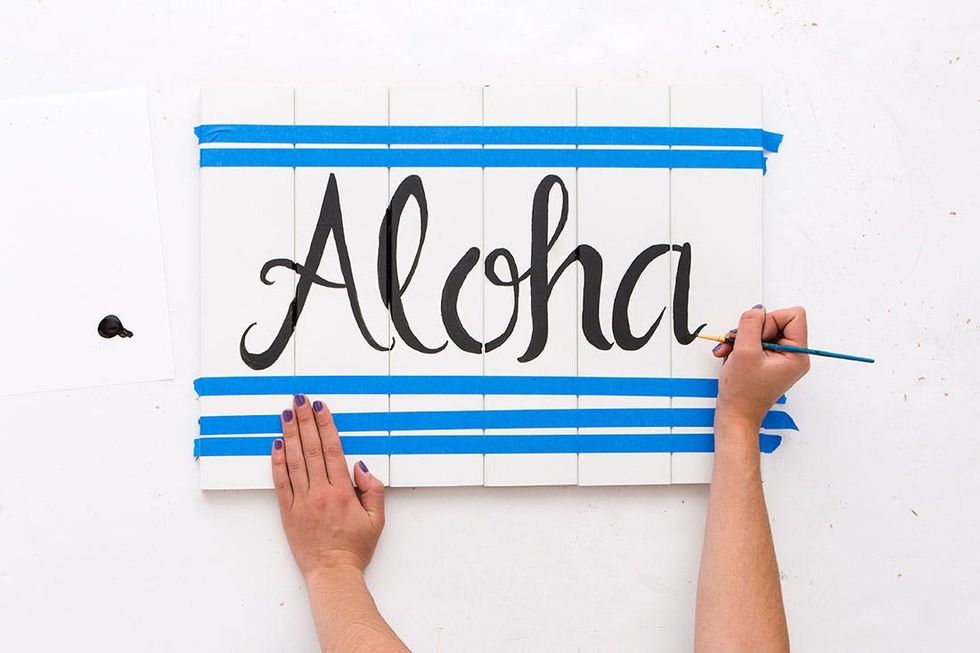
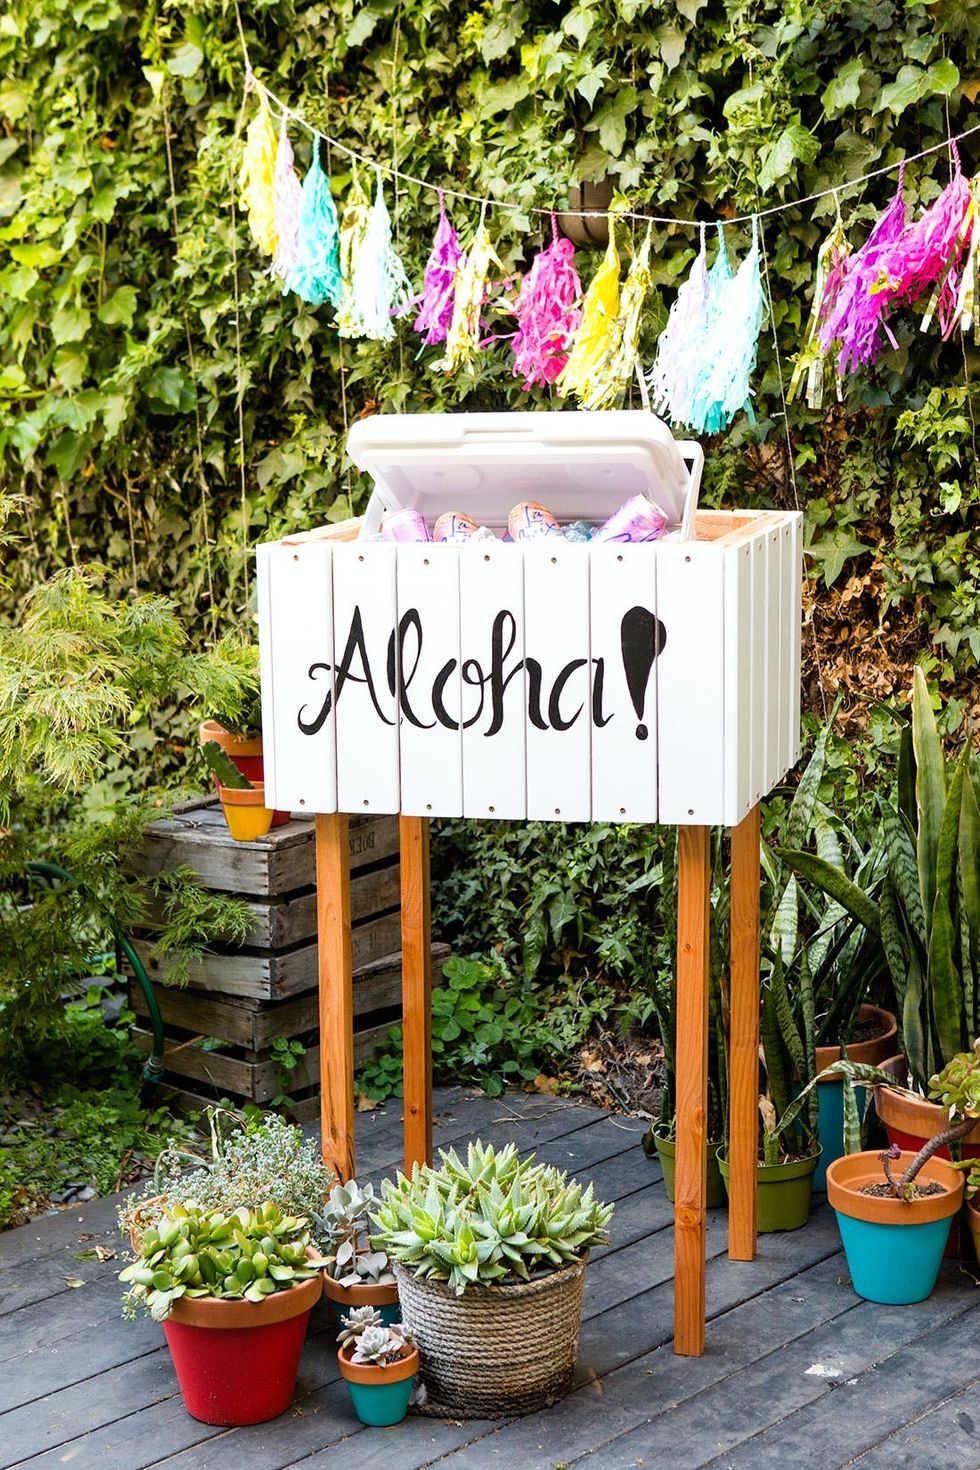
Time to add some pizzazz to this cooler container. Pick your favorite phrase and hand letter with paint onto seven 15-inch boards of wood. Seven? Yes, seven! I, of course, couldn’t count and centered my hand lettered masterpiece onto six boards of wood. Check out in the next step how I fixed my mistake.
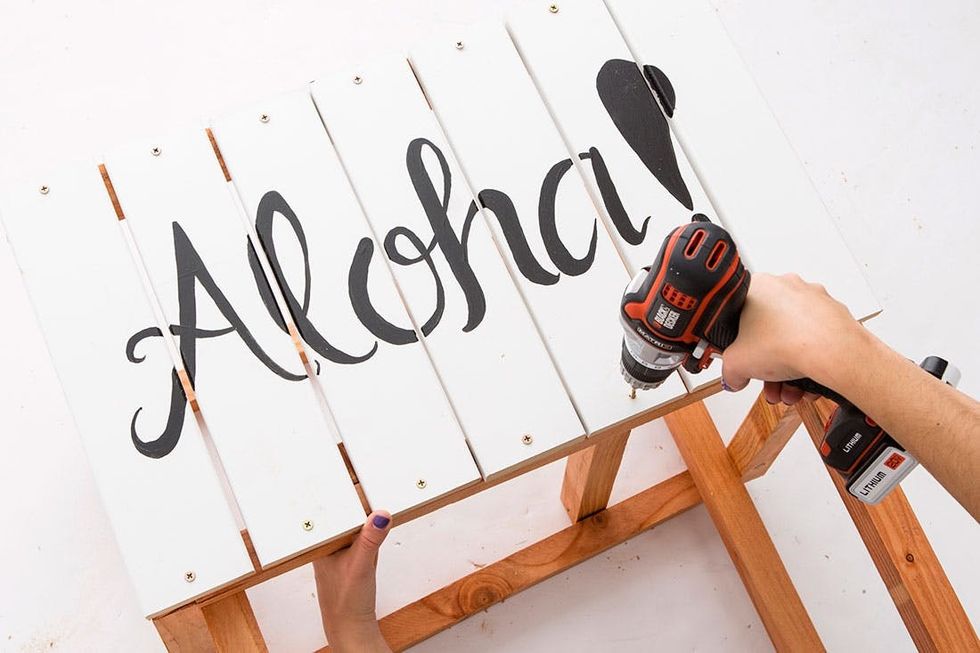
I added an exclamation point! Next, drill holes in the top and bottom of all 24 pieces of wood, then screw them to your new cooler base. Seven pieces will lay across the front of the cooler box and five pieces will lay on the sides.
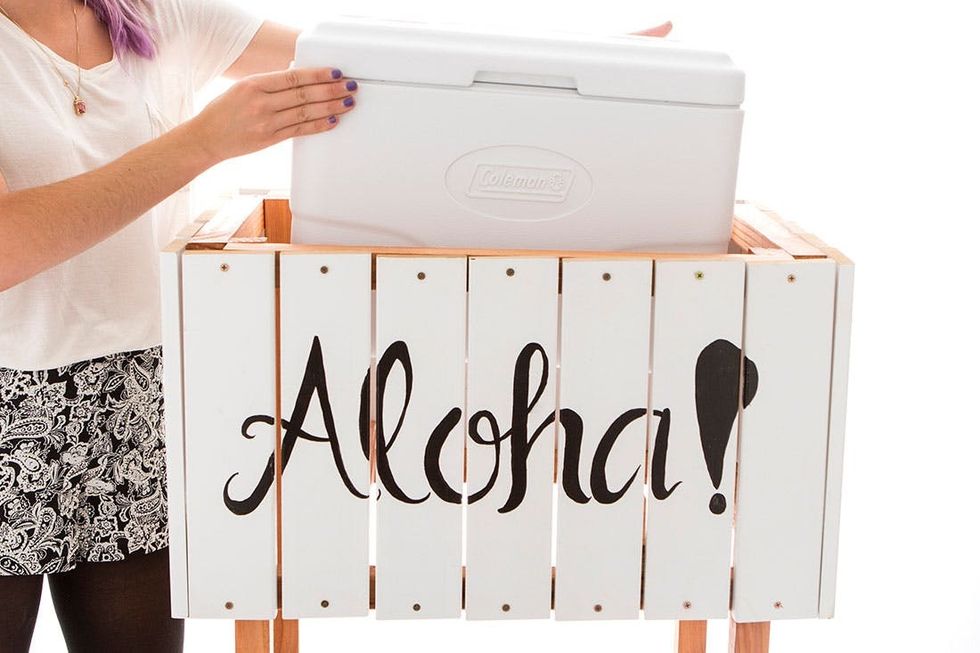
Slide your cooler into place and get ready for the party! Pro tip: If I was able to go back to the hardware store, I would have purchased more white wood to cover the top rim of the container to give it a polished look. Most of your guests will be seeing the top edge when they pull their drink from the cooler, so might as well make it nice :)
One of our favorite parts about this project is that this stand can stay put on our patio, but the cooler is mobile for a quick day trip to the beach.
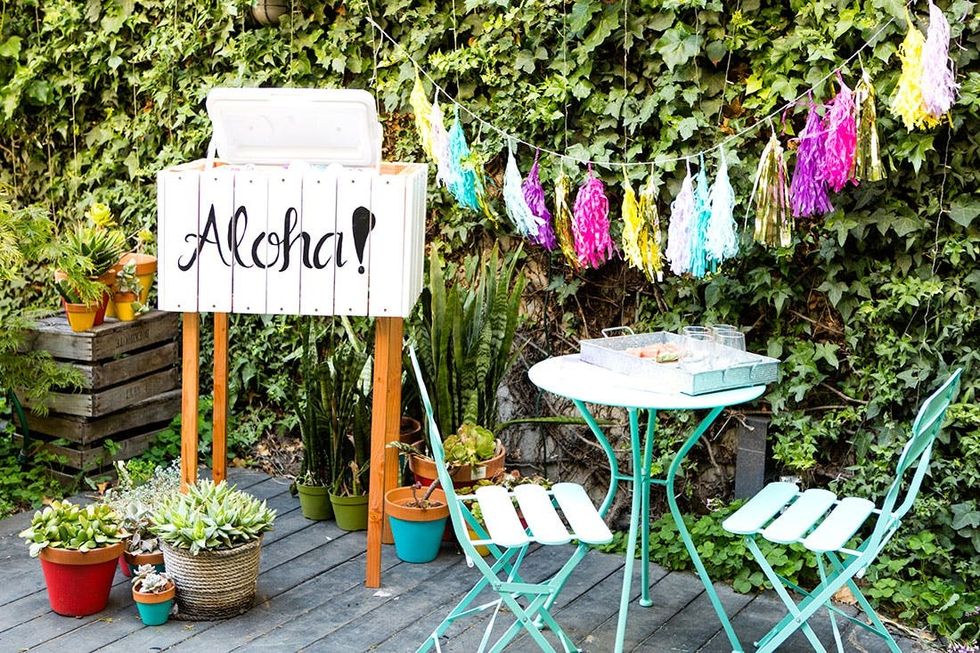
Fill your cooler with refreshing beverages for you and your guests. Set up a side table with glasses, cute straws and refreshing treats.
Show us your project by tagging us on Instagram + using the hashtag #iamcreative!
Getting the word out about your brand takes time, drive, and ingenuity. And it doesn't come easy for many entrepreneurs. As part of our collaboration with Office Depot, we're chatting with Selfmade alum Taylor Morgan McPherson, founder of Sustainable Sparkle Bar, about ways in which she scored press as a solo startup brand and what she learned from Selfmade to take her brand marketing up a notch.
B + C: How did you know Sustainable Sparkle Bar was your business to start?
Glitter has always been my thing, so when I started my event company I decided to make it my niche. I started telling people I threw glitter-themed parties where people would get sparkled with glitter body art and makeup. Six months after that I applied to my first festival and to work with SUR restaurant in West Hollywood.
B + C: What's one strategy that's helped you start your business?
I honestly can't say that I've had a specific strategy that I've followed when it comes to getting my business off the ground. I have a PR background so I was just constantly pitching new business and posting on social media.
B + C: What's the biggest challenge you face as a small business owner?
I would say creating a stable income and revenue stream. With a seasonal, event-based business it can be very up and down.
B + C: What was your most valuable takeaway from Selfmade?
The relationships I made and the push to start an email database.
B + C: How do you stay motivated?
I love what I do and I believe in myself 100%. Staying motivated isn't the hard part. Pushing myself to do the work and staying accountable is the hard part.
B + C: What's your best organizational tip? Do you use any apps that help you manage your business?
I keep multiple to-do lists, hand-written and digital. I also tell clients and partners that I will have something to them by a certain time or day so I have to stick to it.
B + C: What's one piece of advice you would give to female entrepreneurs on the brink of starting?
Just do it, take the leap. And don't worry about what anyone else says to thinks.
B + C: Who inspires you in the entrepreneurial space?
Issa Rae, I'm so inspired by everything that she's created being a creative and a black woman. It's my dream to have my own show one day based on my life and where I give advice and talk about the world. She's doing it and making people laugh and giving people joy. And it's based in LA. Watching Insecure only further cemented my dreams of wanting to live in LA.
B + C: How did you hear about the Office Depot scholarship?
One of my friends that I met through Camp No Counselors saw an IG ad for it and nominated me.
B + C: What has receiving the scholarship to Selfmade done to help you start/grow your business?
It's completely helped me level up and take my business to another level. Selfmade helped me host my first virtual event and taught me how to set up my website to sell tickets to events and get RSVPs.
B + C: How have Office Depot services or products helped you accomplish more in your business?
I got new cards to send in all of my orders with my discount code on them. I also bought a really cool 4K camera that I now use for my social media.
Thanks Taylor! You really know how to sparkle. We love her colorful, creative vibe. You can follow Sustainable Sparkle Bar on Instagram @sustainablesparklebar.
Let Office Depot OfficeMax help you stand out in the crowd. From signs, posters & banners to promote your business, to marketing materials to keep your customers informed, Office Depot OfficeMax offers a full suite of business services & solutions to help you & your business get noticed.
Head to Office Depot's Selfmade page to check out even more amazing business resources (and discounts!) to help you accomplish more on your entrepreneurial journey. These offers are available for a limited time only, so be sure to take advantage of all this goodness while supplies last. Want to join the next Selfmade cohort this summer? Check out all of the scholarship details right here.