 Recommended for you
Word on the street is that a lot of work goes into planning a wedding. It seems like there are a million things to prepare for on your special day, especially if you’re taking on the task of DIYing anything for your wedding. But don’t worry! We’re here to serve up inspiration — budget-friendly inspiration — for you to create beautiful ways to help your wedding stand out. The pics in your wedding hashtag are going to slay on Instagram.
We’ve crafted three dessert table ideas for under $75 each that you can easily DIY in a weekend to match your wedding day personality. We have one table for the modern bride — geometric and minimalist — one frilly dessert table for the boho bride and a rustic-chic creation that’s a little bit country and a little bit glam. All of these pieces can be saved, reused and repurposed to decorate other areas at your bash like your photo booth or guest sign in table. Can’t decide which to DIY? Mix and match your favorites from each section to craft a dessert table perfect for you.
Ladies who aren’t getting married – no worries. DIY these dessert tables for your baby shower, your 30th Birthday or just because you’re 20 and a dessert table in your apartment is a thing you need.
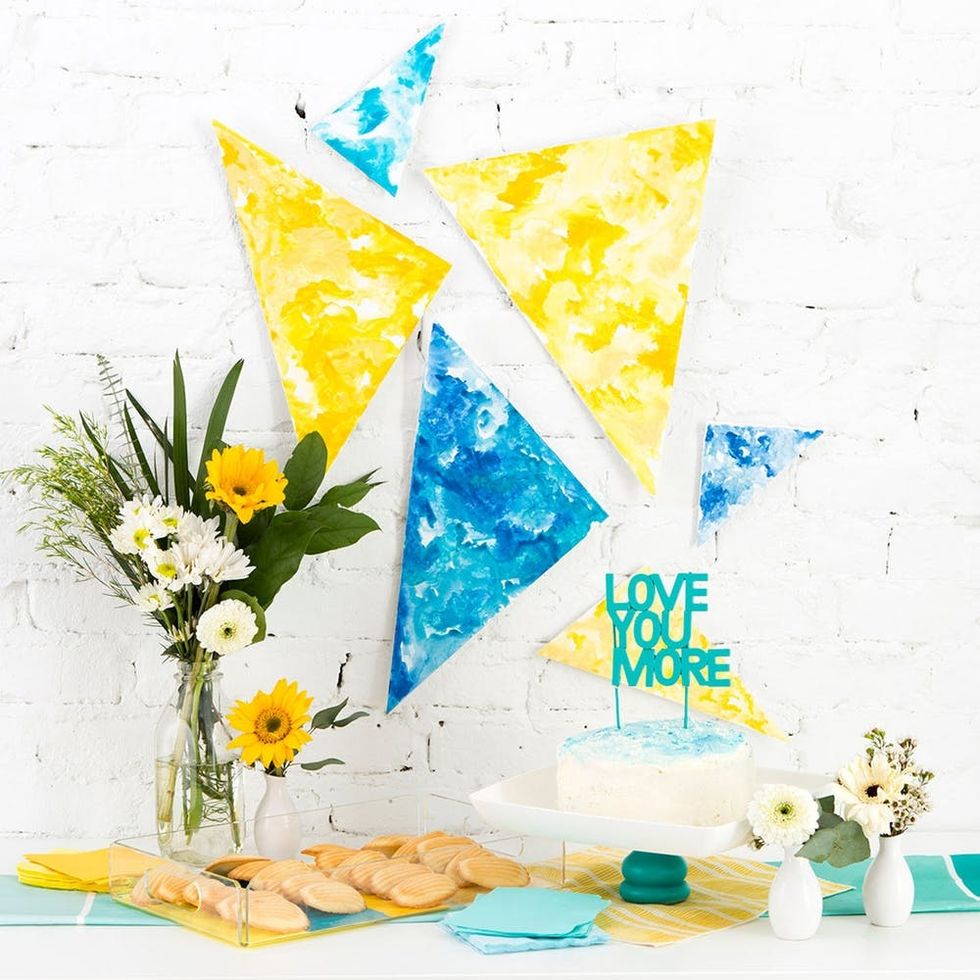
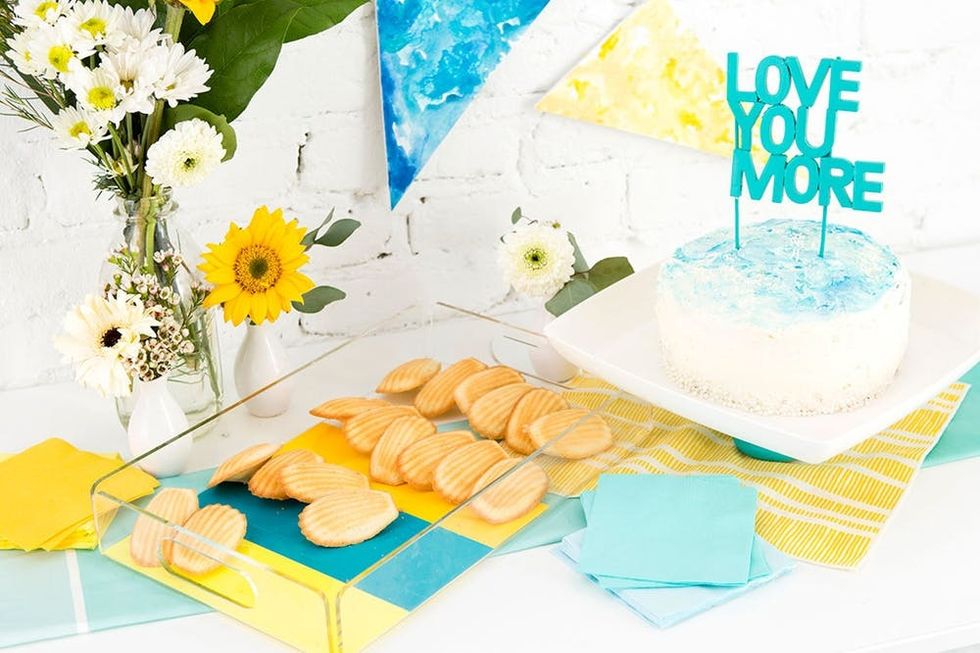
Dessert Table Tutorial for Modern Brides
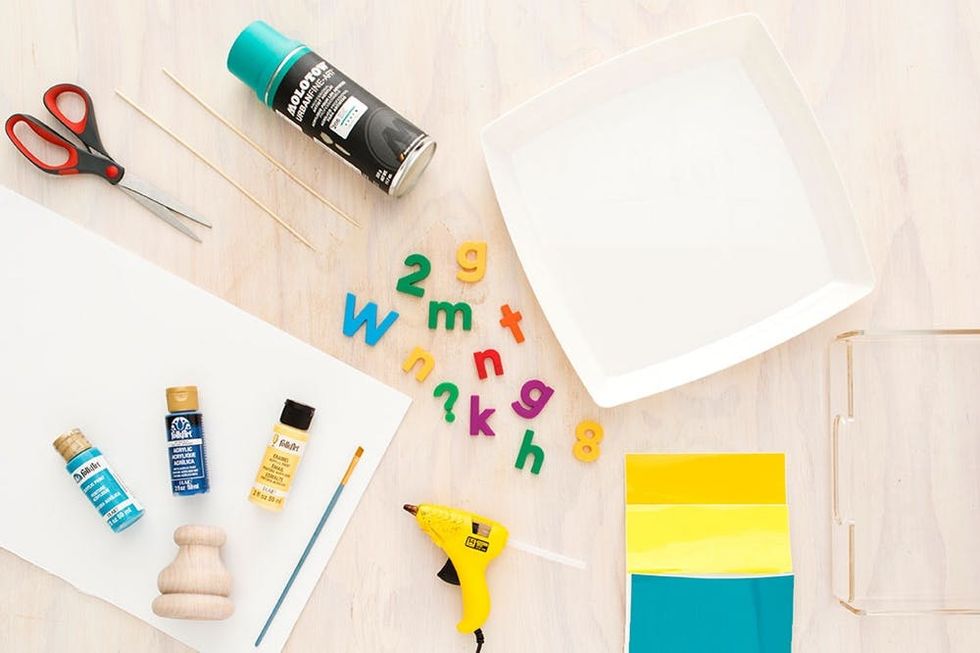
Materials:
– furniture leg
– spray paint
– 3 colors of acrylic paint
– 3 colors of contact paper
– 2 wooden skewers
Tools:
– hot glue gun
– paint brush
– scissors
Let the crafting begin!
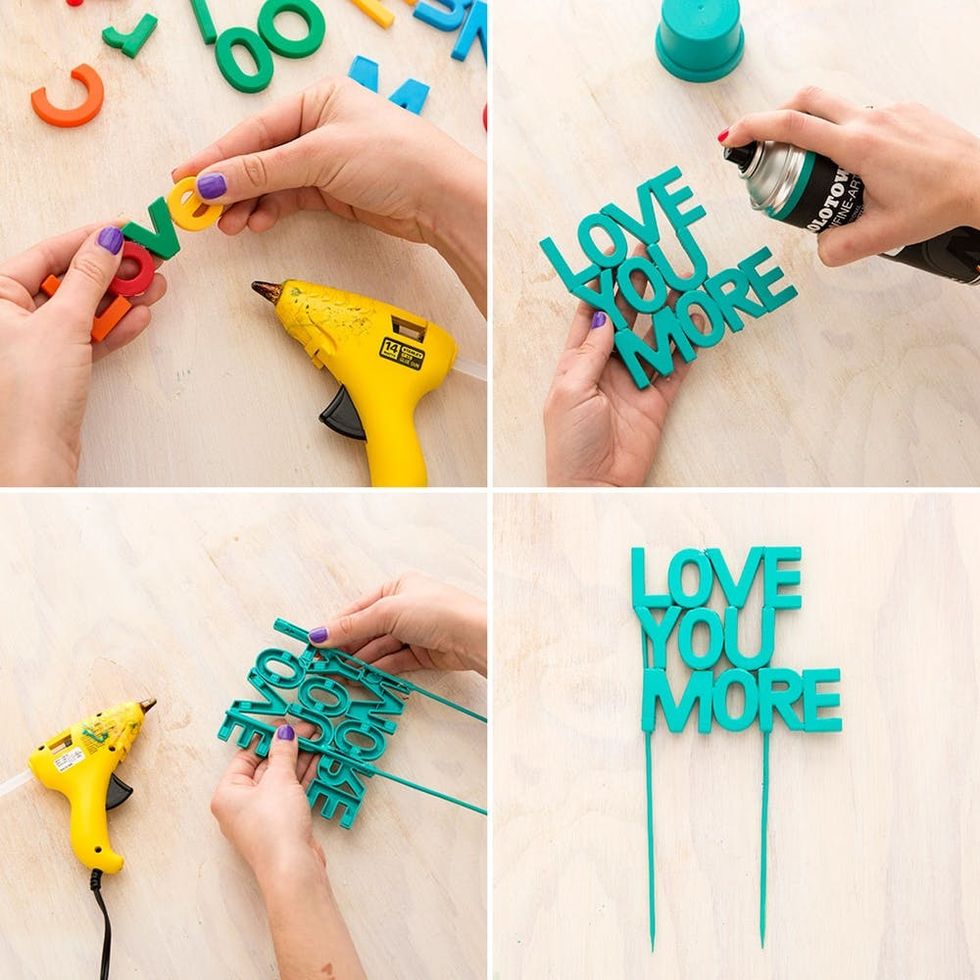
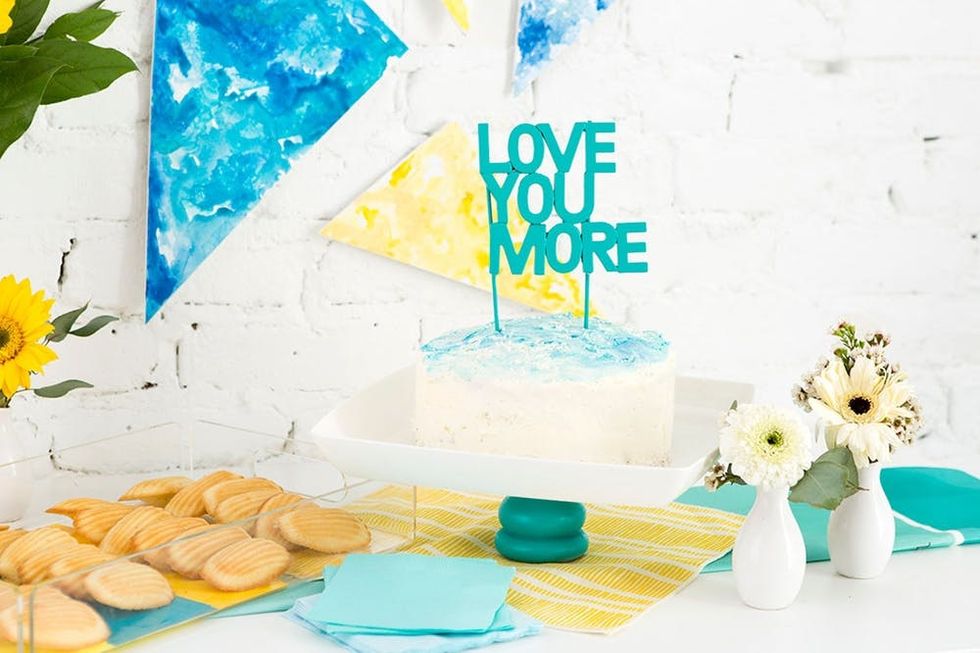
Use a hot glue gun to piece together a cake topper with a special phrase that you and your SO agree on. With a quick layer of spray paint, these childhood magnets become a beautiful wedding cake topper. Add wood BBQ skewers to the back of the topper so it will be able to stand on top of your geometric cake.

DIYing a cake stand is actually a piece of cake. We ordered a furniture leg from Amazon, spray painted it and hot glued it to a tray. Try finding these pieces at a thrift store to save money. Just make sure the proportions of the tray work with the stand; otherwise your cake may topple over.
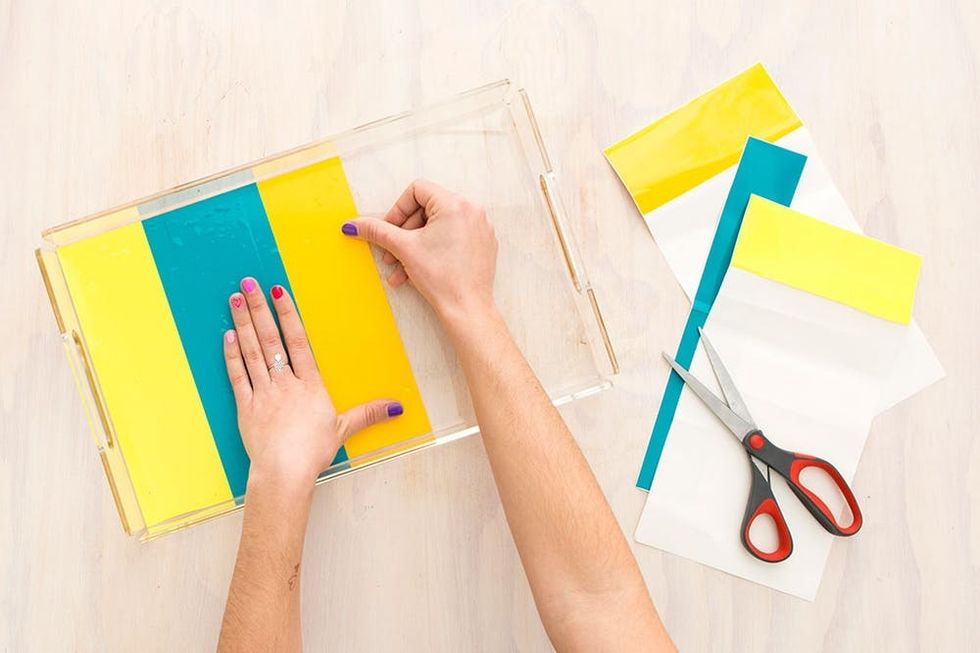
Contact paper is a great way to add customization to almost any piece. We ordered this tray from Amazon for about $17 but if you have time we definitely recommend thrifting for a better priced tray. What is great about using contact paper is that you can easily wipe this tray clean (Ahemm, save it for your baby’s 1st birthday.)
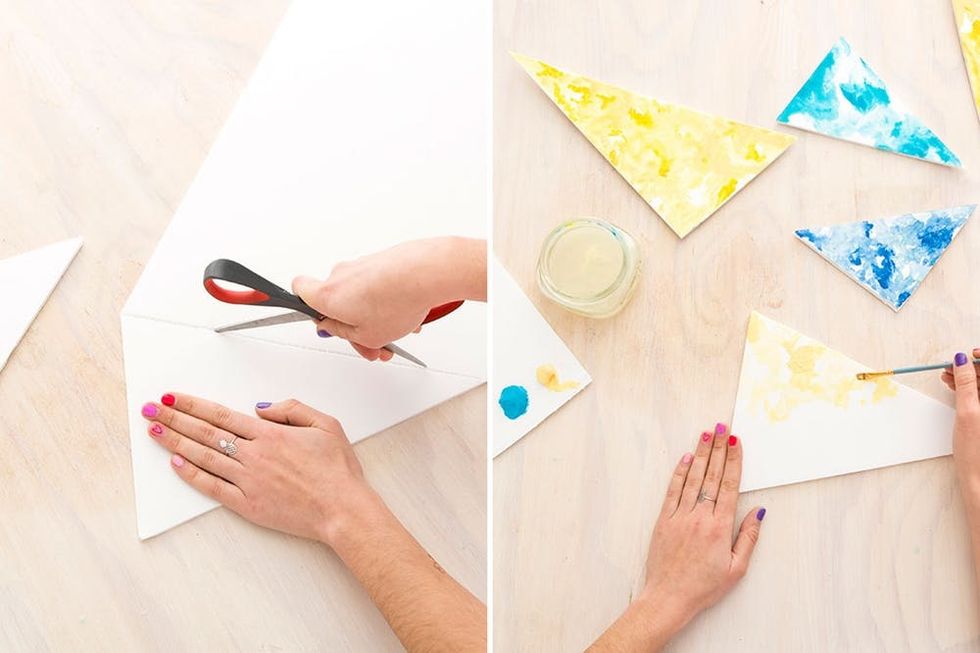
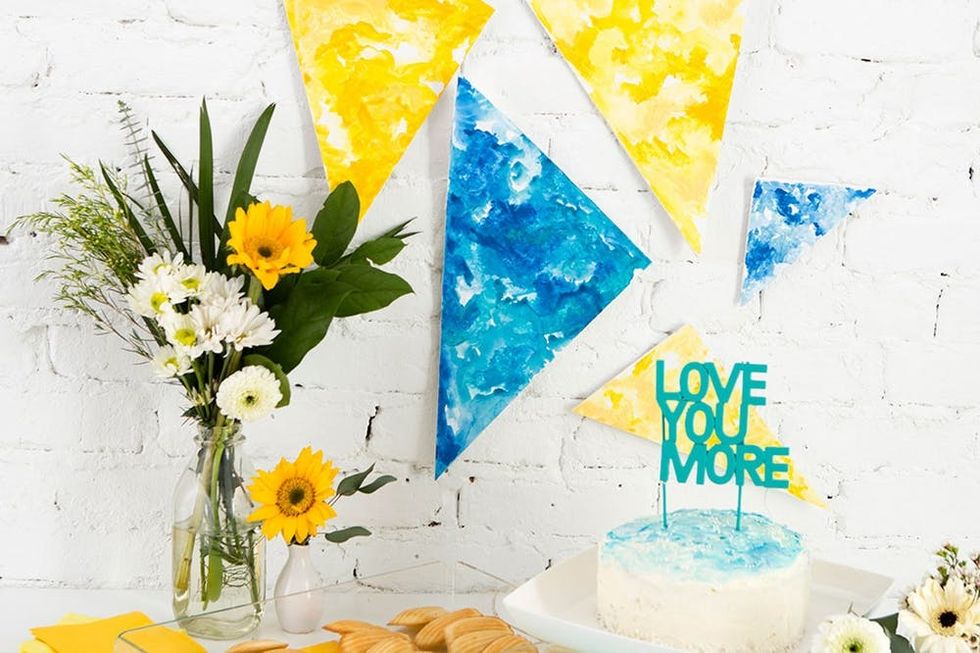
For the backdrop, we tapped into watercolor and painted nine foam core triangles. Cut them into random shapes and sizes and paint in your wedding’s color scheme. Attach to the wall with double-sided tape or sticky tack. Pro Tip: You can make a lot more than nine and use them to decorate the walls around your venue. Cheap and easy FTW.
Accompany your DIY masterpieces with some store bought fabrics and napkins to warm up the table. Before investing in expensive table runners check with your local fabric store; they might have a similar pattern for half the price.
We love flowers, but they can get very expensive when you are trying to incorporate them into every part of your wedding. Arrange your table with mini bud vases – it will fill up the space quickly and will only use one bud and a few stems of filler.

Watercolored cake and shortbread cookies – yes please!
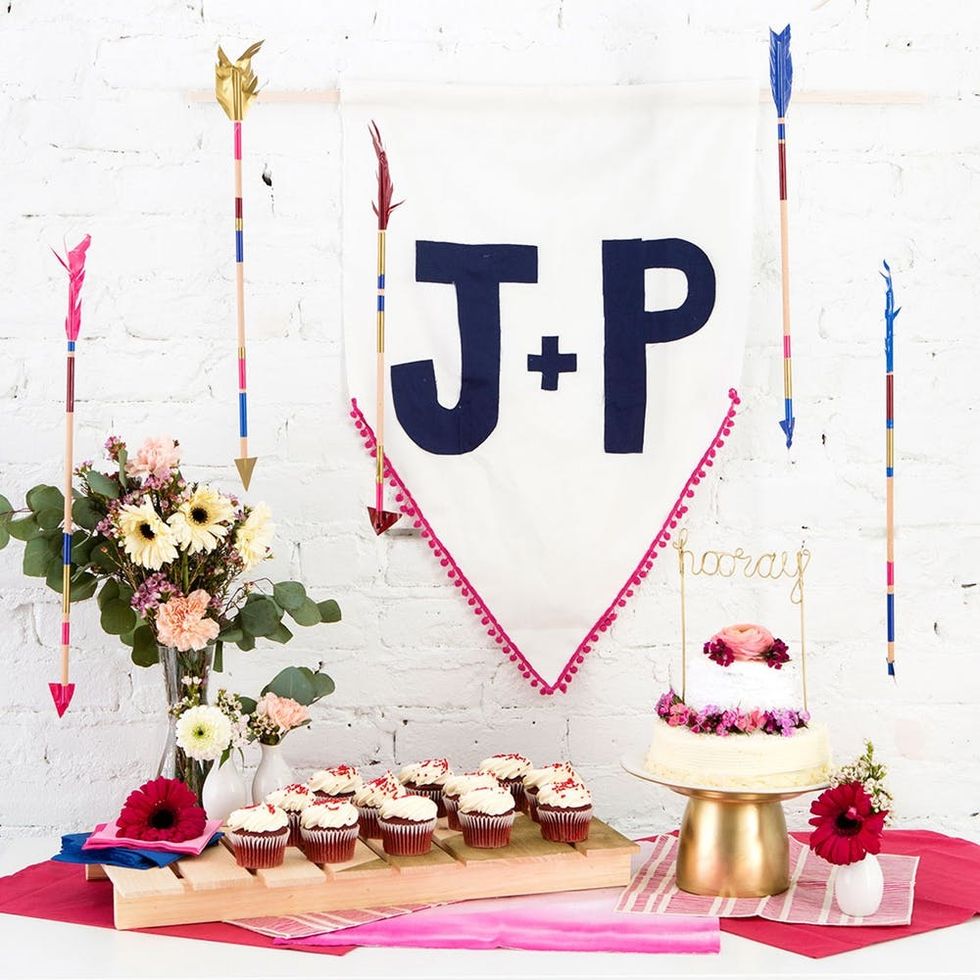
Dessert Table Tutorial for Boho Brides
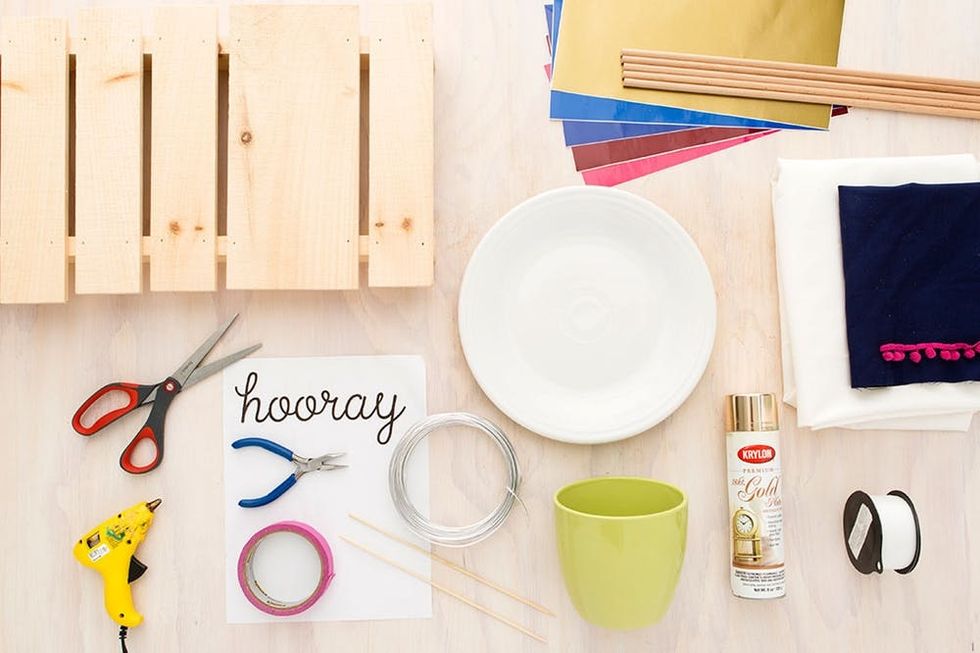
Materials:
– plate
– vase
– contact paper
– 1/2 yard of cotton fabric in two colors
– pom-pom trim
– hooray printable
– wire
– spray paint
Tools:
– scissors
– hot glue gun
– pliers
– fishing line
– tape
Let the crafting begin.
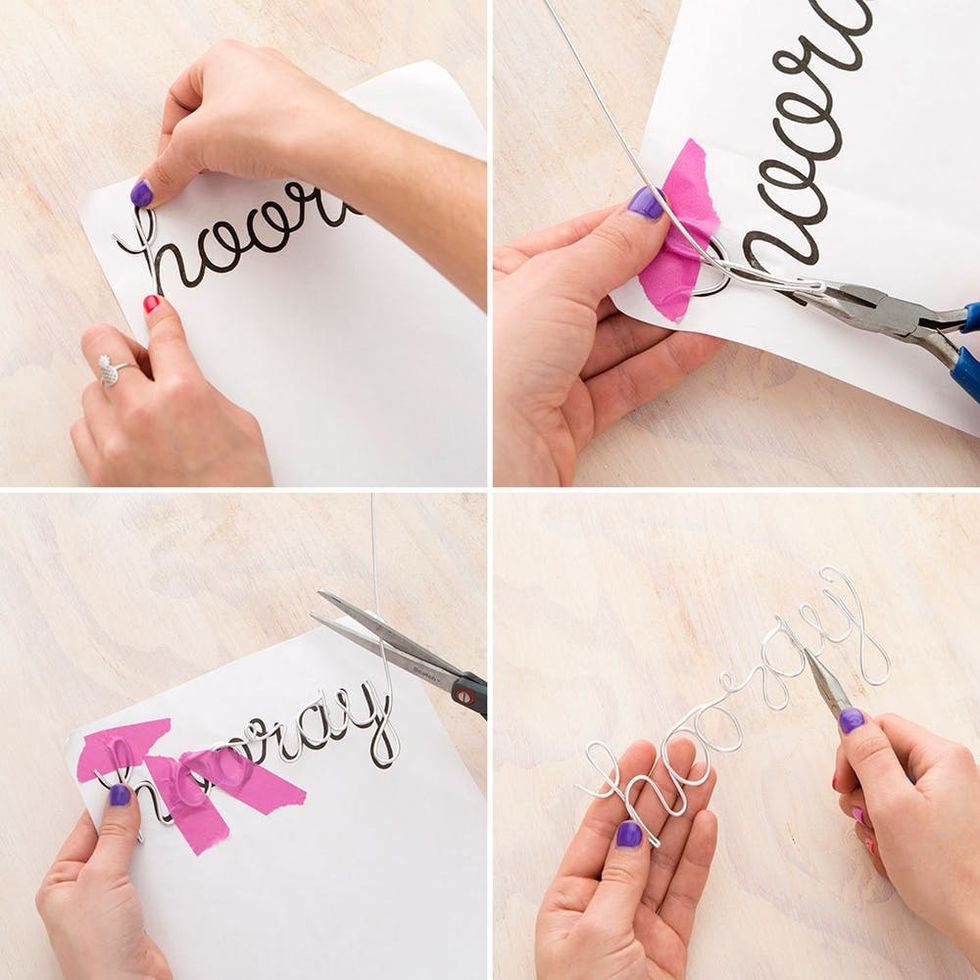
Measure out 40 inches of aluminum wire and start bending in the shape of your word. Use tape to hold the wire in place while you work your way through the letters. The pilers will be your best friend for getting crisp corners when the wire needs to change directions. Once you’re finished, remove the tape and use the pilers to perfect your masterpiece. Don’t be nervous. This is actually super easy to do since the aluminum wire is so malleable.

Hot glue skewers to the back of your word and spray paint in your favorite hue. I’m going to be honest and say that the gold looks BOSS.
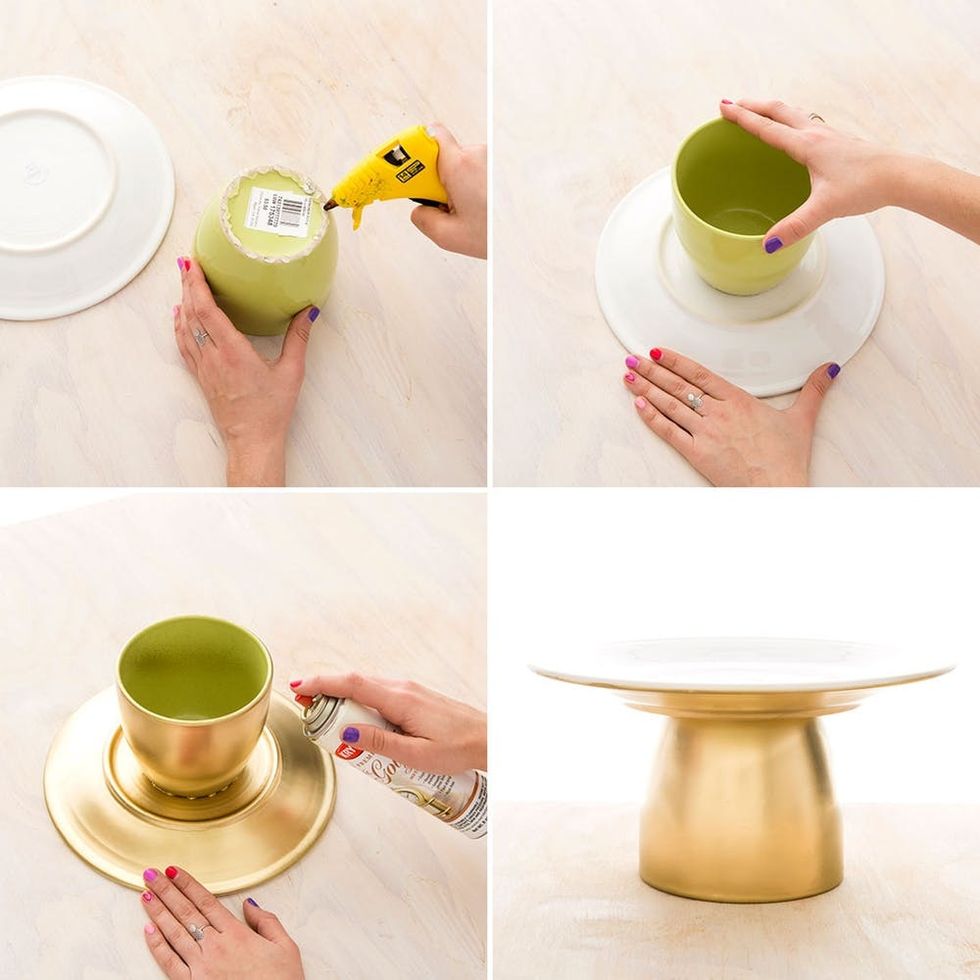
For this cake stand we used a kitchen plate and an old planter. Hot glue the pieces together and spray paint the underside. We had minimal spray paint leak through to the top of the plate, which we cleaned up with nail polish remover, but you can always tape off the top with painter’s tape.
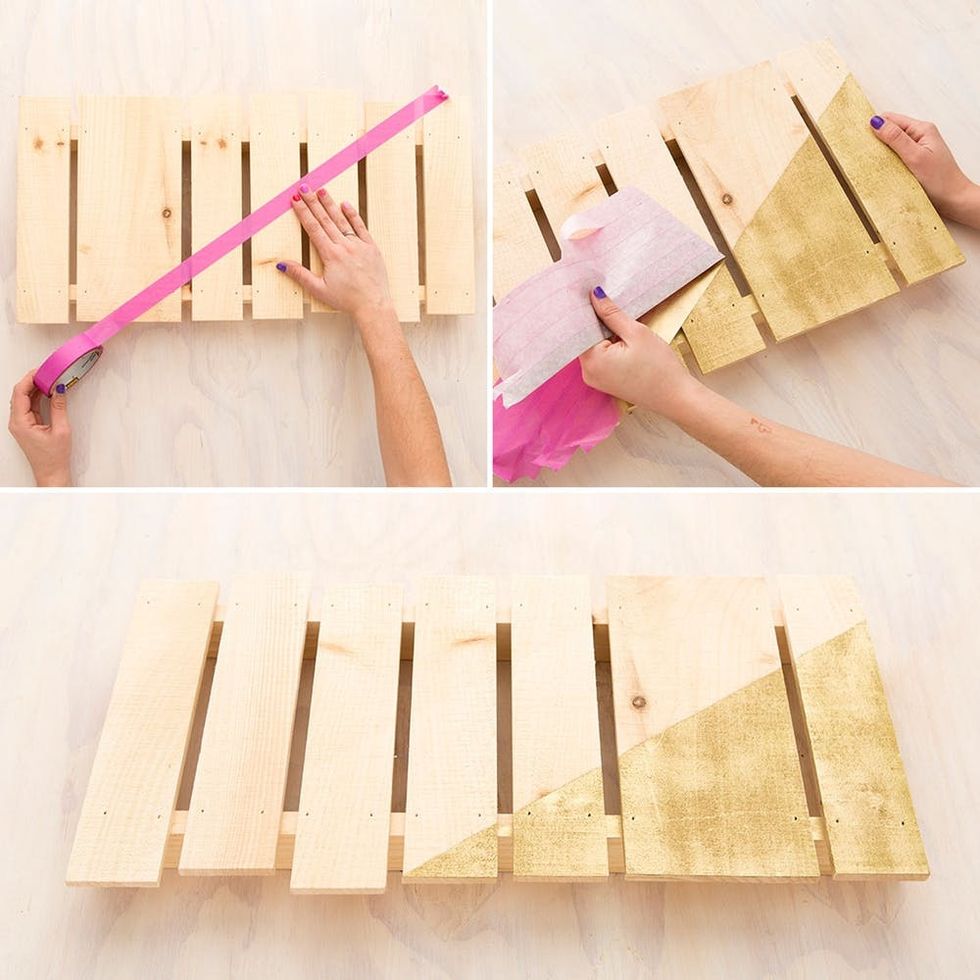
I was so amazed at this wooden palette Amazon find. It is such a perfect size and my DIY mind was running with a million things to do with it. For this DIY, we’re decided to color block it and use it as a tray for more dessert goodies. If you’re feeling fancy, add leather straps to the tops of either side for handles. Use glue or nails to hold the leather in place.
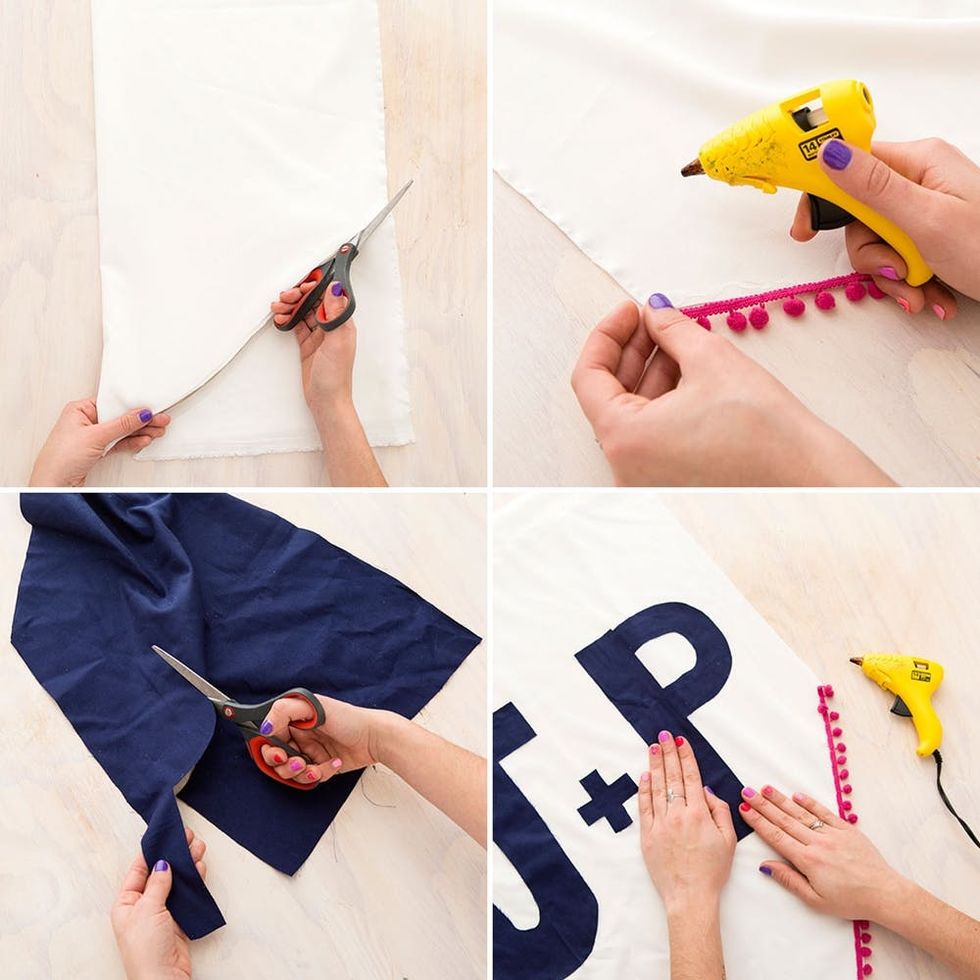
Stop – banner time! Grab some old fabric and make an initial pendant banner. You could even use an old white pillowcase. Adorn the bottom with pom-poms to give it more of a finished look.
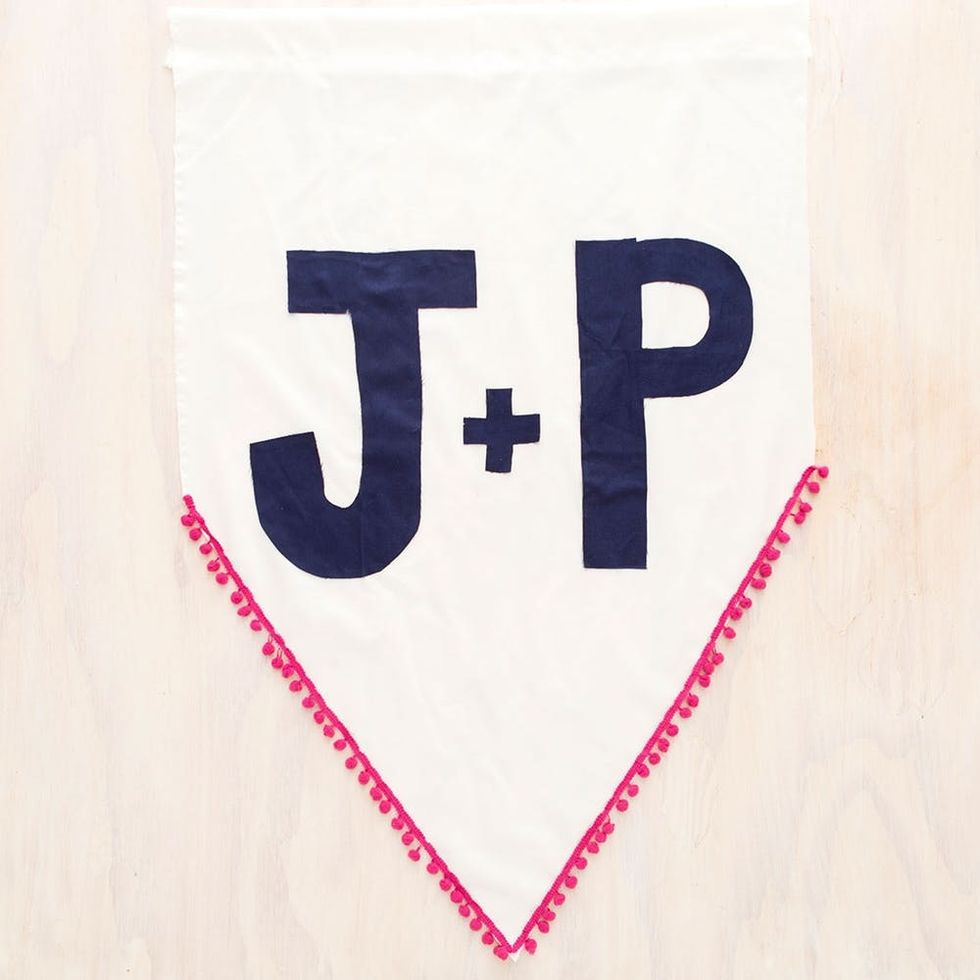
Hot glue the top over itself to form a sleeve; this will make it easier to hang. Having an outdoor wedding? Slide this bad boy through a tree branch so everyone knows which way to the wedding.
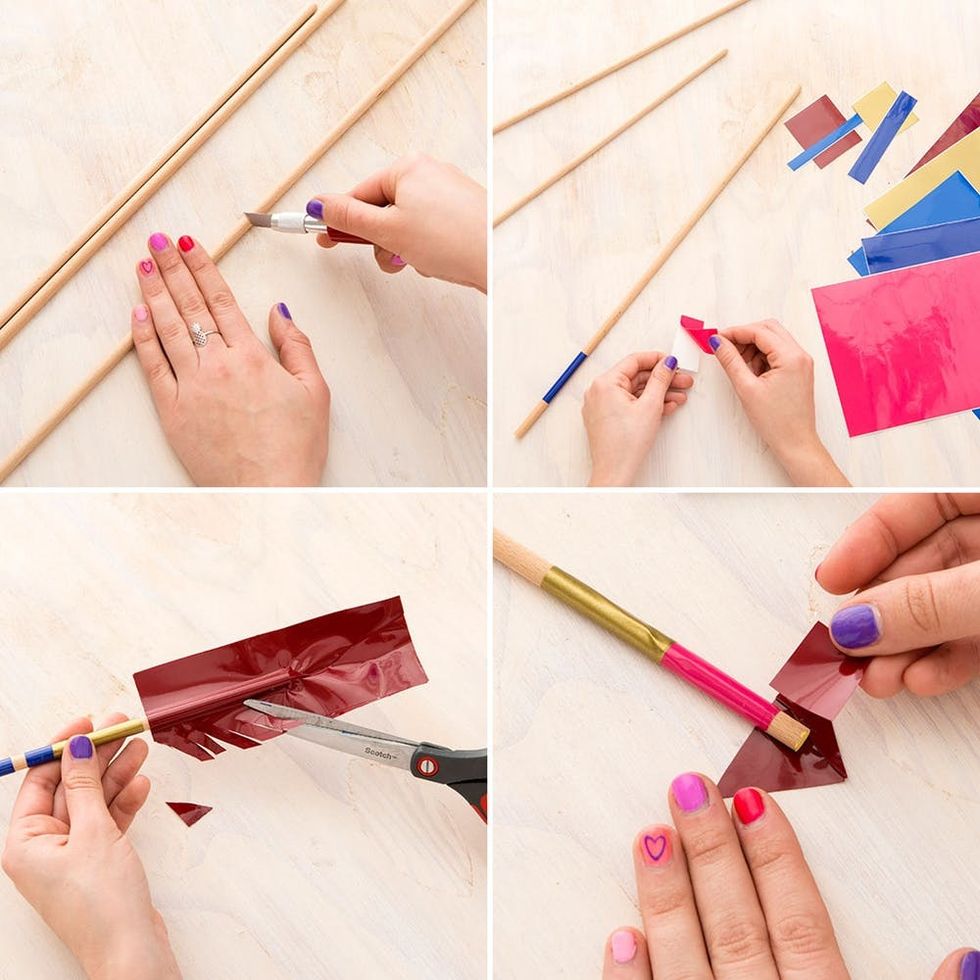
Accompany your banner with some wooden dowel arrows. We stole this idea from a B+C employee – Ashley (Fisher) Stern, who made a bunch for her wedding last October. Use small strips of different colored contact paper to decorate the dowel. Then sandwich the top of the dowel between two large rectangles of contact paper for the feather end – then fringe. Create a small triangle for the opposite end for the point of the arrow.
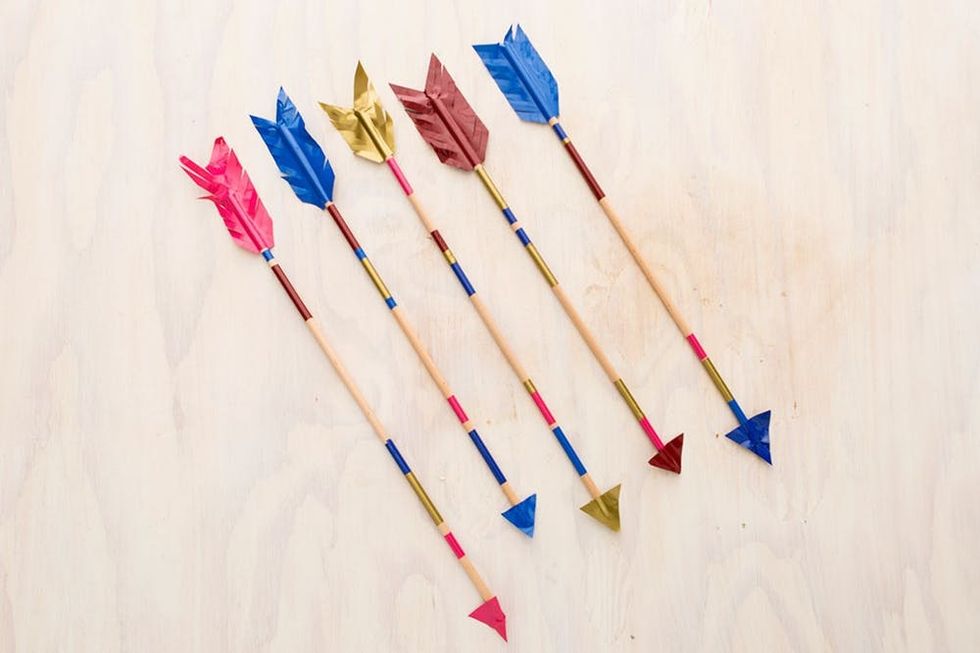
Create a bunch in different colors and sizes. Use fishing line when hanging.
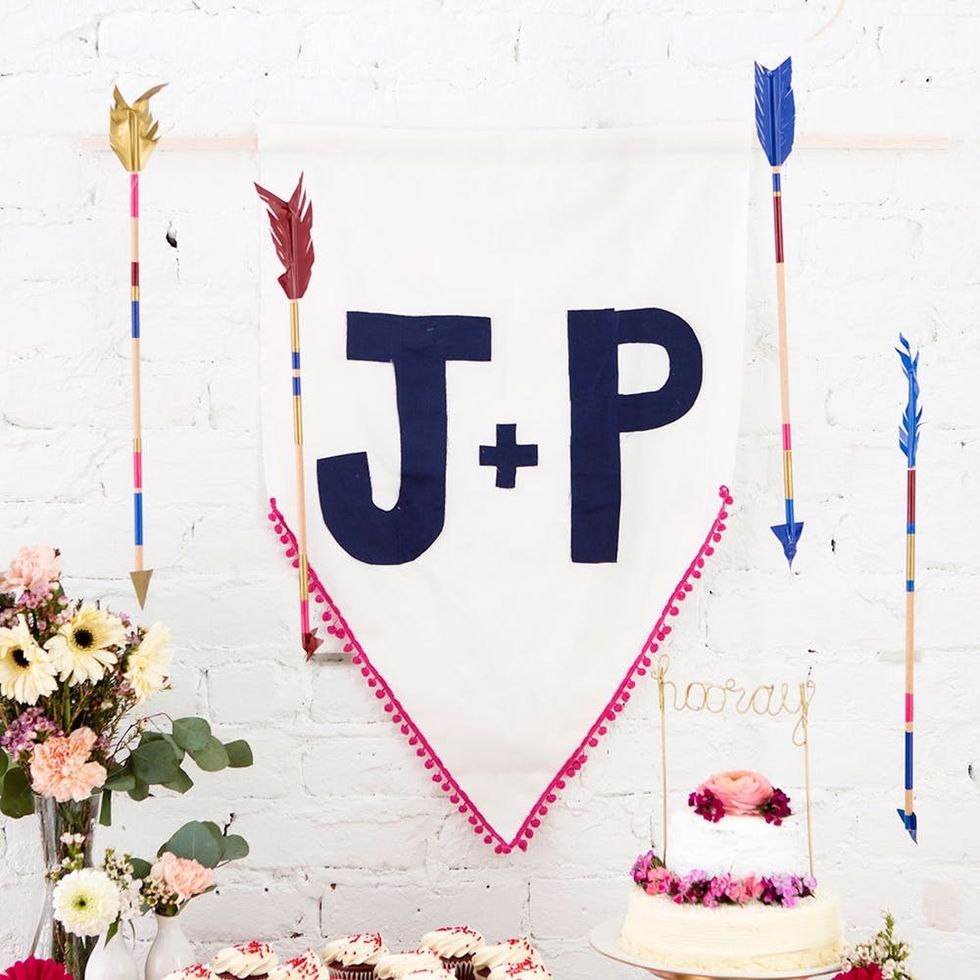
We love the mix of materials in this scene. Wood, fabric, metal and baked goods :)
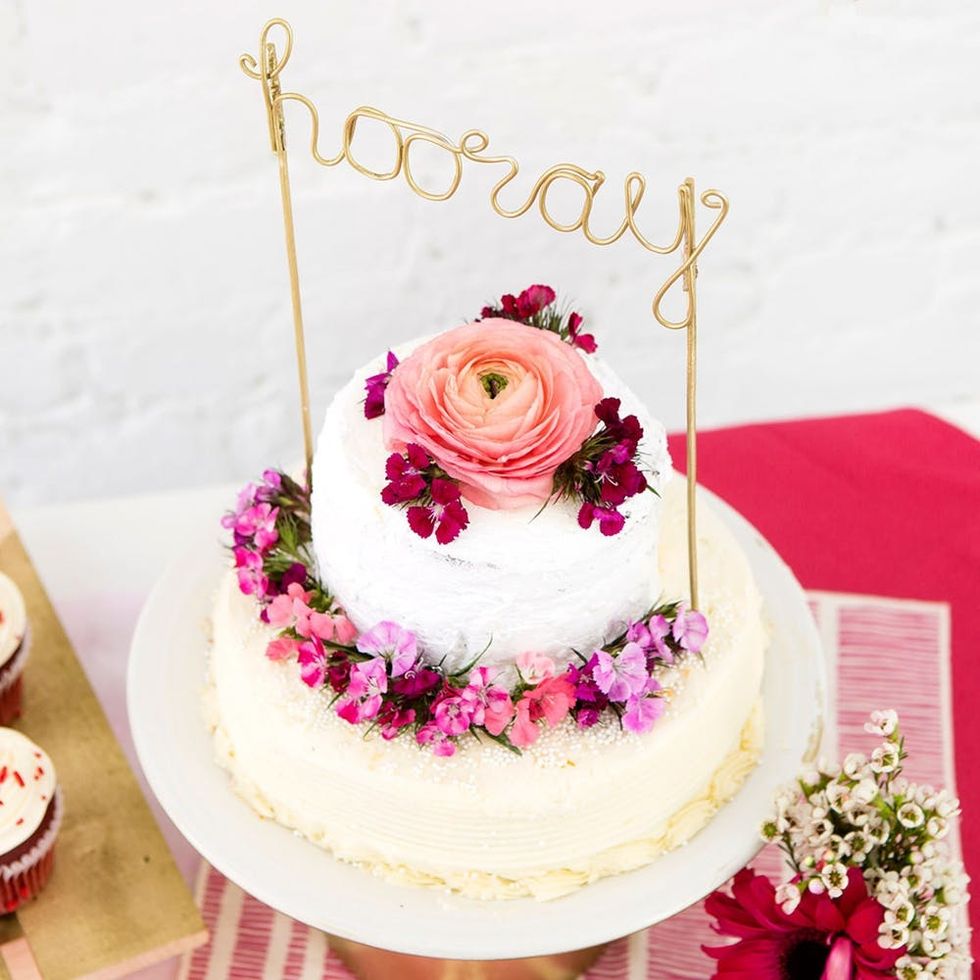
I’ve found my wedding cake – the only problem is I’m not getting married anytime soon. Brides to be: someone recreate this cake and topper so I can live vicariously through you.

Remember – bud vases are your best friend.
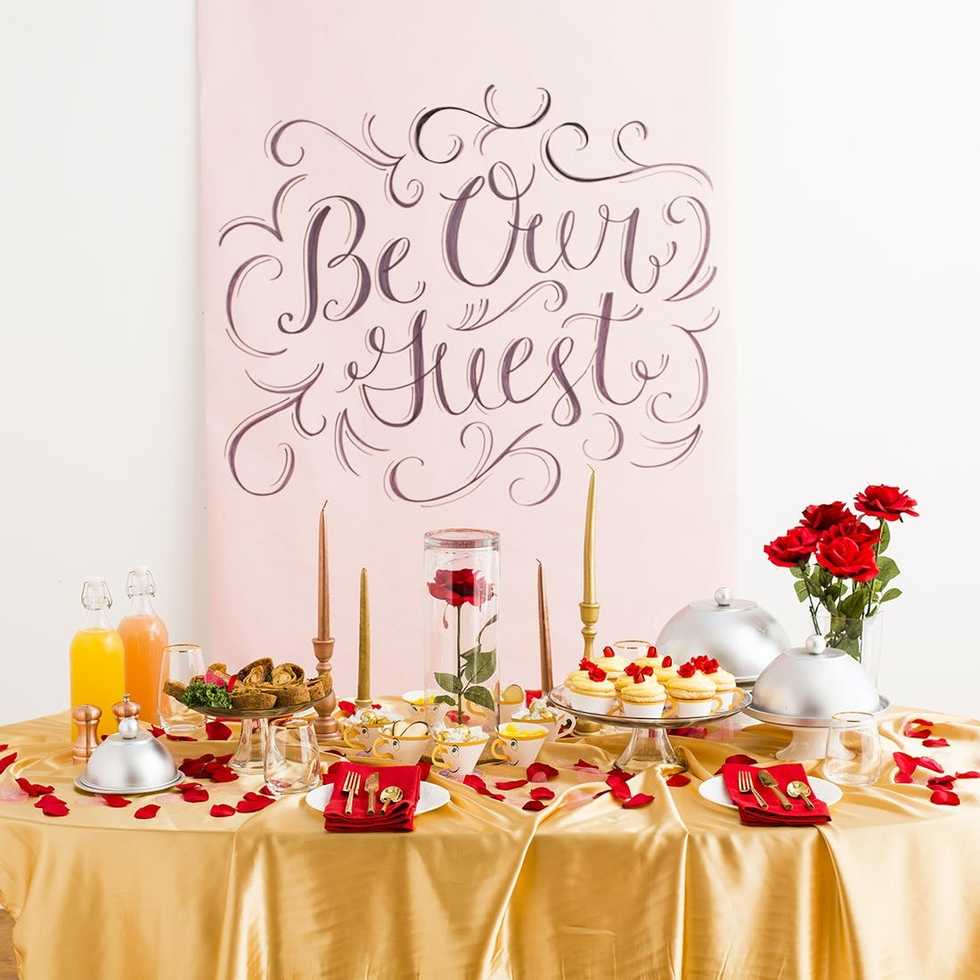
Dessert Table Tutorial for Rustic Chic Brides
Materials:
– architectural Fed-Ex print-outs
– contact paper
– candle sticks
– plate
– spray paint
– skewers
– Shrink Film
– Happily Ever After Printable
Tools:
– hot glue gun
– scissors
– Exacto knife

Let’s get making!
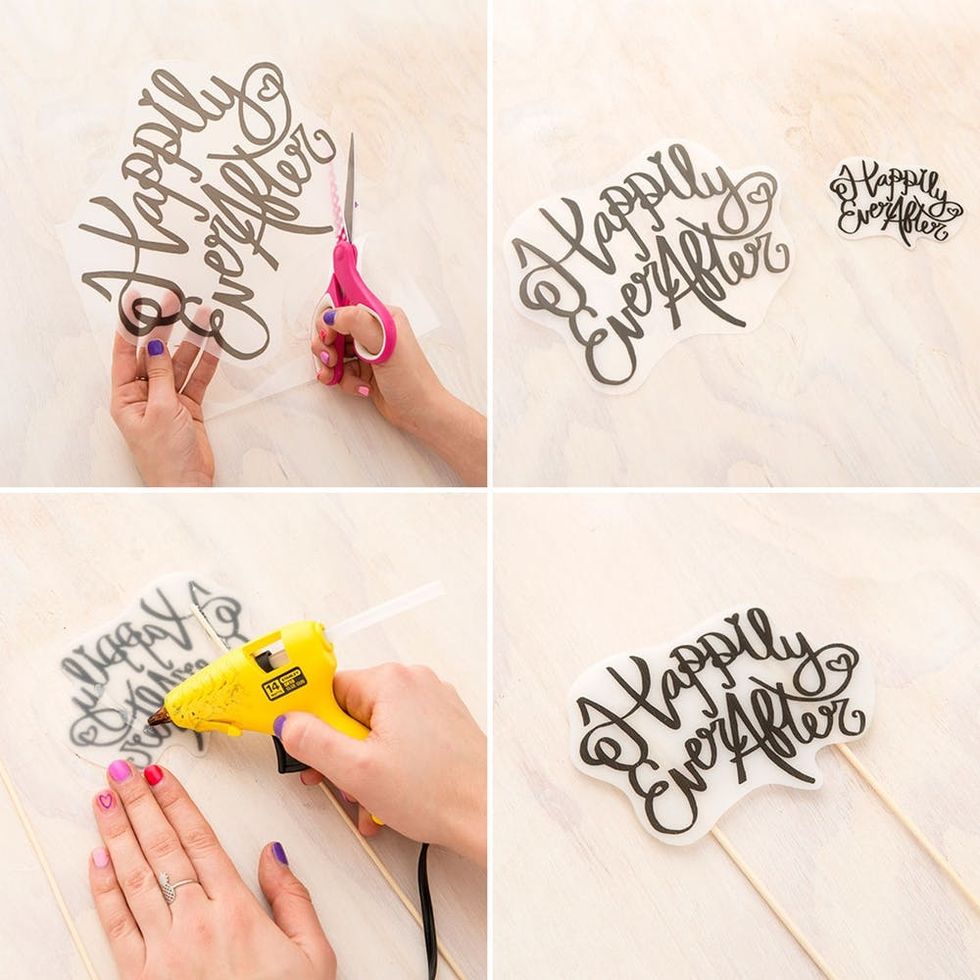
Let’s bring it back to the late ’90s for some Shrinky Dink action. If you aren’t familiar with this magical item, it’s special paper that shrinks and hardens in the oven. What we especially love is that we found printable Shrinky Dink paper. Loosely cut out your phrase and stick it in the a 300 degree oven for 3-5 minutes. Watch as it shrinks – it’s pretty cool. As soon as it stops shrinking, immediately open the oven and place a cookie sheet on top of your piece. This will take all the imperfections out of your piece and make it lie flat. Attach skewers to the back and you’re all set. Cake topper done in 10 minutes, check!
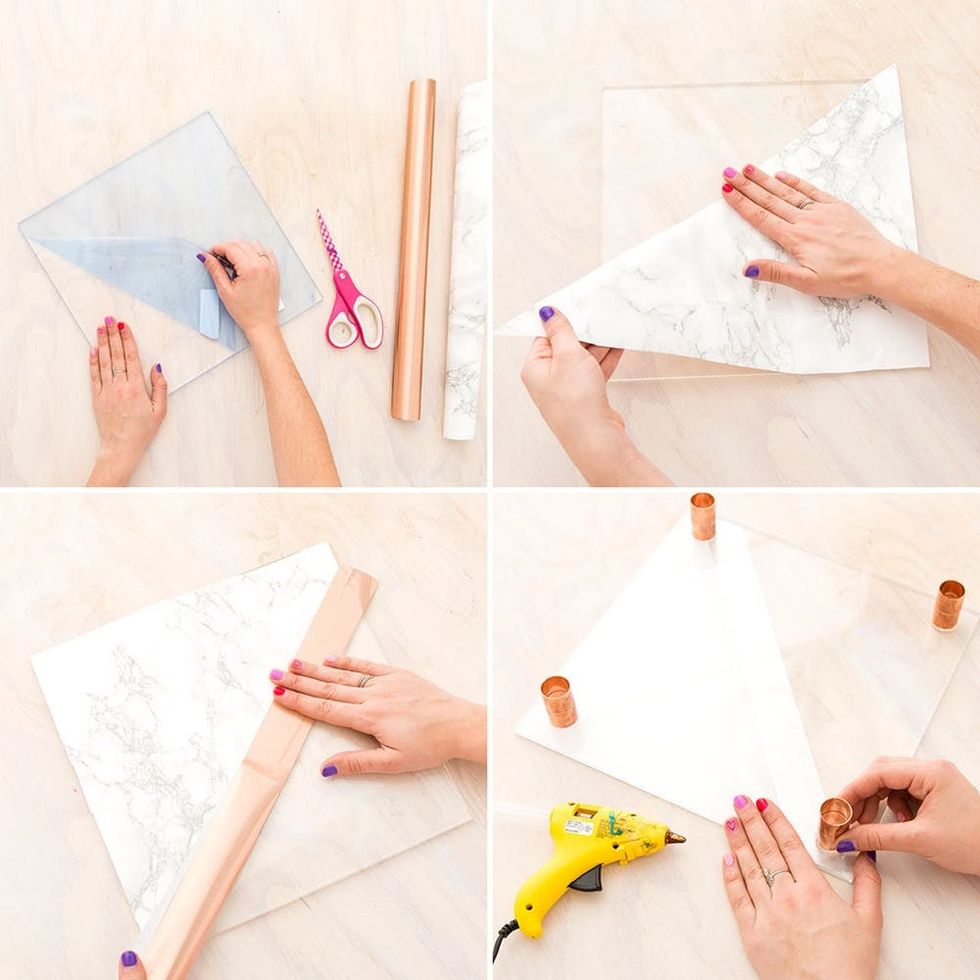
Amazon sells 12×12 inch plexi glass that’s the perfect size for a dessert tray. Decorate it with contact paper and use copper pluming pipes for the legs. If you want your tray to last longer, add another piece of plexi on top of the contact paper. We suggest glueing the perimeter with E6000.
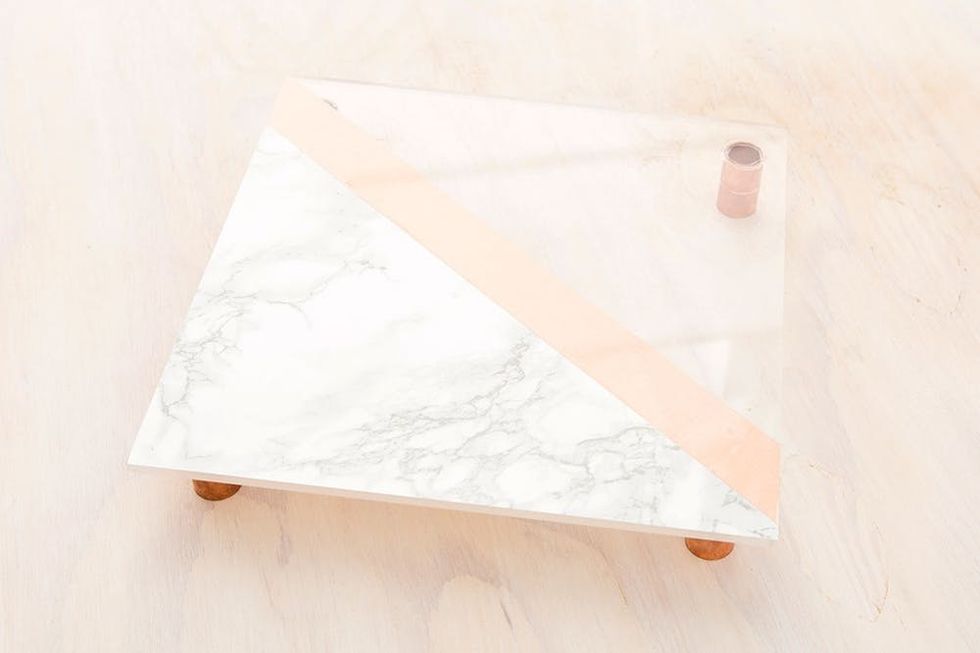
Marble and cooper are très chic.
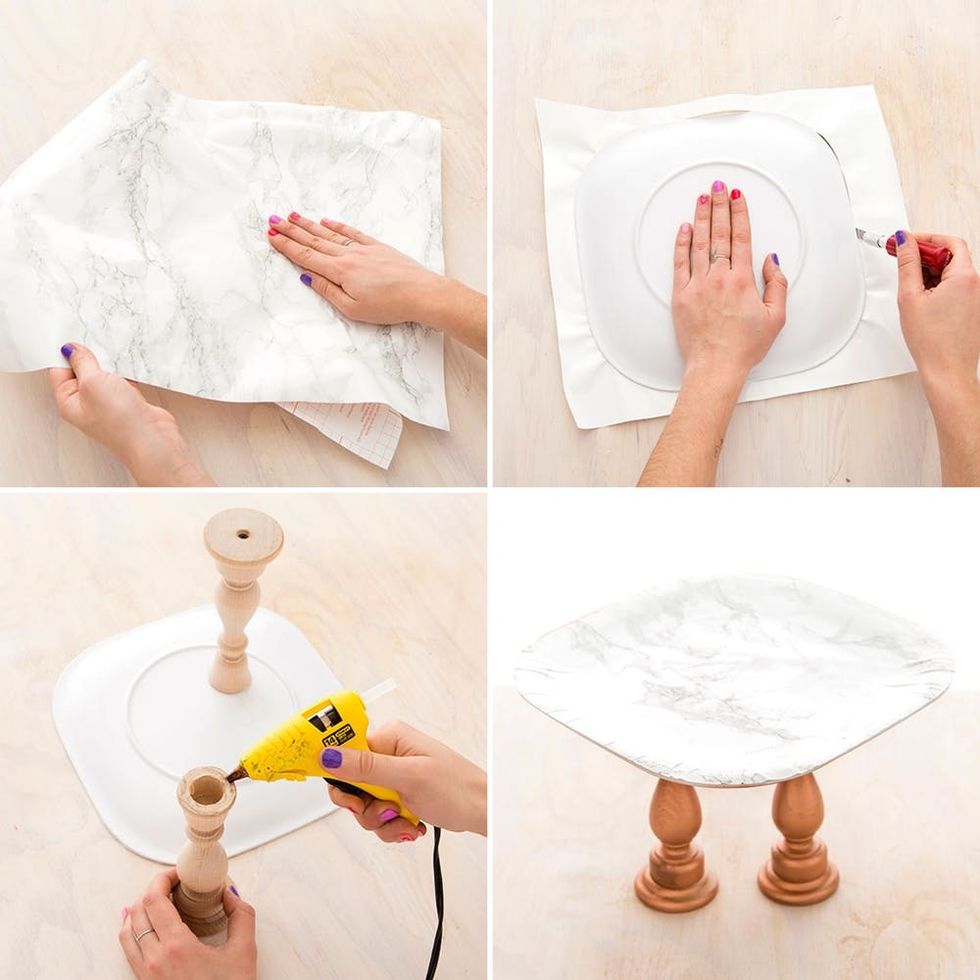
For this cake stand we grabbed an old plate from the kitchen and covered the top with marbled contact paper. We used two candle sticks and spray paint to update the bottom to create a cake stand suitable for the royals.
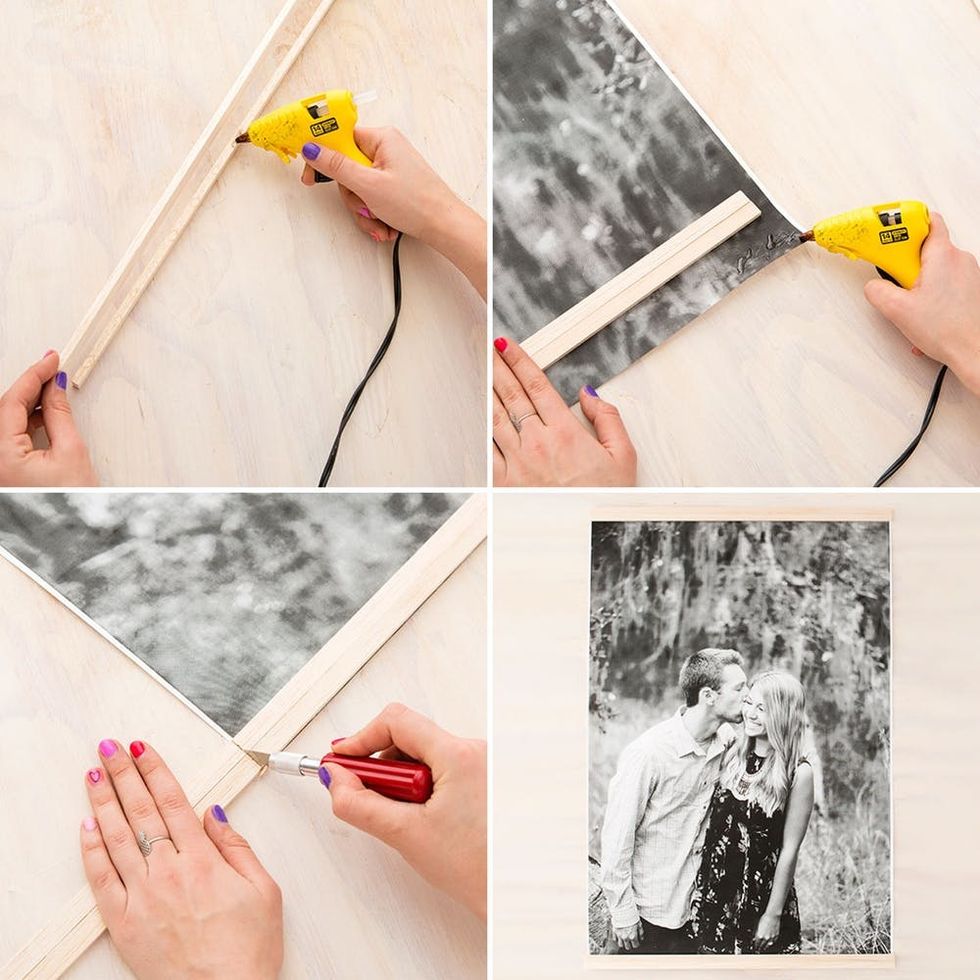
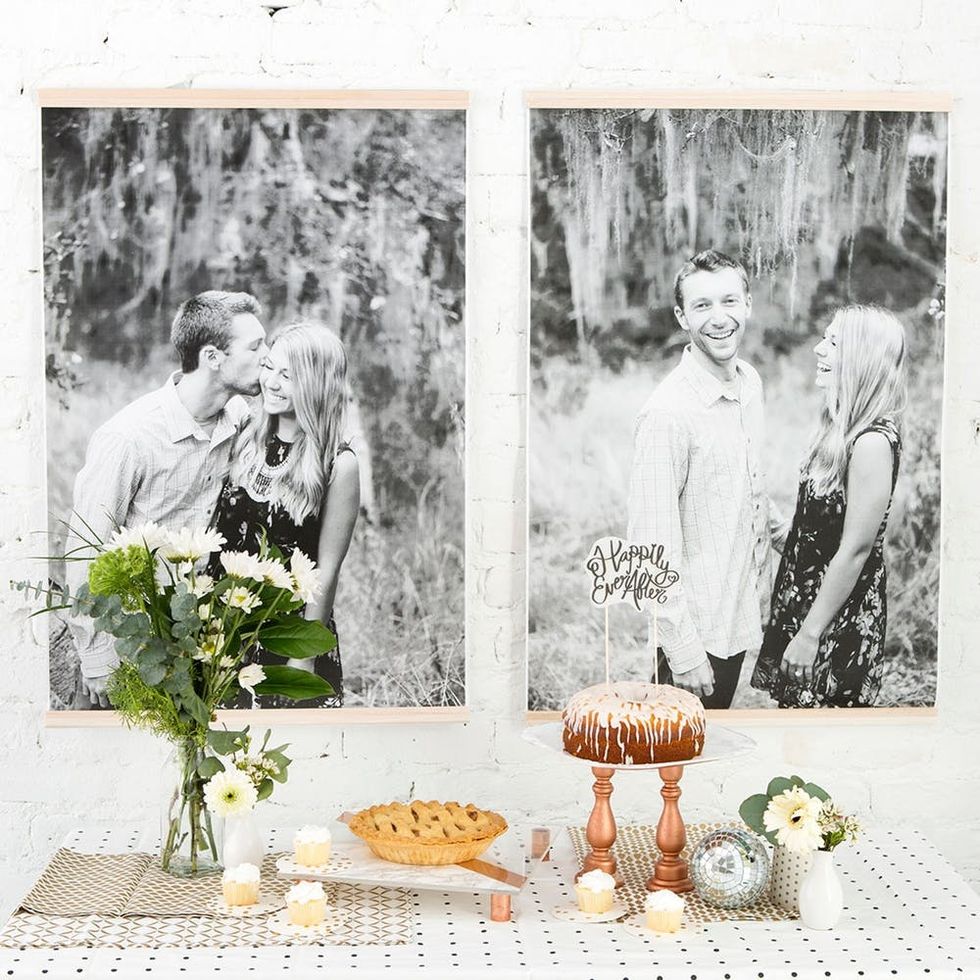
Our lives have been forever changed since we found out that Fed-Ex prints large 24×36 black and white photos for $5. (Thanks for the tip, Anita!) Glue balsa woods to the edges of the photo to create a scroll inspired frame.

Deck out your table with flowers and disco balls for the ultimate sparkly party.

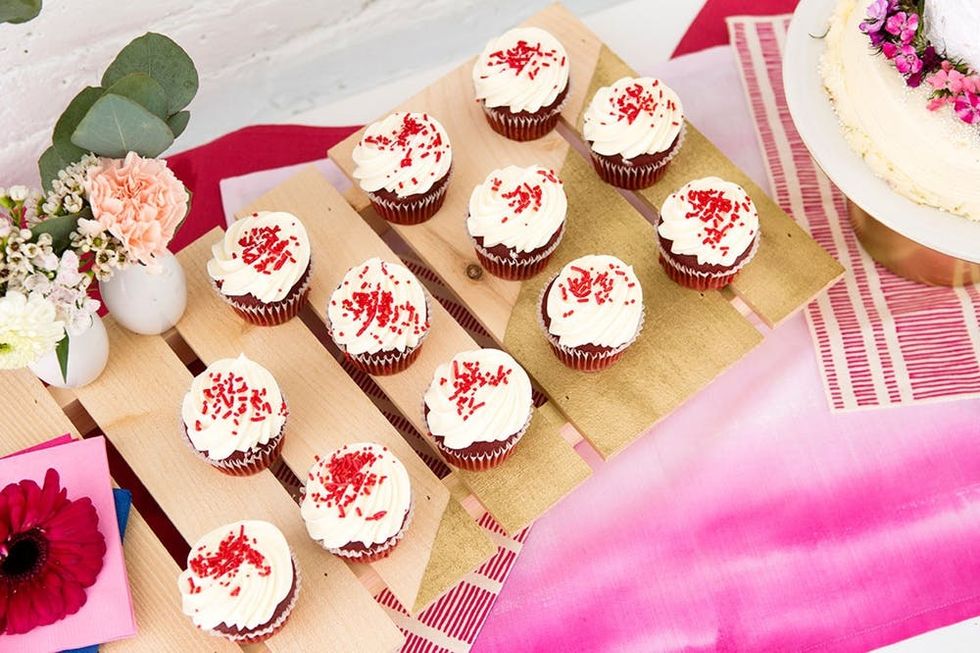
Mini cupcakes, pie and cake – a sweet dessert for every taste.

We completed the scene with white flowers to fit with the metallic, black and white color scheme.
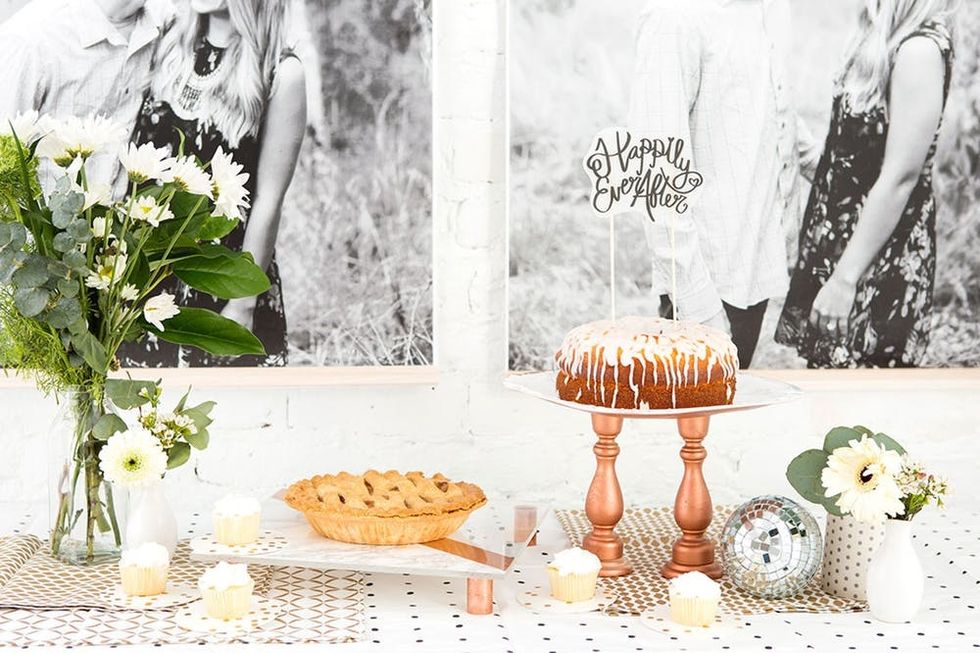
And they lived happily ever after!
Show us your project by tagging us on Instagram + using hashtag #iamcreative!
DIY Production and Styling: Kelly Bryden
Photography: Kurt Andre