 Recommended for you

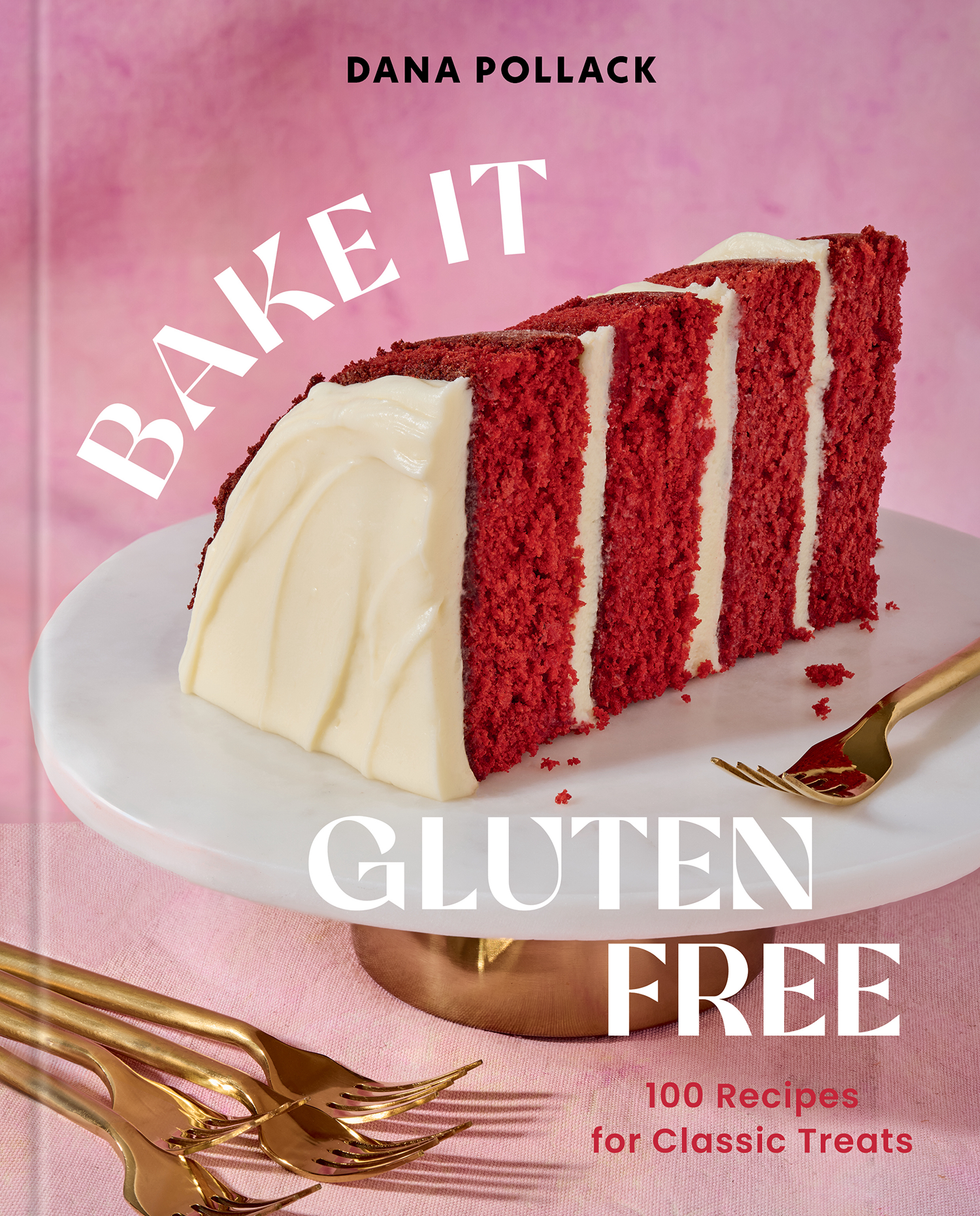
Bake It Gluten-Free: 100 Recipes for Classic Treats, released this week, is the latest sweet creation from Dana Pollack, founder of cult-favorite Dana’s Bakery. In her first completely gluten-free cookbook, Dana reimagines the nostalgic desserts and baked goods we all grew up loving (like chocolate Milanos) minus the gluten, but with every bit of the flavor and joy intact.
"You don’t have to sacrifice flavor and texture just because you have dietary restrictions or you are choosing not to eat gluten for one reason or another," says Dana. Here, she invites us into her baking life and shares four bakery-worthy treats that are perfect for fall, from a stone fruit galette and sweet potato cinnamon cupcakes to rainbow granola bars and zucchini bread.
Get Dana's baking hacks and whip up delicious gluten-free fall recipes.

Morgan Ion Photography
Dana: Ironically enough, I am not gluten-free. When I started Dana’s Bakery over a decade ago we specialized in one product and one product only: French Macarons in fun American flavors. Macarons are made with almond flour and meringue so they are gluten free by nature, so by default I was baking gluten-free from the beginning. As we started to grow, I saw the need for and lack of gluten-free options for people (specifically parents) who were so relieved to find a dessert or sweet treat that actually tasted good. Something that felt like an indulgence for either themselves or someone they knew who couldn't eat gluten. And because I am able to eat gluten, I am able to develop recipes that taste like the originals.
If someone is new to gluten-free baking, which recipe do you recommend they start with?
Dana: The Crispy Chocolate Chip Cookies are just to DIE for. It's also a staple dessert any baker should be able to make. I would also recommend any of the cupcakes, they are all very moist, and if you are new to baking in general, a great intro into baking cakes. Very similar ingredients and processes to cakes but cupcakes are much easier to decorate.
What’s your go-to kitchen hack when you’re short on time?
The freezer is your BEST friend. Whenever making cookies, I always do a double batch and freeze the extra cookie balls so I have some on hand if I ever need or want to have fresh baked cookies without the hassle of making them. You can also wrap and freeze your fully made pies weeks in advance of needing them. This comes in handy around Thanksgiving when you have a lot to do and not a lot of time to do it. I make my pies a few weeks in advance, wrap and freeze them until the day of. They come out PERFECTLY! Just don’t do the egg wash, save that step for when you're about to bake.
Photography by Morgan lone Yeager
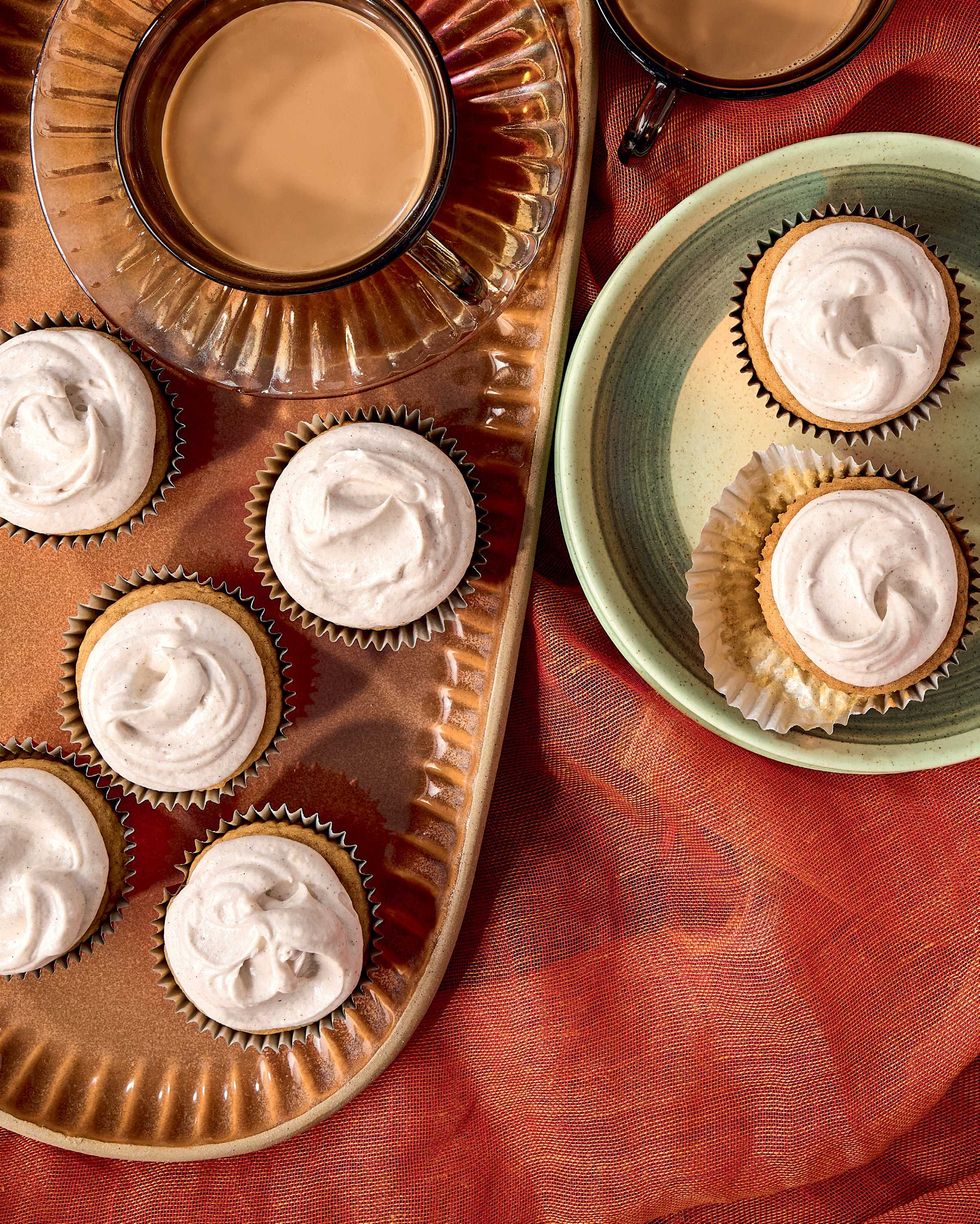
SWEET POTATO CINNAMON CUPCAKES
Makes 12 cupcakes
I love the flavor and texture the mashed freshly baked sweet potato adds to these cupcakes. Roasting them helps caramelize the sugars, adding a bit of extra sweetness, too, but if you’re looking for a shortcut, swap in canned sweet potato or pumpkin puree.
CUPCAKES
- 1 large sweet potato (about 1 pound)
- 1¼ cups (175 grams) gluten-free 1:1 replacement flour blend
- 1½ teaspoons baking powder
- 1 teaspoon ground cinnamon
- ½ teaspoon kosher salt
- 6 tablespoons (¾ stick) unsalted butter, at room temperature
- 1 cup (200 grams) granulated sugar
- 2 large eggs
- 1 teaspoon pure vanilla extract
- 1 ⁄3 cup (75 grams) whole milk
FROSTING
- ½ cup (1 stick) unsalted butter, at room temperature
- 1 (8-ounce) block full-fat cream cheese, at room temperature
- 4 cups (455 grams) powdered sugar
- 1 tablespoon whole milk
- 1 teaspoon ground cinnamon
- 1 teaspoon pure vanilla extract
- Make the cupcakes: Preheat the oven to 350°F. Line a 12-cup muffin tin with cupcake liners.
- Wrap the sweet potato in aluminum foil and bake it directly on the oven rack for about 1 hour, until tender. Set aside until cool enough to handle.
- Preheat the oven to 400°F. Line a baking sheet with parchment paper.
- Cut the sweet potato in half and scoop the flesh out of the skins into a food processor or blender. Puree until smooth.
- In a medium bowl, combine the flour, baking powder, cinnamon, and salt.
- In the bowl of a stand mixer fitted with the paddle attachment or in a large bowl using a handheld mixer, beat the butter and granulated sugar on medium speed until fluffy, about 2 minutes. Add the sweet potato puree and beat until smooth. Add the eggs one at a time, beating until smooth after each addition. Beat in the vanilla. Add the dry ingredients in three additions, alternating with the milk, and beat until smooth, about 30 seconds.
- Divide the batter evenly among the prepared muffin cups. Bake for 25 to 30 minutes, until lightly golden on top. Remove from the oven and transfer to a wire rack to cool completely, about 1 hour
- Meanwhile, make the frosting: In the bowl of a stand mixer fitted with the whisk attachment or in a large bowl using a handheld mixer, combine the butter, cream cheese, powdered sugar, milk, and cinnamon and beat on medium speed until smooth. Scrape down the sides of the bowl and beat on high until light and fluffy, 2 to 5 minutes.
- Spread or pipe the frosting on top of the cooled cupcakes. Store in an airtight container in the refrigerator for up to 3 days.
Recipe reprinted with permission from Bake It Gluten Free © 2025. Published by Square Union & Co., an imprint of Grand Central Publishing, a division of Hachette Book Group.
Amazon
What’s your favorite gluten-free baking swap that actually works?
These days finding a good gluten-free flour is so easy, you can find lots of options and alternatives in most grocery stores or online. A cup for cup or measure for measure flour is ideal because it is formulated to work as a gf flour substitution and you can use it with almost any recipe without needing to adjust or alter the recipe.
What ingredient do you think is underrated in gluten-free baking?
I also use a lot of psyllium husk in my recipes, specifically when it comes to breads. Not only is it added fiber BUT it acts as a binder and hydrator replacing the electricity and structure that you would get from gluten.
What’s the biggest misconception people have about gluten-free baking?
The biggest misconception is that you have to substitute flavor and consistency because you are baking without gluten. These days there are so many alternative ingredients / substitutions available for you and so many tricks of the trade on how to achieve the same results when baking Gluten Free. Bread doesn't need to be hard, cakes don’t need to be dense and heavy. You just need to follow the steps and tricks in your baking bible, like BAKE IT GLUTEN FREE!
Photography by Morgan lone Yeager
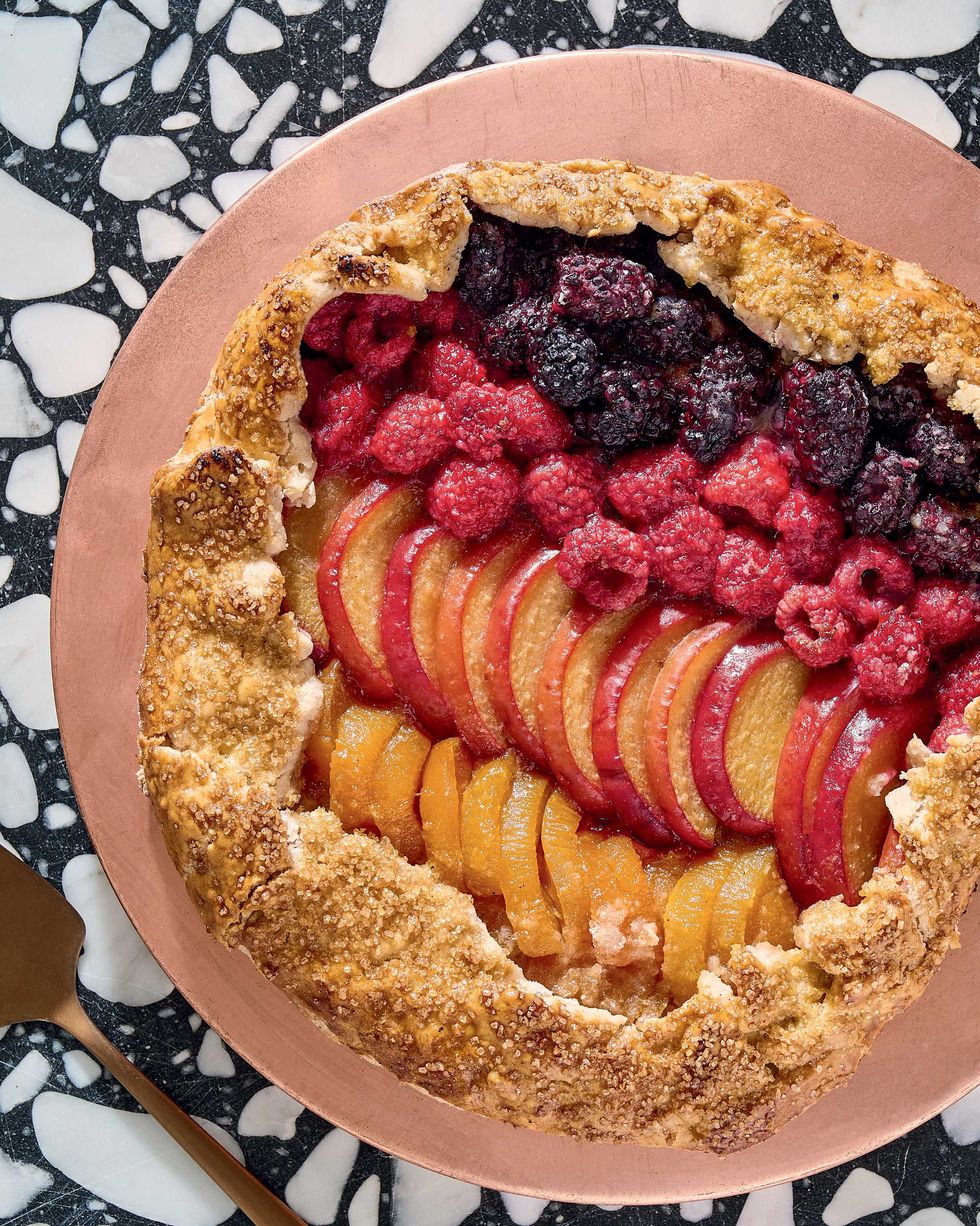
STONE FRUIT GALETTE
Makes one 10-inch galette, serves 8 to 12
A layer of graham cracker crumbs between the crust and the fruit helps soak up extra juices, keeping your crust crisp while adding flavor. For an even flakier crust, use European butter (it’s also my favorite for croissants, page 99), which has a higher fat content; you may need a touch less water in the dough.
- 1¼ cups (175 grams) gluten-free 1:1 replacement flour blend, plus more for dusting
- ½ cup (100 grams) plus 1 tablespoon granulated sugar
- ½ teaspoon kosher salt
- ½ cup (1 stick) cold unsalted butter, cut into small cubes
- 1½ teaspoons apple cider vinegar
- 4 to 5 tablespoons ice water
- 4 gluten-free graham crackers (65 grams)
- 2 pounds stone fruit, such as peaches, plums, nectarines, cherries and/ or apricots, pitted and sliced (about 5 cups)
- 1 ⁄3 cup (40 grams) cornstarch 1 large egg, lightly beaten, for egg wash
- 1 tablespoon turbinado sugar
- In a medium bowl, whisk together the flour, 1 tablespoon of the granulated sugar, and the salt. Add the butter and toss to coat with the flour mixture, then smush the butter into flat discs with your thumb and forefinger to grind it into the flour mixture. Sprinkle the vinegar over the flour-butter mixture and toss to coat. Sprinkle the ice water
- over the mixture 1 tablespoon at a time, stirring after each addition, until a shaggy dough forms.
- Dump the dough out onto a clean work surface and lightly knead until it starts to hold together. Using a bench scraper, cut, stack, and press the dough (to avoid overworking the butter) until you have a smooth disc. Wrap tightly in plastic wrap and refrigerate for at least 1 hour or up to 8 hours.
- Preheat the oven to 400°F. Line a baking sheet with parchment paper.
- On a lightly floured surface, roll out the chilled dough to a roughly 13-inch round. Transfer the dough to the prepared baking sheet.
- Place the graham crackers in a resealable plastic bag and smash with a rolling pin into fine crumbs. Spread the crumbs in a roughly 8-inch circle in the center of the dough. Refrigerate while you prepare the fruit.
- In a large bowl, combine the stone fruit, remaining granulated sugar, and the cornstarch and toss to coat. (Alternatively, sort the fruit into bowls by color and divide the cornstarch and sugar among the bowls, then toss to combine.) Arrange the fruit on top of the graham cracker crumbs as desired. Fold the exposed dough up over the fruit, leaving the center uncovered and pleating the dough as needed as you work your way around the circle.
- Brush the egg wash over the pleated edge of the dough and sprinkle it with the turbinado sugar. Bake for about 1 hour, until the crust is golden and the filling is bubbling. Let cool completely, about 1 hour, before slicing. Store, well wrapped, in the refrigerator for up to 3 days.
Recipe reprinted with permission from Bake It Gluten Free © 2025. Published by Square Union & Co., an imprint of Grand Central Publishing, a division of Hachette Book Group.
Photography by Morgan lone Yeager.
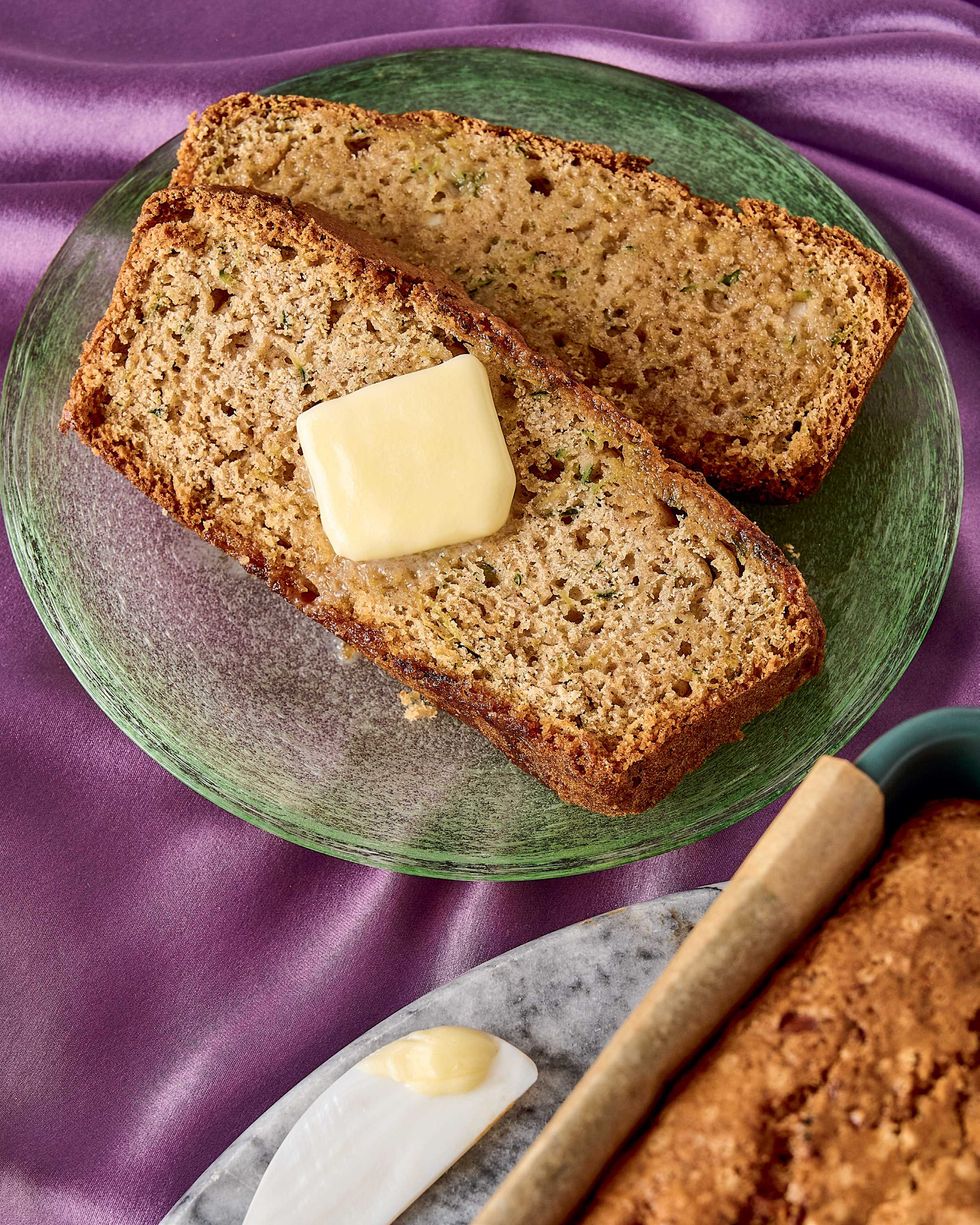
ZUCCHINI BREAD
Makes one 9 x 5-inch loaf; serves 8 to 10
There comes a time every year when my garden is absolutely bursting with zucchini, and this is the recipe Leni and Ella always ask me to make with it. They love helping me by grating the zucchini and stirring it into the batter, and I love anything that gets them excited about eating vegetables.
- Nonstick cooking spray
- 2 cups (275 grams) gluten-free 1:1 replacement flour blend
- 1½ teaspoons baking powder
- 1 teaspoon ground cinnamon
- ½ teaspoon baking soda
- ½ teaspoon kosher salt
- 1 cup (200 grams) sugar
- 4 tablespoons (½ stick) unsalted butter, at room temperature
- Zest of 1 lemon
- 2 large eggs
- 1 teaspoon pure vanilla extract
- 1 medium zucchini (1 pound), shredded (about 1½ cups)
- ¼ cup (40 grams) buttermilk
- Preheat the oven to 350°F. Coat a 9 × 5-inch loaf pan with cooking spray.
- In a medium bowl, whisk together the flour, baking powder, cinnamon, baking soda, and salt.
- In the bowl of a stand mixer fitted with the paddle attachment or in a large bowl using a handheld mixer, combine the sugar, butter, and lemon zest and beat on medium speed until light and fluffy, 2 minutes. Add the eggs one at a time and beat until fully incorporated. Beat in the vanilla. Beat in the zucchini. Add the dry ingredients in three additions, alternating with the buttermilk, and beat until fully combined.
- Transfer the batter to the prepared pan. Bake for about 1 hour, until a toothpick inserted into the center comes out clean. Let cool completely before slicing, about 1 hour.
- Store in an airtight container at room temperature for up to 4 days.
Recipe reprinted with permission from Bake It Gluten Free © 2025. Published by Square Union& Co., an imprint of Grand Central Publishing, a division of Hachette Book Group.
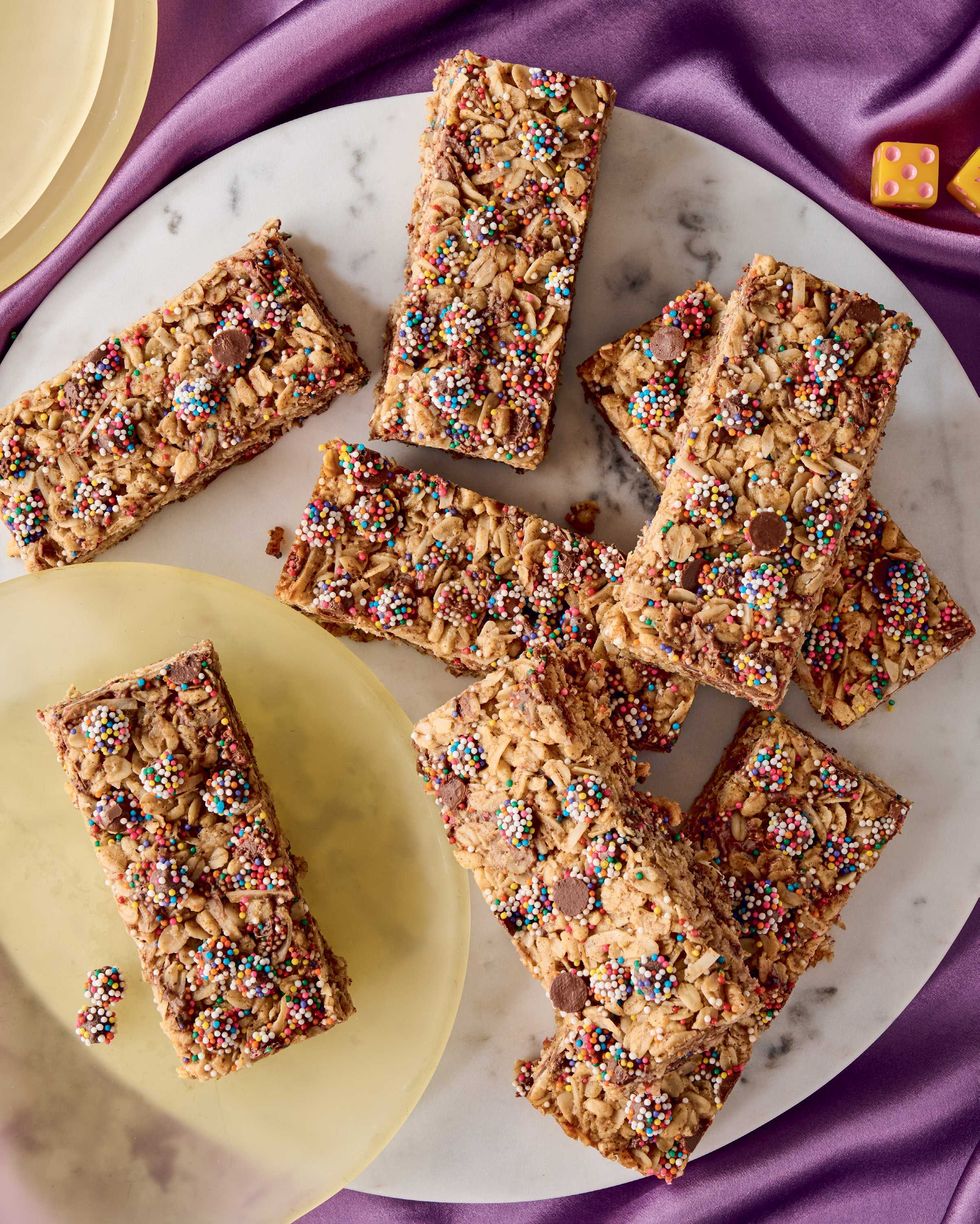
Photography by Morgan lone Yeager
RAINBOW CHOCOLATE CHIP GRANOLA BARS
Serves 12 to 16
When packing my kids’ lunches, I always include a protein, a vegetable, and a treat. They love finding these bars as the treat in their lunch boxes, and I love that it’s a treat chock-full of healthy ingredients that will actually fill them up. I make them with sunflower seed butter to keep them nut-free and school-safe, but feel free to swap in your favorite nut butter.
- Nonstick cooking spray
- 3 cups (370 grams) gluten-free rolled oats
- 2¼ cups (385 grams) mini rainbow chocolate nonpareils
- 1 cup (45 grams) gluten- free crisped rice cereal
- 1 cup (55 grams) unsweetened shredded coconut
- ¼ teaspoon kosher salt
- 2 ⁄3 cup (240 grams) brown rice syrup
- ½ cup (130 grams) creamy sunflower seed butter, almond butter, or peanut butter
- 1 ⁄3 cup (75 grams) coconut oil
- 1 teaspoon pure vanilla extract
- Preheat the oven to 325°F. Line a 9 × 13-inch baking pan with parchment paper, leaving some overhang on the two long sides. Lightly coat the parchment with cooking spray.
- In a large bowl, combine the oats, 2 cups (340 grams) of the nonpareils, the cereal, shredded coconut, and salt.
- Place the brown rice syrup, sunflower seed butter, coconut oil, and vanilla in a medium microwave-safe bowl and microwave on high in 30-second intervals, stirring after each, until the coconut oil is melted, about 1 minute. Stir to combine. Let stand until cool to the touch, about 5 minutes, then pour the mixture over the dry ingredients in the large bowl and stir to coat.
- Press the mixture into the prepared pan in an even layer and sprinkle the remaining ¼ cup (45 grams) nonpareils over the top. Bake for about 20 minutes, until the edges start to brown. Remove from the oven and let cool until cool enough to handle, about 15 minutes, then use the overhanging parchment to transfer the bars to a cutting board. Cut into 16 bars, leaving them together on the cutting board, and let cool completely before separating the bars, about 1 hour.
- Store in an airtight container at room temperature for up to 1 week.
GO FOR GRANOLA
To make granola instead of granola bars, bake the mixture until the top is lightly browned, about 30 minutes. Let the granola cool completely, then break it up into chunks to serve over yogurt, etc. Store in an airtight container at room temperature for up to 1 week.
Recipe reprinted with permission from Bake It Gluten Free © 2025. Published by Square Union& Co., an imprint of Grand Central Publishing, a division of Hachette Book Group.
Join our newsletter for more fall ideas and inspiration and check out our cooking and baking classes!