When it comes to creative inspiration, there is one place we turn to on an almost-hourly basis. YOU! Seriously. All y’all are some of the most innovative makers out there, and we want to share your DIY skills with the world. A couple weeks ago we announced the launch of our first ever community publishing tool. Today, we’re going to take you through just how easy it is to publish your own DIY tutorials using this handy dandy tool. Plus, if your project catches our eye, you just might land yourself a spot on our homepage. Woot!
How to Publish Your Own DIY Projects on Brit + Co!

When it comes to creative inspiration, there is one place we turn to on an almost-hourly basis. YOU! Seriously. All y’all are some of the most innovative makers out there, and we want to share your DIY skills with the world. A couple weeks ago we announced the launch of our first ever community publishing tool. Today, we’re going to take you through just how easy it is to publish your own DIY tutorials using this handy dandy tool. Plus, if your project catches our eye, you just might land yourself a spot on our homepage. Woot!

First things first: Head here to apply to be one of our very first community users. You should hear back from us in a day or two, and then you can start posting.
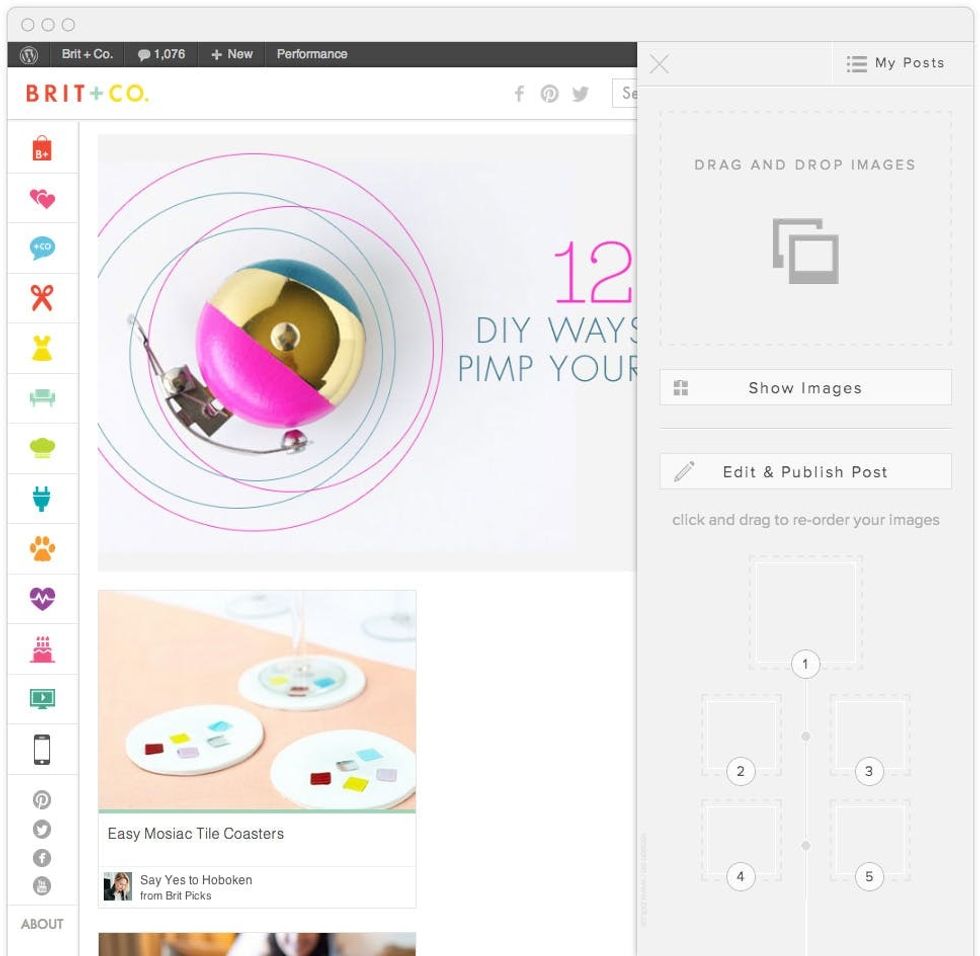
Now that that part’s covered, it’s time to get the lowdown on how to share your DIY projects with the Brit + Co. world! We’ve taken you the process with images from the web, so this post is all about how to upload images from your computer.
1. Head to any webpage and click the + Brit bookmarklet. Then the sidebar you see pictured above will appear.
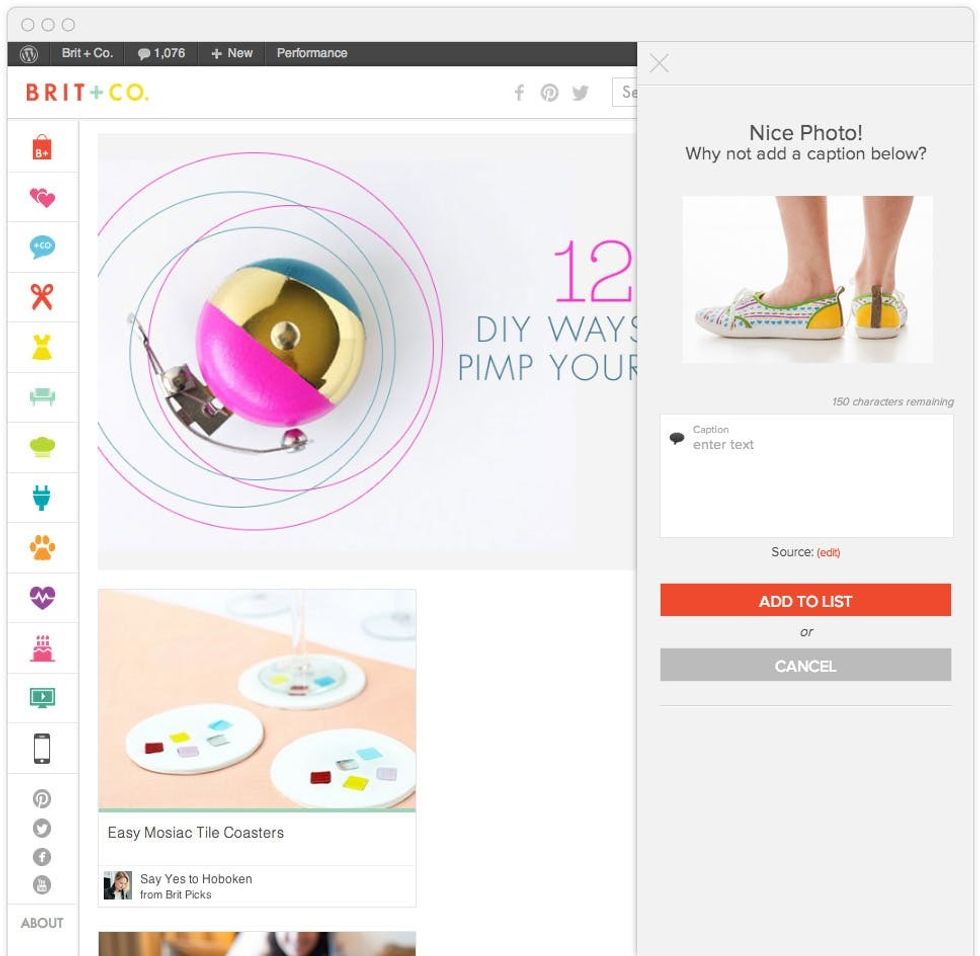
2. Drag a photo from your desktop into the the sidebar and write a caption.
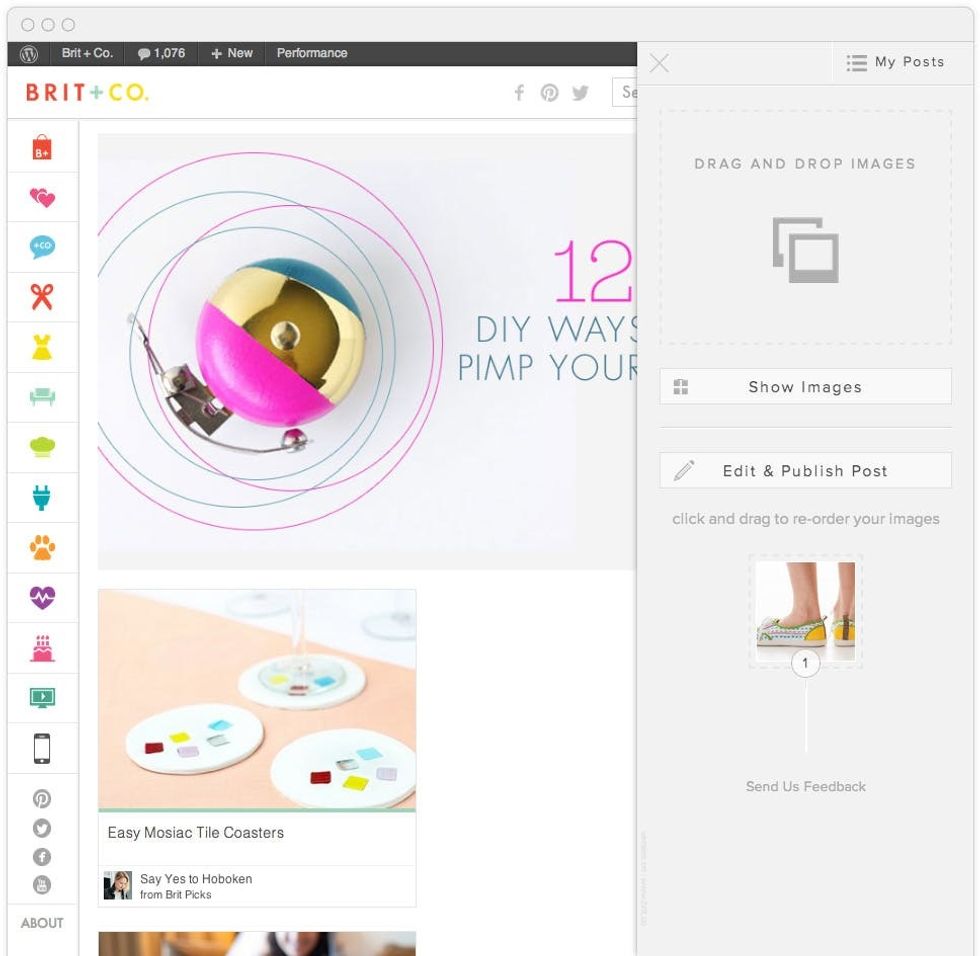
3. Click Add to LIST.
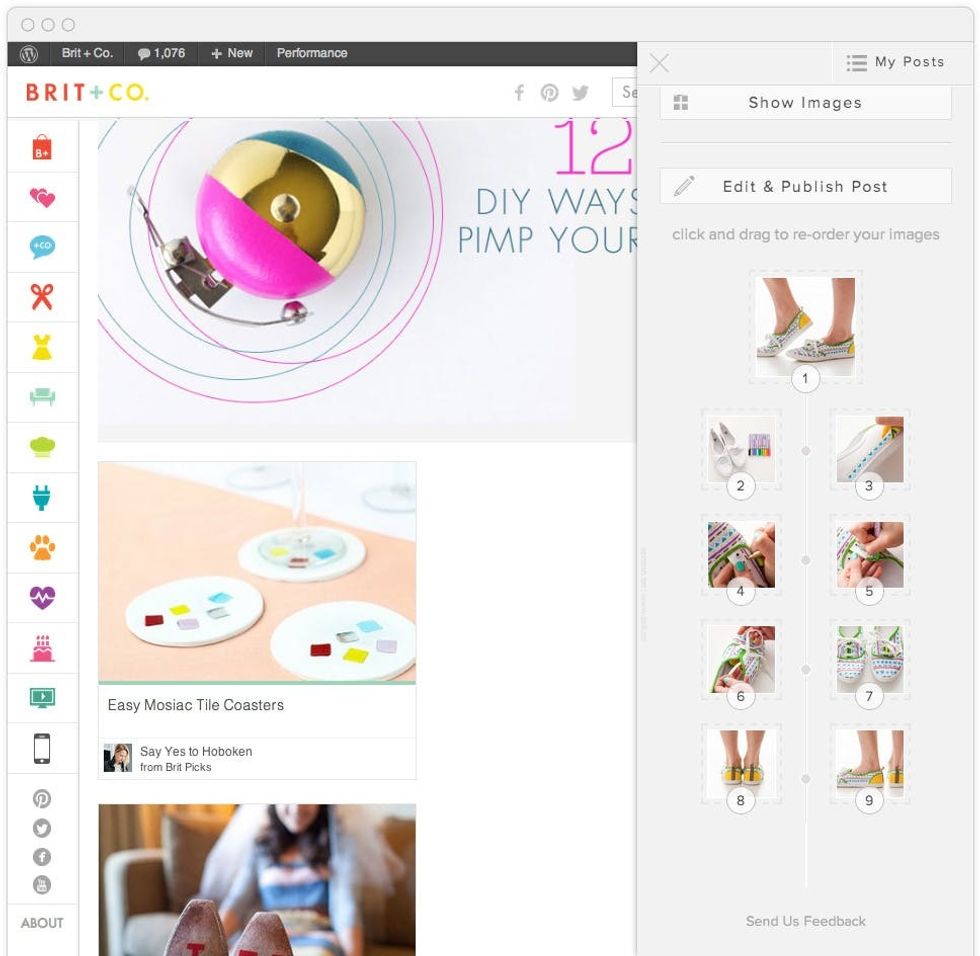
4. Keep doing this until you have all your steps covered. In the case of this list, we had one supplies shot, four process images, and four final project images.
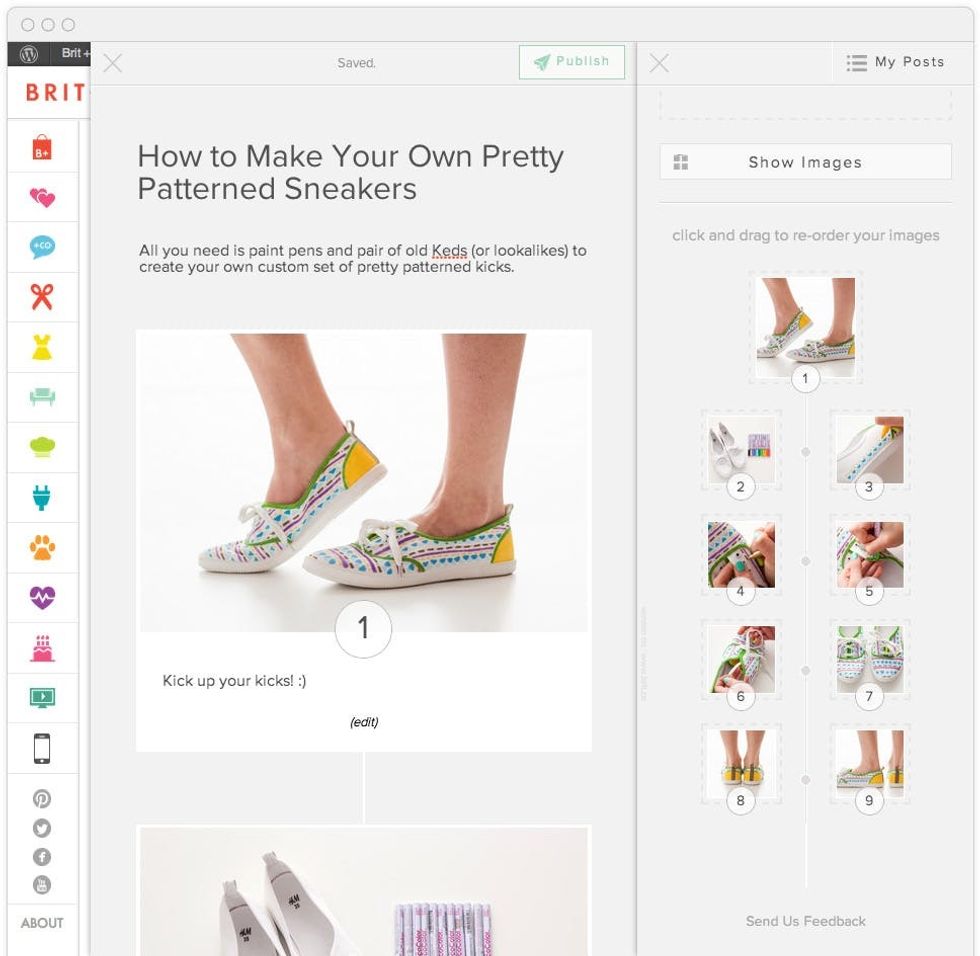
5. Click Edit & Publish Post to add a title, description, and edit any captions.
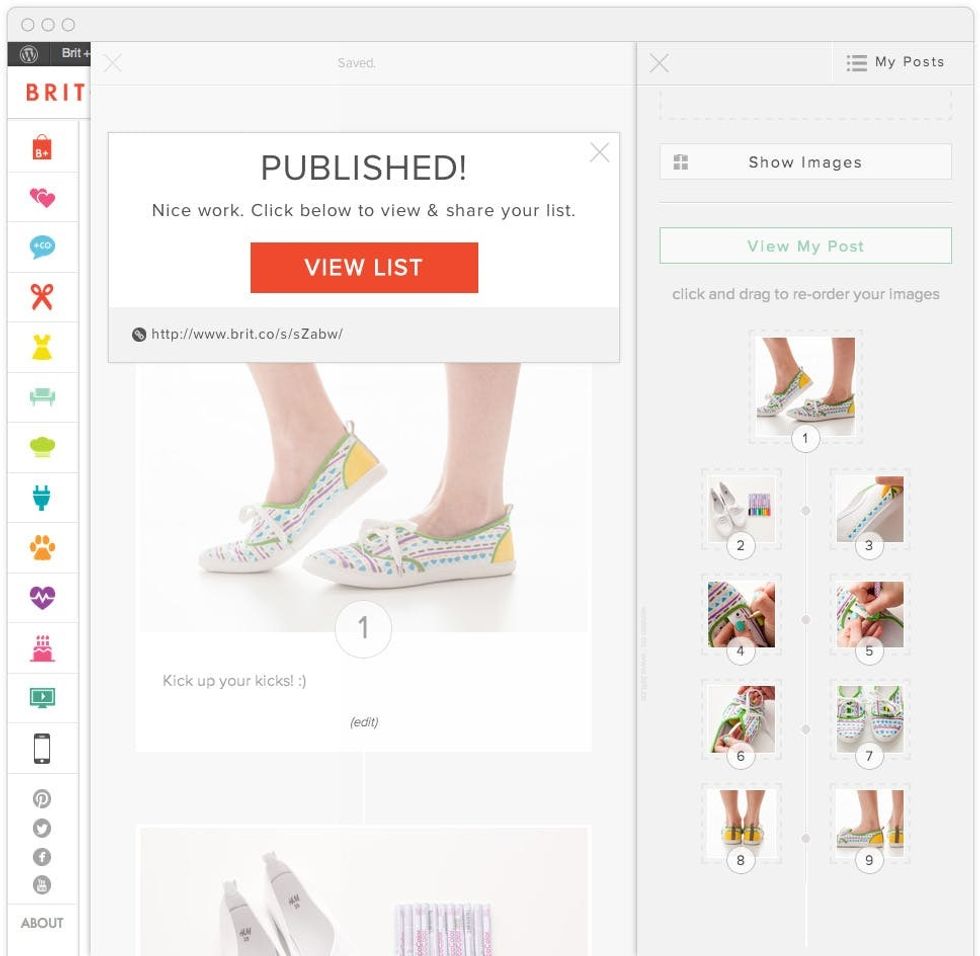
6. Now click Publish!
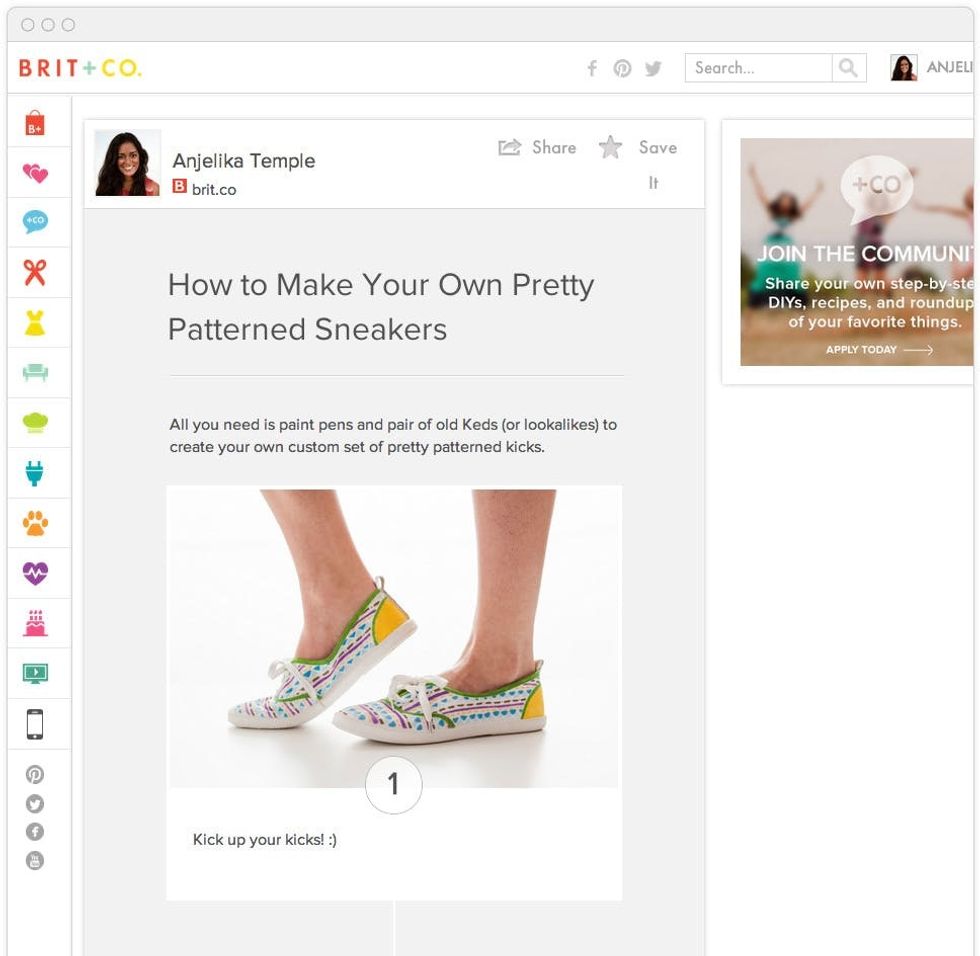
7. Voila! This is how your list will look, and you’ll have a unique brit.co URL to share with your friends, family, and followers.
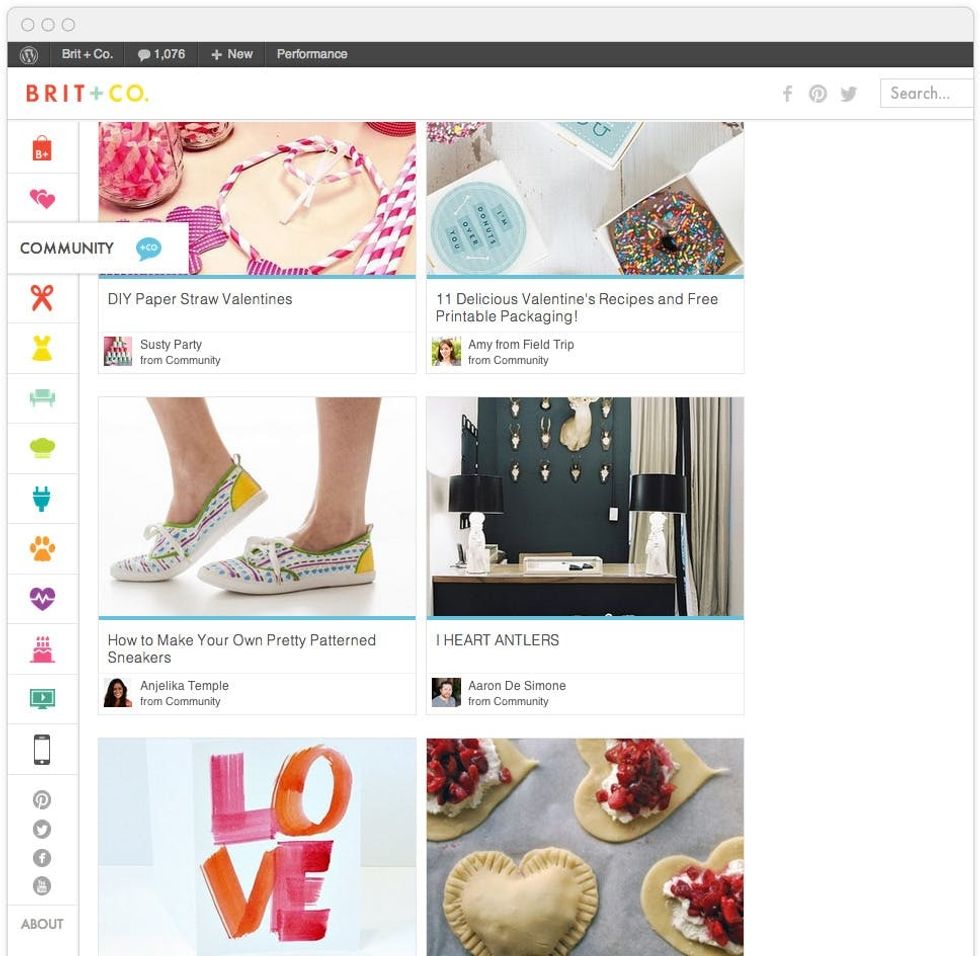
9. And then, if your project rules as much as we know it will, we’ll feature you in our community feed as well as our homepage. #winning


